Workshop finishing

My house is a little weird. The street is the high point of the property, and it slopes away toward the house and into the backyard, so I have a daylight basement in the back.

I also have a very rare commodity. I have a room underneath my two-car garage. The back half is full height, and then the front slopes up to driveway level.

The front half has some nice shelves that are used for storage, and the back has some old kitchen cabinets, yard tools, and some junk. The room is uninsulated and has no windows…

I have an office in the basement where my computer and my electronics workbench is, along with my 3d printer. That works great for those items, but when I bought a Glowforge, I didn’t want to have inside the house because of fumes. So, the logical place was to have it under the garage.

And since it’s winter, I’ve been freezing my butt off (in Washington state terms) whenever I need to cut things, and the Glowforge does have a lower temp limit.

So, it’s time to finish the space out. It’s going to get a window in the side wall, Roxul insulation in the walls, and CDX plywood on the walls. It *might* get roxul in the ceiling as well if it’s still too cold, and I’ve also considered a thermal blanket to separate the front section from the back if it turns out I spend a lot of time there.

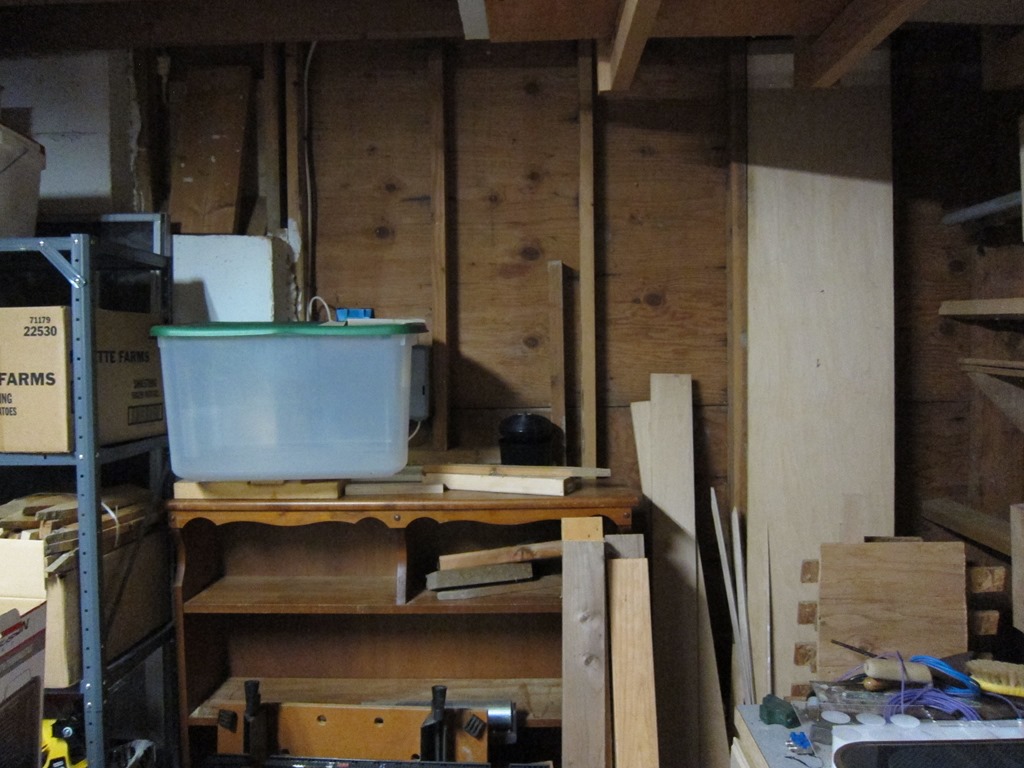
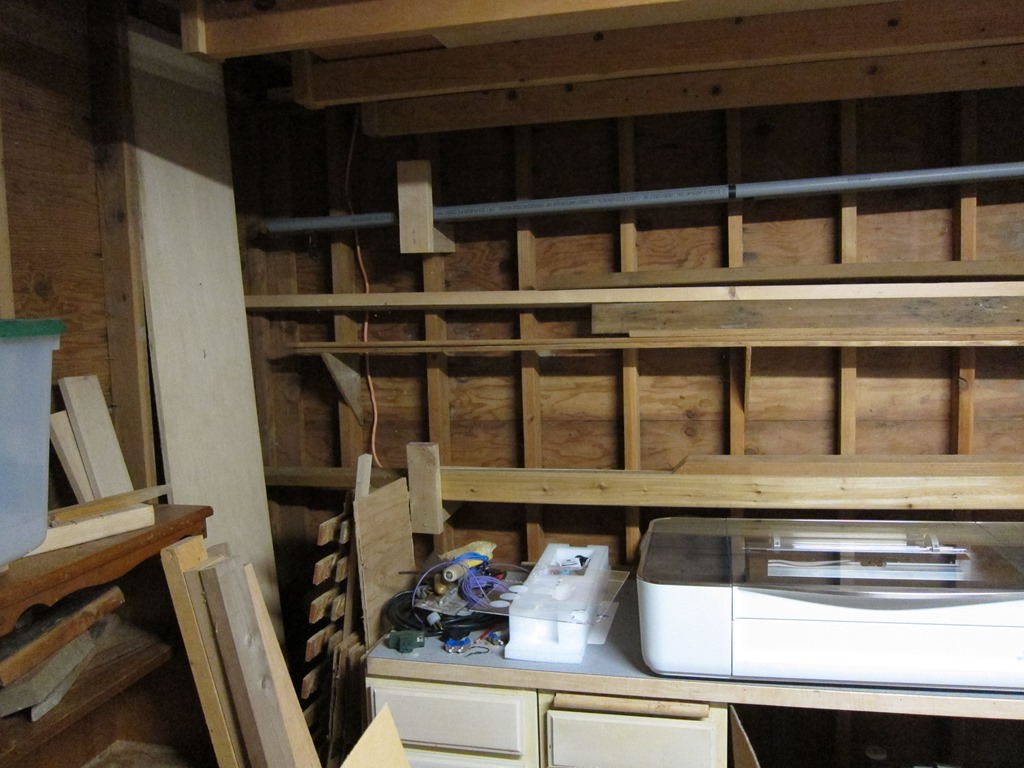
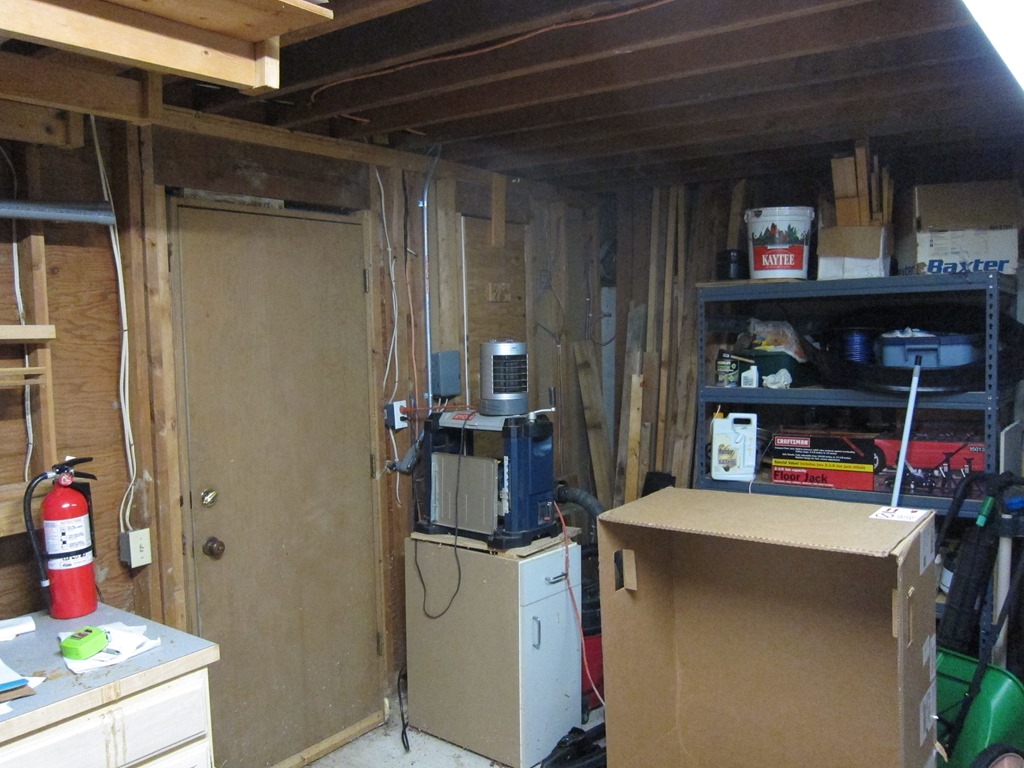
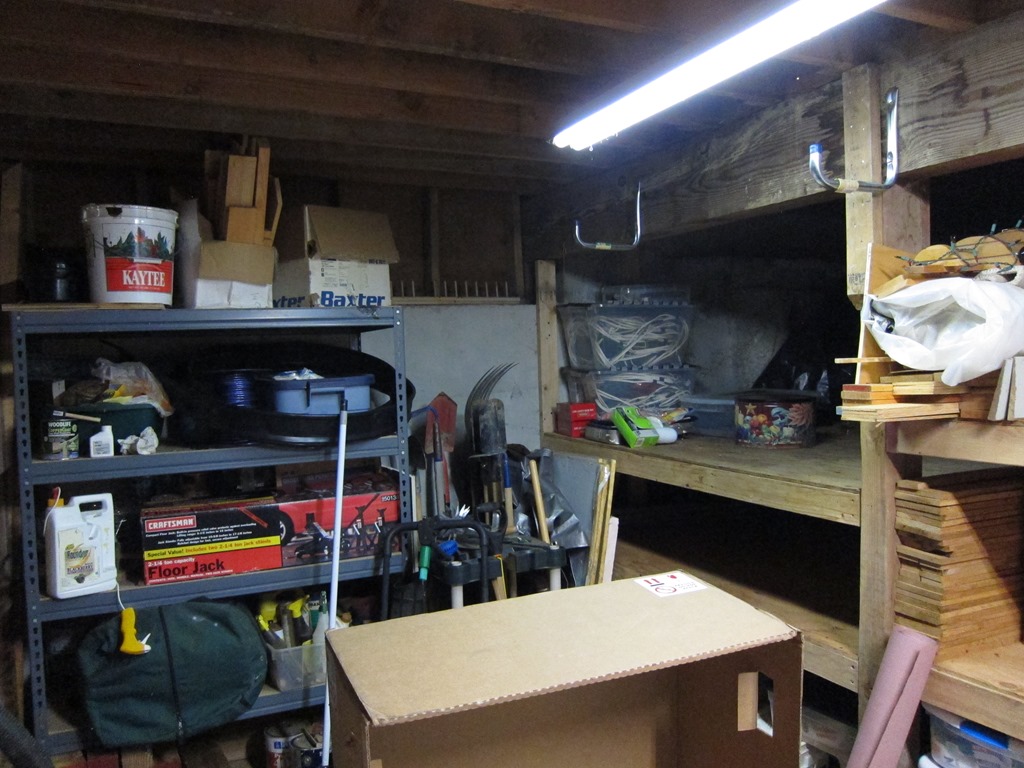
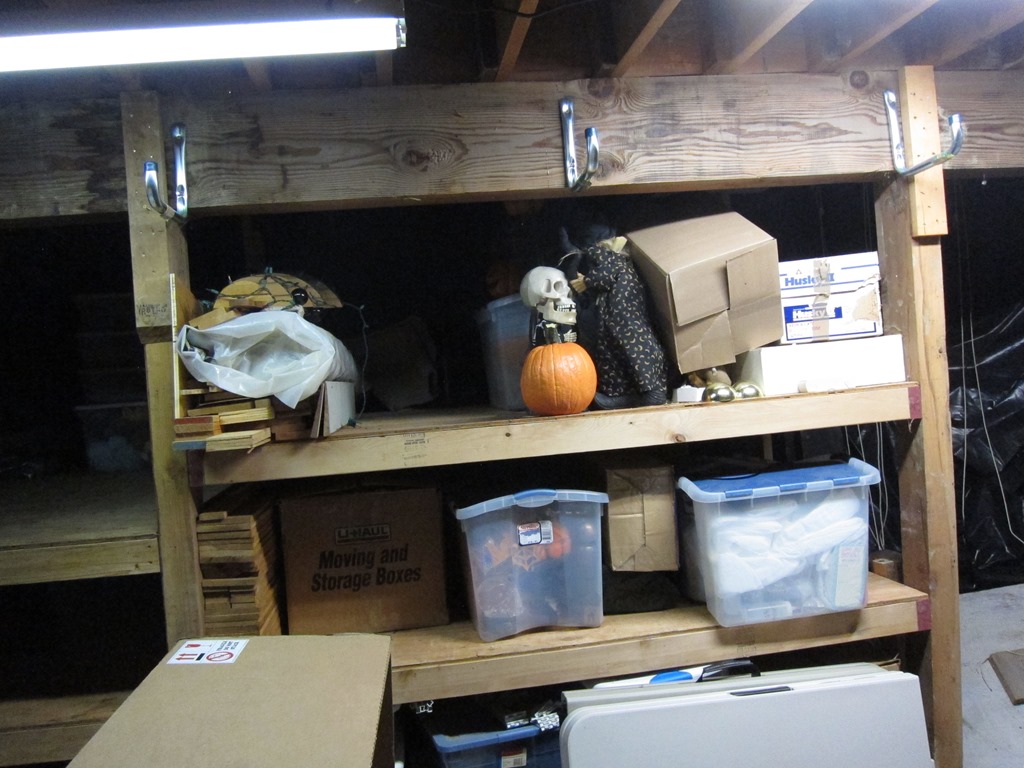
Here’s the starting point:

IMG_9007

IMG_9008

IMG_9009

IMG_9010

IMG_9011


Chemistry nameplate

A somewhat belated present for my wife – belated because my Glowforge had to go back to the shop.

I wanted to do something chemistry-related for her. In the past I’ve bought her a few items like the MadeWithMolecules jewelry, but we all know that gifts that are handmade mean oh so much more.

So, I came up with a concept; a nameplate for her office with some sort of relevant compound on it, and ideally that compound would wrap over the top of her name.

The problem is that most organic compounds were either too complex or structurally inconvenient for the layout. I settled on dopamine, which looks like this:

Image result for dopamine

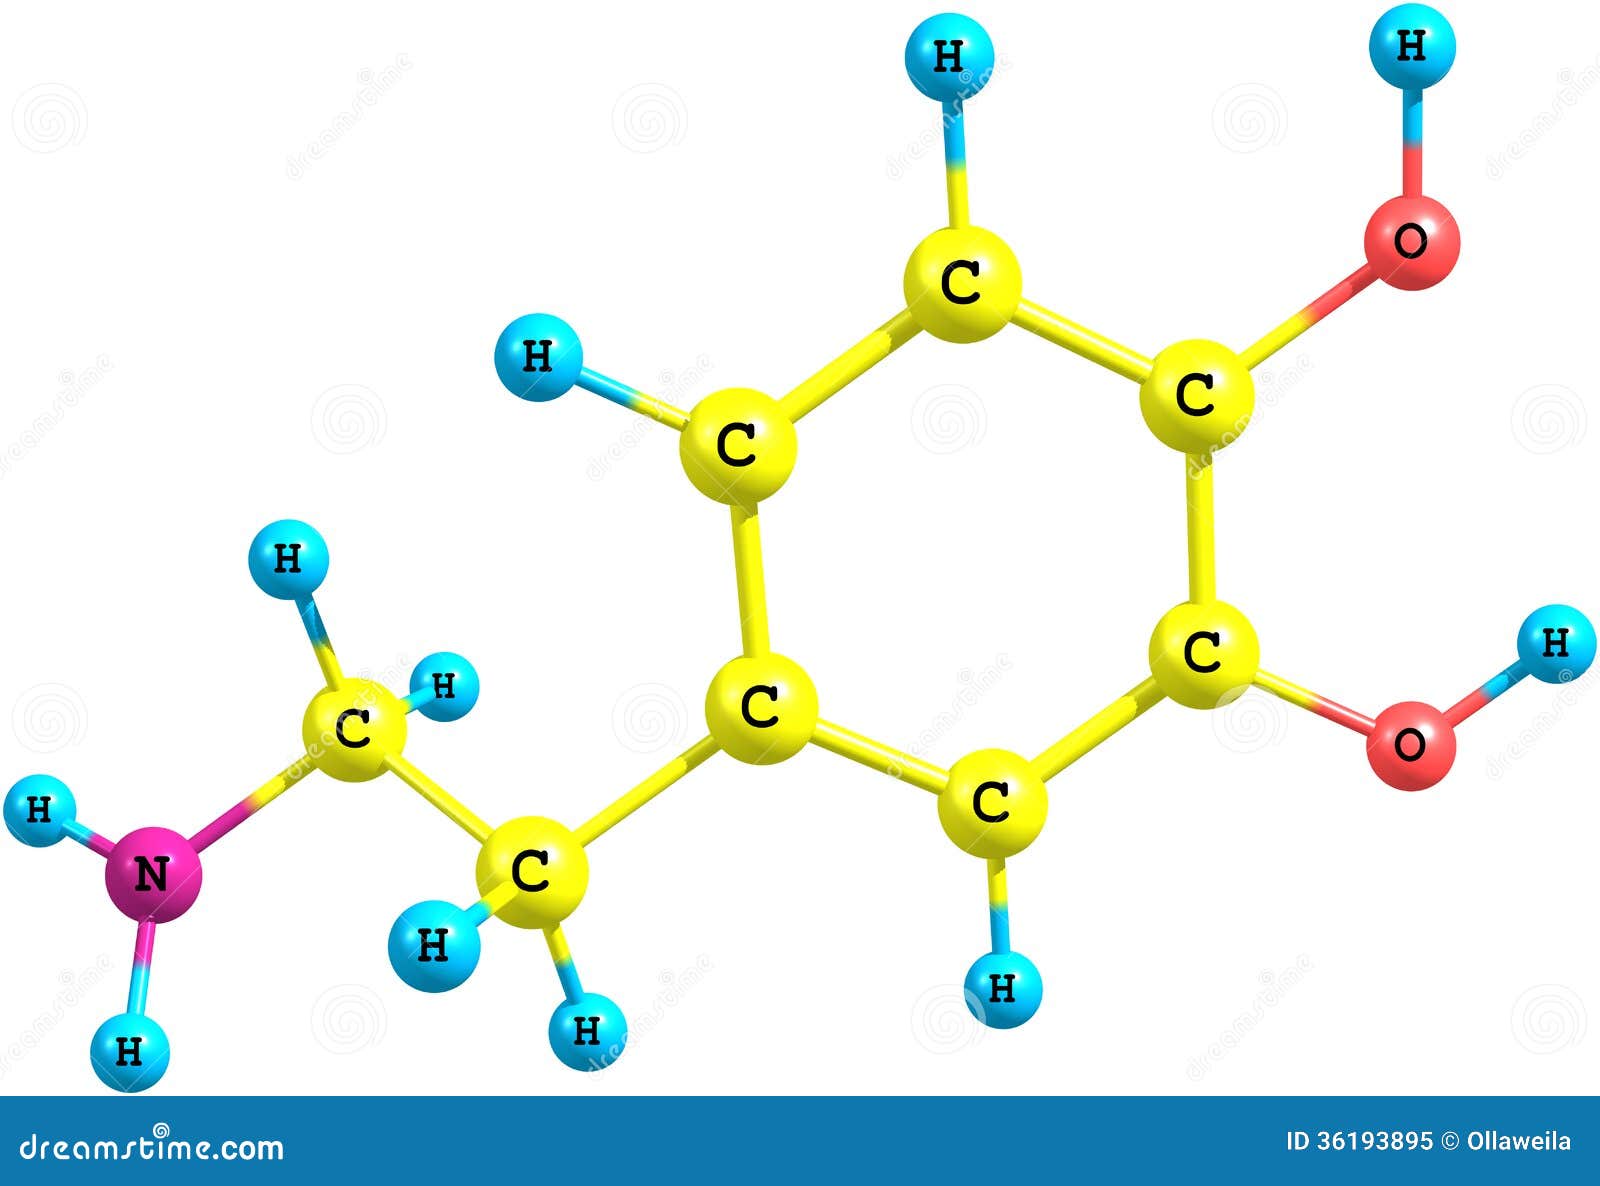
Which is fairly simple, except that I wanted to show all the atoms, so it really looks something like this:

Image result for dopamine model

I pulled out Visio and started playing around to see if I could get a two-dimensional representation that worked. And I did a bit of searching to find out atomic sizes and expected bond lengths, so that it could be accurate – which is a bit silly given that it pretends that atoms are round balls, but you get the idea.

Here’s what I ended up with:

image

Where:

  • Green = Oxygen (oxygen cylinders are green)
  • Blue = Hydrogen (because water is blue)
  • Grey = Carbon (it would be black, but the nameplate background is black)
  • Nitrogen = Yellow (because I like yellow and it looks good against black)

The atomic sizes and bond lengths are as close as I could get them. The bond angles are also mostly right, except for the two carbon/hydrogen bonds at the top; you have to pretend those are a 3-d projection.

I did a laser test engrave of that on some cheap plexiglass, and that worked okay, so I ordered up some 1/8” cast acrylic for the final version.

Unfortunately, the acrylic I ordered had plastic film protection rather than paper protection, and that plastic melted into the acrylic when I went to etch it, so the results sucked. About this time, my Glowforge went into permanent “too cold” state, so it had to go back, and then there were the holidays…

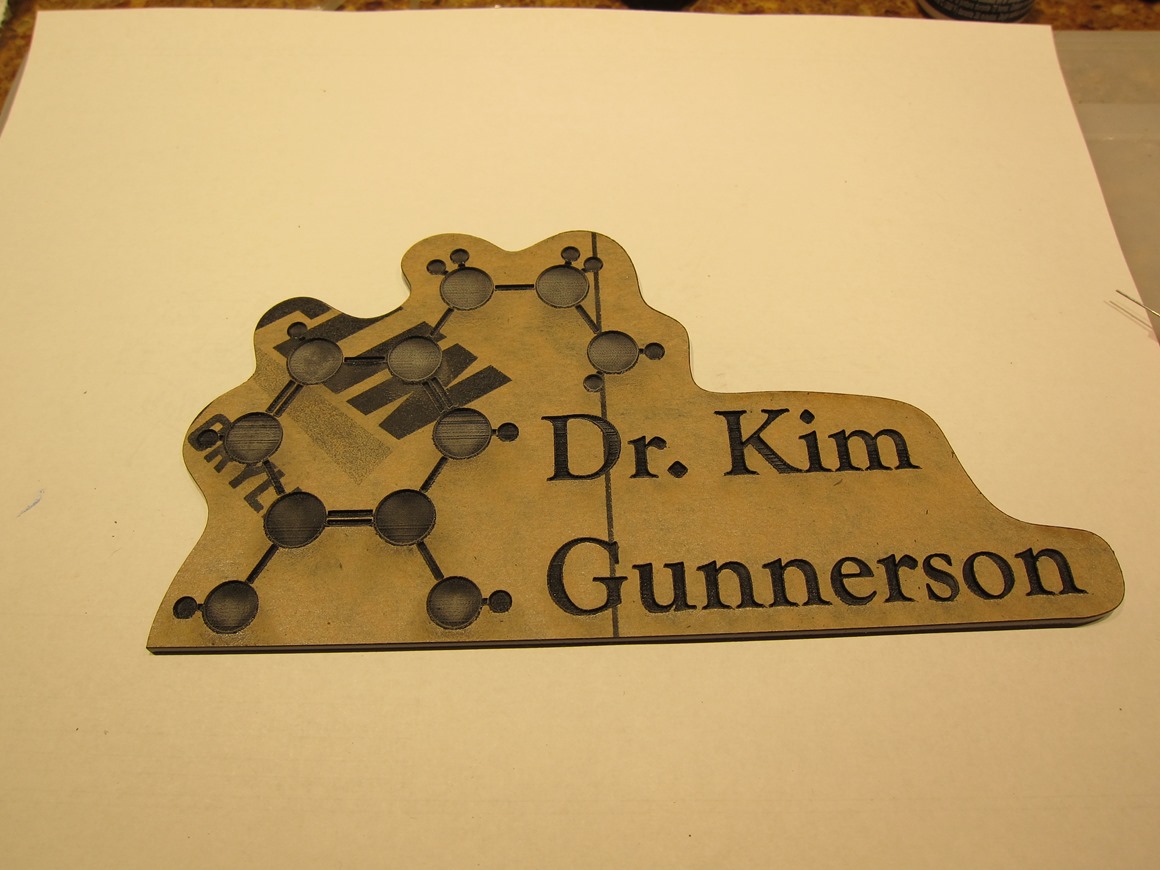
I eventually finished the prototype and gave it to my wife, and we agreed on two things. First, it was a little too small, and second, the saturated blue I used for the hydrogen atoms was too dark. So, here’s the remake of the production version, starting with the acrylic straight off the cutter:

IMG_9029

One of my challenges was figuring out how to paint it; a few tests showed that a brush was too big, and even a toothpick was too big; the bonds next to the tiny hydrogen atoms are *tiny*, and it’s important not to bleed paint from one area to another. I found some acrylic paint bottles, but they still had bit tips.

Finally, I found these:

image

These are syringes and tips that are sold as glue applicators. The tips are known as “Luer Lock” tips, and the twist right into the syringes. And this kit goes all the way to 25 gauge, which is *tiny*.

So, those showed up while waiting for the Glowforge, and then I had already purchased some acrylic paint from Michael’s:

image

If you are using the smallest tips, it’s pretty hard to suck paint up through them, so I used a big tip, pulled some paint into the syringe, and then switched to the smaller tip. It takes very small amounts of paint to do this; I have a lot more than I need here:

image

The technique is pretty simple; you put the tip into the corners and then carefully flow the paint into the corners to try to cover all of the walls in the paint, and after that you fill in the recess. I found that it made sense to work from different directions.

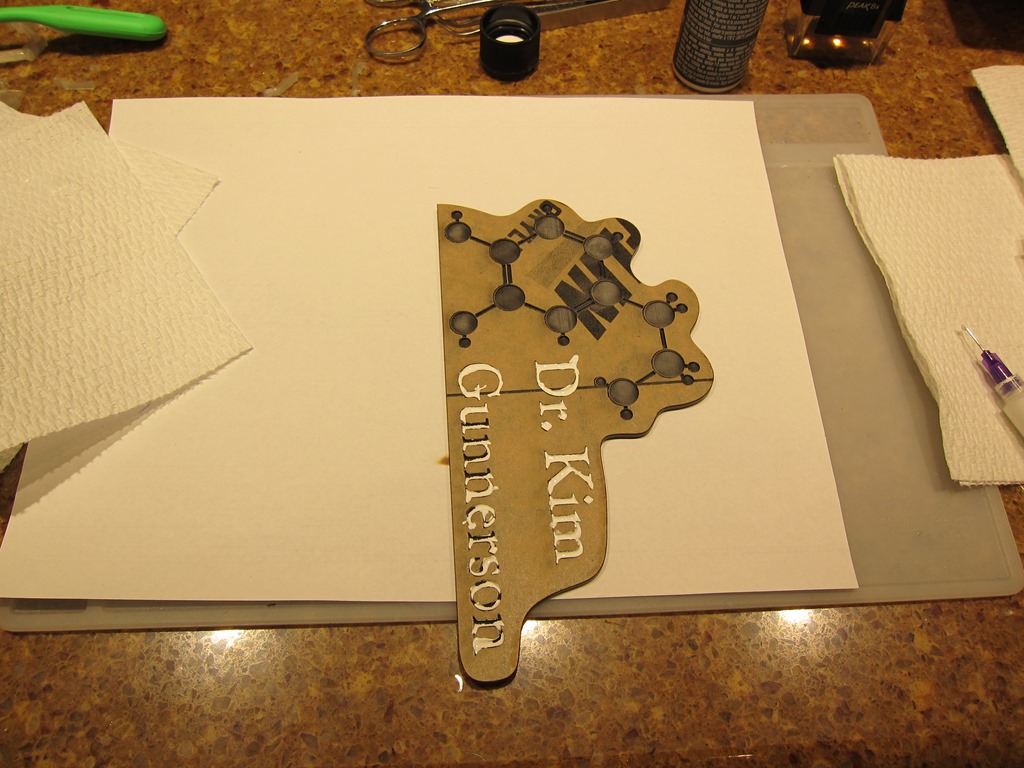
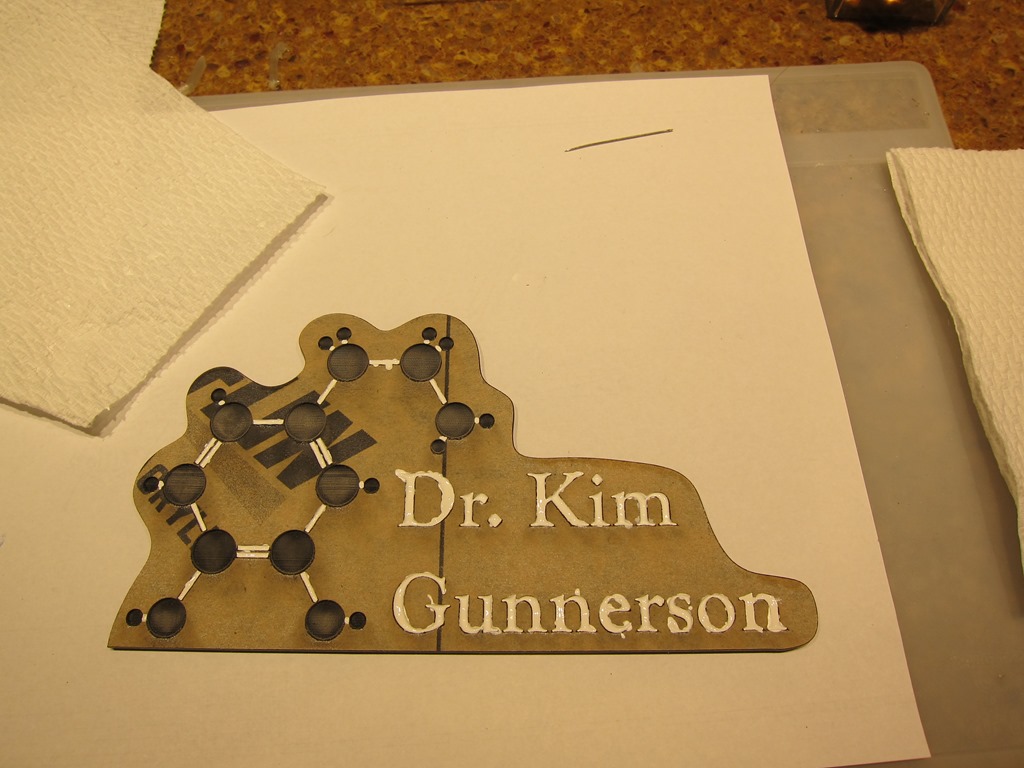
Partway through the name:

IMG_9031

Done with white (the bonds were a bitch, as I expected). This would look better but I didn’t clean the fine gauge tips well enough after the first version, so the ones I wanted to use were plugged.

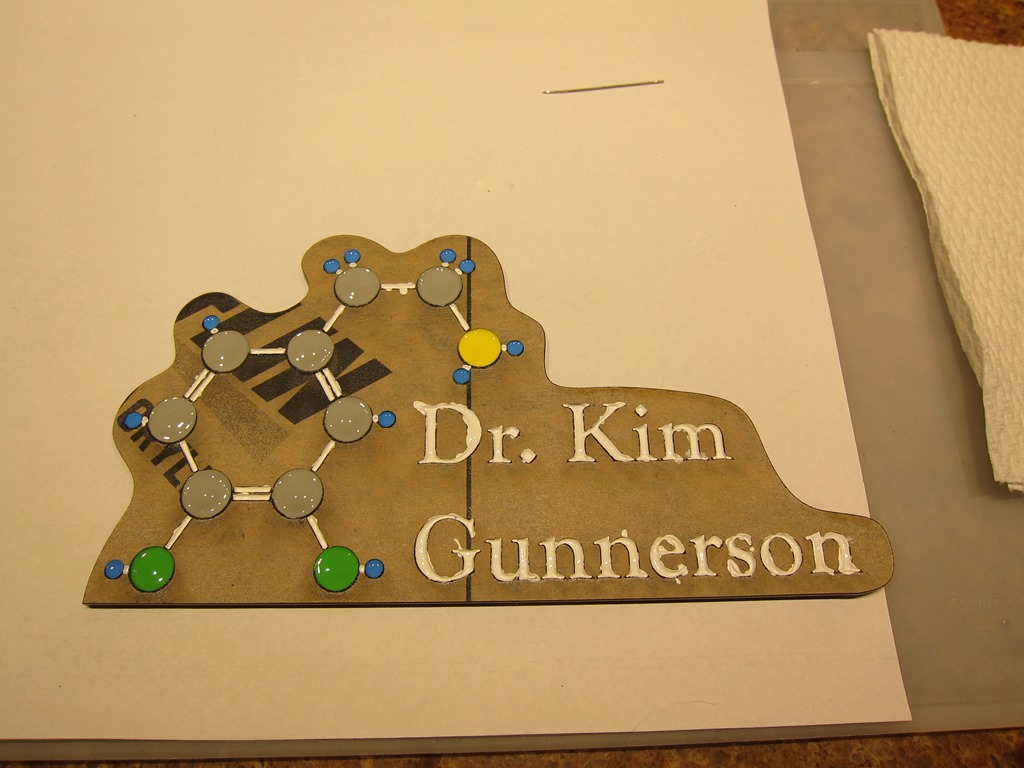
IMG_9032

Done with paint. Those white spots are specular reflections from the track lights above my workbench

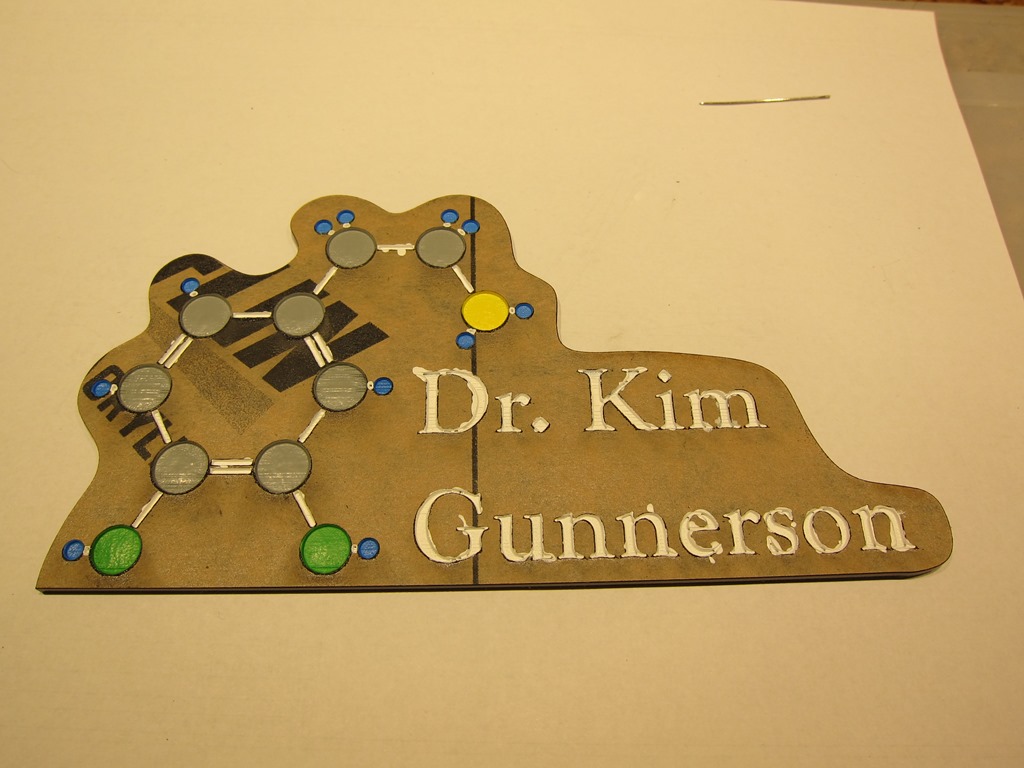
IMG_9033

Dry paint.

IMG_9034

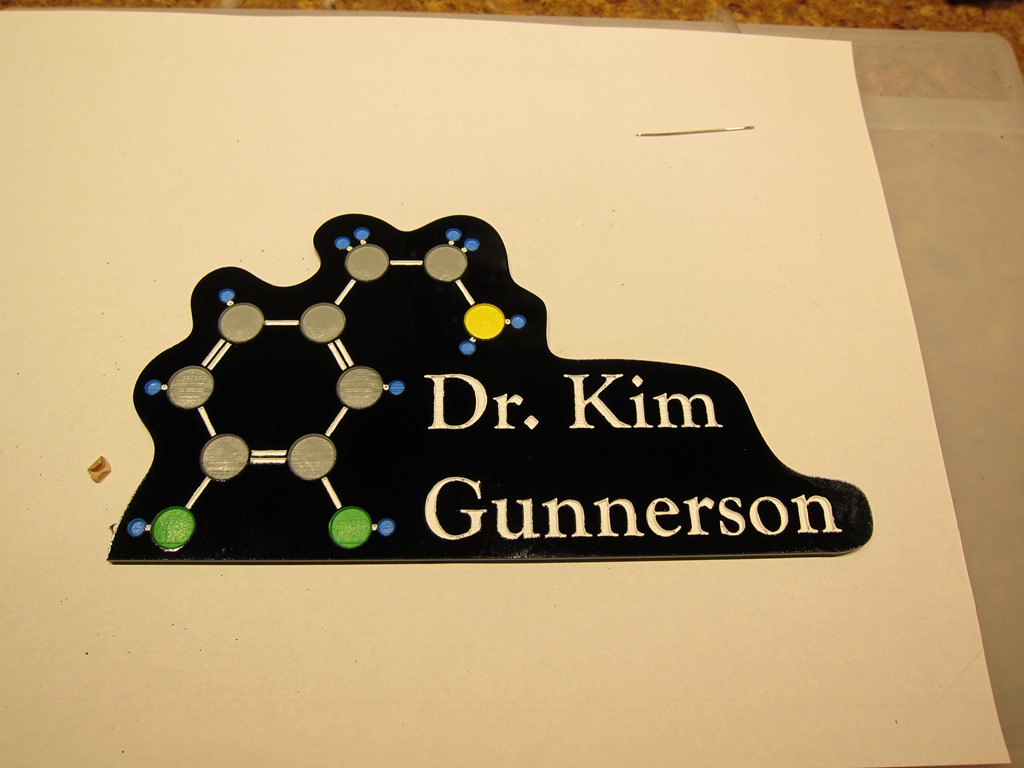
And, finally, after the backing is removed:

IMG_9035

The coloring isn’t perfect; there are some spots where the black shows through, and in this light you can see the texture the laser cutter left. But overall, I think it’s pretty good, and it looks better in real life than in this shot.


Globes of Fire!

The parts for the new controller have started trickling in, but until they all show up I’m a stuck there, so I’ve been thinking in other areas.

In the olden days – pre LED – I had a number of the 50 or 100 light globes in my display:

See the source image

I liked them for their intense burst of light, but the ones I had gradually died, and I haven’t found a replacement.

So… I got thinking again about options. When I built my Animated Snowman, I used WS2182 leds on the faces of 3d-printed dodecahedra. It worked fine, but the hand-cabling was a pain:

IMG_8435[1]

Using the acrylic lamp globes worked great, however. They are cheap, easy to get, and fully waterproof. I just needed a better way to get the LEDs in place.

One of the nice things about dodecahedra is that the faces are all pentagons. I remember a hack-a-day article a couple of years ago when somebody built one by soldering pc boards together, so I decided to do a design of that what that might look like:

image

The concept is that any face can hook to any face. You wire up the ground and VCC connections on all faces to give rigidity to the dodecahedron, and then wire up the DIN and DOUT connections from face to face in whatever pattern makes sense.

This design gives me 12 LEDs (well probably 11, since the top or bottom one will be used for support) in the space of about an inch, so that would easily work in the small acrylic balls (6”, or 4” if I can get them).

Of course, why do one LED per face when you can do 3:

image

Same concept as before; hook up DIN from another face, it will chain through all three LEDs and then head out through DOUT.

This board is roughly an inch in size, so the resulting dodecahedron will be around 2” in size. That will give us 33 LEDs and live up to the title of the post, but it may be overkill, which is why I’m going two versions. I’ll drill a hole through the 12th face and use a threaded rod and nuts to mount the DLE (Dodecahedral Light Engine).

I need to do some design cleanup and then send off for a run of these to see how they work.


Down 20?

(Authors Note: This is the fourth time I’ve tried to write something like this, but it kept getting *way* too long and detailed. I’ve kept it simple this time, but that means I’ve left out a lot of details, some of which are surely important. So ask if you have questions…)

It started with the candy dish…

Early last spring, due to show reshuffling, my team ended up in the same room as our admin – which was fine – and in the same room as the group candy supply – which was not.

It was a bit better than my previous team – which maintained what was officially known as “the candy wall” – but the problem was that the candy dish was at the entrance of my room, so was really easy to come back from lunch, grab a few “fun size” pieces, and eat them at my desk. There’s some interesting research in psychology that says that one of the best ways to get adherence is through random rewards, and our candy dish implementation had that; you might not really be hungry for a Reeses ™ peanut butter cup, but if you see one, you better grab it before somebody else does.

The whole “work food” culture is pretty horrible when you think about it.

I am lucky enough to have good genetics when it comes to keeping a decent weight, but the extra candy bumped me up from my long-term “fighting” weight of 173 to 178, and I was feeling really tired and crappy in the afternoons. The first did not bode well for the upcoming cycling season, and the second did not bode well in general.

At the time, I was on a low-fat diet, which is the kind of diet they tell you to be on. And I’d been doing a bunch of reading about glycemic index and glycemic load, and wondered if that was having an effect. Clearly, the candy was high glycemic index, but was there something in my lunches that was contributing to me craving candy?

So, I started an experiment. Instead of the sandwiches that I ate at lunch 3 days a week (because they were cheap) and the burritos that I ate the other two (because burritos), I switched to salads with meat three days, and burrito bowls without the rice and tortillas the other days (because burritos).

It was a pretty simple change, but it had a pretty immediate impact; I still habitually wanted candy (because candy), but I didn’t crave it as much, and I could cut down how much I ate. And I felt much better in the afternoons, which was good, but did not convert them to an endless series of rainbows and unicorns (a guy can dream, right?).

Anyway, that led to a whole lot of research into nutrition, which led to research into biochemistry, watching a few lectures, and reading a lot of clinical research.

But I started by trying to answer a question that had always confused me:

Why is it so damn hard for many endurance athletes to lose weight?

Some of the cyclists I know are very thin and light, but I know others – many that ride a *lot* more miles than I did – who carried maybe 40 pounds more than they would like to. I knew what worked for me – making sure I controlled my blood sugar well after long rides – but that still required a fair bit of discipline to get me to light, and I never got to “cycling light” – that weight where your cycling friends are annoyed at how little you weigh. That was true of most cyclists I knew. My trust power meter said that I was easily burning 4000 calories per week.

Why wasn’t all of that exercise translating to weight loss?

Looking at the clinical studies about exercise and weight loss, we see mixed results. Aerobic exercise works in controlled situations – where the amount of food is controlled – but doesn’t work well where people choose what they eat. There are two hypotheses for what is going on; the simple one is that people are hungry and just eat the calories back; the more troubling (and luckily, probably rarer) one is that exercise under caloric restriction can reduce the base metabolic rate for some people.

To lose weight, eat fewer calories or burn more

This has been the mantra for weight control for over 40 years, and it’s what I used to believe. It’s simple to understand, but  doesn’t work very well in practice.

The problem is that it considers all calories to be the same. But when we are talking about body weight, we don’t want to lose weight, what we really want to do is to lose *fat*. So, let’s recast the statement:

To lose weight, live in a way that minimizes the amount of energy that is put into your fat stores, and maximizes the amount of energy that is pulled out of your fat stores.

So, I started looking more closely at how fat accumulation works in humans – what drives calories into fat stores, and what pulls calories out of fat stores.

I originally had a long and technical discussion on what controls energy partitioning – where the energy to run your body comes from – but I am unable to make such a discussion brief, so here’s the simplified version:

  1. The amount of fat you burn during day to day living is tied directly to the percentage of carbs that you eat. Eat a lot of carbs, burn a little fat; eat a few carbs, burn a lot of fat.

  2. The amount of fat you burn during exercise is tied both to the kind of diet you eat and your energy state when you exercise.

The key point is that both of these are adaptable behavior; our bodies can adapt (mostly) to different mixes.

The result of this is that two riders of equal fitness can go on the same ride, both burn 1000 calories, and burn *vastly* different amounts of fat. If you want to look at some pretty graphs that illustrate this, go read this article and this article from CyclingTips.com.

Back to the experiment…

Back in real life, I expanded my experiment a bit. My breakfast went from a big-ole bowl of cereal with a lot of milk to a small bowl with minimal milk and a hard-boiled egg. My dinners lost a few of their carbs.

And I was down about 5 pounds, back to the weight that I wanted, with just some small changes.

At this point, I really didn’t have many carbs in my base diet – and they were increasingly low-GI carbs – but I was still using Skratch on my rides, and I was still using Endurox after my rides; following my traditional fueling strategy.

So…

I forgot to mention another motivation that got me playing around with diet. My on-bike fueling strategy did not work very well. Thankfully, I rarely got the “GI distress” that some people do, but on longer rides I know that I’m going to get some stomach pain from the skratch, and I’m going to have energy issues. That makes rides like RAMROD a bit of a crap shoot; at best I felt sort of blah, but generally I felt a few rungs below blah.  

The next experiment was obvious: I put the Skratch in the back of the cupboard, and started filling my bottles with water. I put some cheez-its (carbs + fat + protein) in ziploc in my pocket, added a packet of sport beans just in case, and I started riding.

And that mostly worked. I felt a little under on power, but it was early season and I’m under on power then anyway. I sometimes supplemented a bit with the aforementioned cheez-its in the middle of the ride.

About this point, I weighed myself, and the scale said 169. I checked another scale to be sure. I hadn’t been this light in 20 years, not even in 2005 when I rode *way* more miles I ride these days. And I was eating what I thought was a lot of food.

Hmm…

Somewhere in here, I came across a post by noted cycling coach Joe Friel in which he talked about how he got back down to his “racing weight”, which aligned well with the research I had been doing, the biochemistry I learned, and my experimental results.

And I thought, “What the hell, let’s see where this thing ends up…”

Heresy

I own a copy of “food for fitness”, and a copy of “the feedzone cookbook”. I’ve read all the recommended diets for athletes, and they all recommend a diet high in complex carbs – something like 60 or 65% of calories.

I decided to go full keto, and see what happened. That means <50grams of carbs per day (though I never actually counted), quite a bit of protein, and more fat. Since I had eased myself into a lower carb diet, the transition was pretty easy (this is not the case for a lot of people), and about a week later, I headed out on Saturday morning for a nice 45 mile ride.

The first 45 minutes was great; I felt strong, had good power. And then it happened; over the space of about 15 minutes, I ran out of carbs.

If you’ve bonked, you know what this is like, but this time it was different. I actually felt okay, my brain was fairly clear. I just lost all ability to put power down. You know the Tour de France rides where the guy’s bike breaks and he picks it up and throws it into the bushes? I was close to that. I cut the ride short, could barely push 150 watts the rest of the way home, and regrouped.

After talking with a few people and doing some more research, I realized that while I was pretty fat adapted for regular life, I was not fully adapted for cycling. So, I kept at it. I did Tour de Blast (6000+ feet of up over 80 miles), felt good at some points and awful at others, bad enough I had my wife pick me up at 70 miles. But the overall trend was positive; I could do my Tue/Thu night rides (35 miles, 2000’ of up) *easily* on just water and feel good at the end. And my high-end power was just fine; one night I out-sprinted one of our race-team guys and did over 1000 watts for about 9 seconds, which is pretty decent for me. The only point of concern I have is the high aerobic range; I don’t think I quite have the pep I used to have there, but give that I made this change right at the beginning of the season (stupid) and didn’t do the kind of high-intensity training I would usually do (lazy), I don’t know how much is a dietary effect and how much is just a lack of training.

And then finally, near the end of the summer, I did my own supremely stupid ride, Sufferin’ Summits. 9500’ of climbing over 55 miles.

I did it fasted, and over the 5 hours it took (did I say it was hilly?), I had two servings of a really cool time-release glucose called SuperStarch – about 280 calories total, a bottle of diet coke, and about 14 cheez-its. After dragging myself up the worst hills I know of in the area, I finished the ride.

And I could have kept going. Honestly, I felt pretty good.

During the weeks before the ride, my weight continued to drop, and finally the numbers clicked over to 158, which is pretty much where I am right now. I lost two inches off my waist (34 –> 32, my college size), and I lost a ton of subcutaneous fat.  I have a tiny bit of fat remaining around my waist, and I think this spring I might see if I can drop down to 153-155 or so. From what I can tell I *mostly* preserved muscle mass, but since cyclists tend to have the upper bodies of 80-year-old French grandmothers, I have been spending a bit of time in the weight room.

So that’s the story. Down an honest 20 pounds over 4 months.

Guidance

I went as far as I could – heresy, right? – to see what would happen, but there are a lot of variants of low carb. Some athletes do less strict diet variants like Paleo, Primal, or slow carb. Many aim for a higher level of carbs; something like 100 grams per day. A few are very strict on carbs during training but carefully use gels and other simple sugars during events. Some do a complex cyclic protocol. Some do it as a weight reduction approach during the off season and switch back to a moderate carb diet during the bulk of the season.

There are a lot of options, which is good, because there isn’t a lot of research in this area yet (and I’m not sure who would pay for research; certainly not the exercise drink folks).

As I said at the beginning, if you have questions, please ask me.


Snowflake–custom controller

The Adafruit Huzzah was a nice starting point for the snowflake, but it’s both more expensive and not well-tuned for what I need. To drive the WS2812s, all I need is a single output, and I don’t need dedicated buttons on the board.

I went back and forth on whether I wanted to do two controller boards – one that used the ESP8266 and another that used a cheaper AVR, but the ESP can be had so cheaply that it hardly seemed worth it. I considered a number of different ESP modules – or even building directly from the ESP8266 and adding flash, but the ESP-12 is pretty cheap and it has FCC certification (or is claimed to, at least).

So, basically, I took the Huzzah design and looked at it in Eagle, and then pared off things that I didn’t need and did my design in KiCad. It currently lives here.

The design is pretty minimal; it has a small 3.3 volt linear regulator to power the ESP (I used the same SPX3819 as on the Huzzah), appropriate resistors to put the ESP in the right state, diodes to handle level conversion between the 5V world and the 3.3V world and two headers. There’s a 6-pin programming header that has power, serial connections, and the reset and GPI00 pins on it, and there’s a three pin header for operation that has 5V and GND in to power the board and the data line out for the WS2812 string. Simple and straightforward. There will probably be another version with another sensor; I’m going to need a way to reset these things to handle wireless setup and my new design will be fully encapsulated, so I’ll probably do something magnetic.

Here’s the schematic:

image

Once I had that, it was off to do the PC board layout. That is really my favorite part of the process; to go from a set of random components on the board to something functional (and perhaps even elegant) is a rewarding process. Here’s the layout.

image

I decided that I wanted both sets of connectors at the bottom and the ESP-12 at the top. Basically, the jacks are at the bottom, the 3.3V supply is in the middle, and the resistors, diodes, and LEDs are on the sides. All of the small components are 0805 sized, since I wanted something that I could hand-solder if necessary, and those will also reflow reasonably well if I want. Given the need for two jacks and the space they take up, there’s not a lot of margin in going smaller at this point.

One of these times, I’m going to do snapshots of what it took to get to a decent layout.

The PC boards got finished and sent out to AllPcb.com, who sent me 10 (actually, 11) copies of the board for a total of $5.49 with about a 7 day turnaround. I don’t understand the economics of how that can be profitable, but I’m not going to complain right now.

Initial guesses at the overall costs for the controller:


Part Price
ESP-12 Module $1.78
3819 regulator $0.06
Other parts $0.11
PC board $0.50
Total $2.45

No labor in there yet, but it’s just a matter of putting the parts on there and reflowing them. It should be pretty quick, and I’ll check to see what it would cost to outsource it as well.

The boards have showed up, but I was too cheap to pay for fast shipping of the other components, so they’ll trickle in and then we’ll see if my design works.


Snowball pricing analysis

I’ve been thinking about maybe selling the snowflakes – or a variant of the snowflakes – commercially. Pursuant to that, I did a few calculations on parts costs.

Here’s what it would take to build the prototype in volume (say, 100 units):


Part Price
PC Boards $2.04
55 WS2812 LEDs $3.72
Adafruit Huzzah $7.96
Acrylic $4.07
Printed separators $1.00
Labor @$13/hour $26
Total $44.79

The labor is frankly a bit of a guess; it’s probably quite a bit worse than that.

Assuming I wanted a 50% margin, that would put the retail cost at about $90. The snowflakes are nice, but I’m not sure they are $90 nice.

To reduce the price, we need to look at the places that are the most expensive. Clearly, labor is a problem, so making the design easier and more robust to assemble is going to be critical. And the cost of the Huzzah is a big part of the parts cost, so coming up with an alternative that is easier and cheaper to use makes sense.


Snowflake Final

The snowflakes – five in total – have all been finished.

Well, mostly finished… there are three animating themselves on the gutters of the house right now, while the remaining two (which were on the house until this afternoon) are waiting for their waterproofing to cure.

This post will cover a lot of ground, since I missed a couple of updates along the way. 

Assembly

When we last left our story, we had a PCB in the snowflake form and some laser-cut pieces of translucent acrylic that go on the front.

The next step was to put the LEDs on the board. My hope had been that I could use the hot air rework station to reflow all the LEDs, but a bit of experimentation showed that I was melting the LED cases and hand soldering was faster, so I went that way. I think a cheap reflow oven is in my future.

I used the following approach:

  1. Add solder to all the solder pads on the snowflake (55 * 4 = 220 of them).
  2. Carefully hold an LED in the right position, and touch two of the pads to tack it in place.
  3. Press down hard on that end of the LED, and touch each pad until the LED sinks down even with the level of the board at that end. .
  4. Repeat on the pads at the other end of the LED.
  5. Reheat the first two pads to get rid of the stresses induced when the second end was dropped down.

That was mostly straightforward, except it turns out that if you put the LEDs in backwards, they turn into HEDs – Heat Emitting Diodes – and you get to remove them and put new ones in their place. I put my new hot air rework station – a 9570W+ – to work at that.

Eventually, I got all of them soldered correctly, fixed some connection issues between the boards, and had something I could run my initial animation code on.

It worked.

My original plan was glue the PCBs directly to the acrylic, but I discovered that I liked the result better if there was some space between them. I did tests using pennies as spacers, grabbed my calipers to get some measurements and drew a quick drawing, and then came up with this in TinkerCad:

image

And then printed up a bunch of them in clear PLA. They mostly work pretty well; the only downside is that the connection at the small end needs to be flexible to warp around the board but that also makes it a bit weak, so I’ve broken a few of them. Carefully put them on the PC board and squeeze in the acrylic, and you end up with this:

image

Call this the first prototype. At this point, I was a bit tired of soldering and was waiting for some more parts to show up – and finding out that Amazon’s two-day prime shipping is only aspirational at times – so it was time to write some code.

Code

Both the code and the circuit designs live in GitHub here.

I’ve written four or five versions of color-blending animation code. Last year I wrote a nice abstraction that worked great for the linear strip animations I was doing, but it didn’t adapt very well to what I wanted to do here, so I went back to first principles.

Using polar coordinates, the code knows the location of each LED on the snowflake. For some of the animations, the color is determined by either the angle or distance of the LED from the center, and in these, there is just a simple mapping that says “add the animation offset to that number, and then use it to find a color”.

The nice part of this approach is that is gives me appropriate color blending across the whole snowflake.

I spend a few days on the code, and it’s decent as a first try. It implements four animations:

  • A continuous rotation of all the colors around the arms of the snowflake.
  • An animation of colors based on the distance of the LEDs from the middle.
  • A “sparkle” effect; all the LEDs smoothly and slowly blend between colors, while random LEDs flash full white and then fade back to the current color. I wrote some nice code for this.
  • A bouncing effect called “worm” that is a bit of a take on the Larson Scanner, but across opposite arms of the snowflake, also with color blending.

I had more ideas for animations, but decided to freeze the implementation so I could finish the build.

Autonomous display

For the prototype so far, I was driving it with a ESP that was powered by the serial port, and with a short ribbon cable carrying signals to the snowflake itself.

My plan was to put the ESP remote from the snowflake (so it could be under the eaves and shielded from rain), so I cut two-foot lengths of red/black/yellow wire (for power and signal), wired everything up, plugged it in…

And the LEDs started flashing randomly. Tried decoupling capacitors, tried signal resistors, tried a whole bunch of things, and nothing worked; if I made the signal line longer than about 10”, it wouldn’t work.

Trying to fix that consumed the better part of a day. Ultimately, I decided that the problem was that I was getting a lot of transients, so I decided to run the 5V power directly to the snowflake, and then chain the ESP off of that.

And it worked perfectly the first time, leading to this arrangement:

image

Plus 4 = 5

During the long hours of making four more of the PCBs – cursing my choice to use tiny pads for data connections and not doubling them – I realized that there was a far better way to do the attachment; if I allowed the boards to overlap vertically, I could use through-holes that aligned between the parts and just solder component leads into the holes. My guess is that I could do that basic board in about 1/10th the time, even less than that if I could reflow solder the LEDs. And the boards can probably be (mostly) square, which will make them easily fababble, easily broken apart, and they will fit tighter for better utilization.

Sounds like version 2 to me.

I didn’t take any pictures during this time, but it was a huge pain in the butt to get them all working; the tiny data paths were especially troublesome.

Finally that, was done, and I could turn to other matters. Four more Huzzahs were wired up:

image

and were all attached to the snowflakes.

With the Huzzah mounted close, it needed some protection, so a bit more time in TinkerCAD yielded a nice little case:

image

That’s a PrintrBot simple metal pro with a custom heated bed on it. I had the usual problem getting tolerances right, but eventually got to here:

image

Power

Whenever anybody asks me what the hardest part of these projects is, I always respond “cabling”.

LEDs are power hungry, and unfortunately small wires introduce voltage loss, which means you get color shift. If I had 3 snowflakes on one wire, the last one is going to be dimmer and the colors will likely shift as well. In my previous projects I’ve resorted to powering strips at both ends and using thick landscape lighting wire, but it’s a huge pain.

This time, I got smart.

WS2812s pull about 60 mA max if they are all white, and with 55 of them I needed 3.3 amps @ 5 volts. Since I can live without full white, I decided that 3 amps would be sufficient. And bought 5 of these:

image

One of these will be right next to each snowflake, and then I just need wires that supply something around 12 volts, and everybody will get a nice solid 5V supply and be happy. I reused the 10-gauge wire I had for the project this replaced, but I could easily get by with something like 18 gauge.

I’m not sure powering with DC is the right approach, however; it might be cheaper to go with small 5V AC power supplies and just use standard AC cords.

Waterproofing

I live in the Seattle area, and the holiday season is generally quite wet, and the electronics will need some protection from the elements.

I have quite a bit of West Systems epoxy sitting in the garage leftover from a custom subwoofer enclosure I did a while back, but their website didn’t yield much information about its conductivity. So, I built this:

image

and embedded it in a whole lot of epoxy:

image

image

Works fine…

Distractions

About this time, I had a couple of distractions. First off, this showed up from Italy:

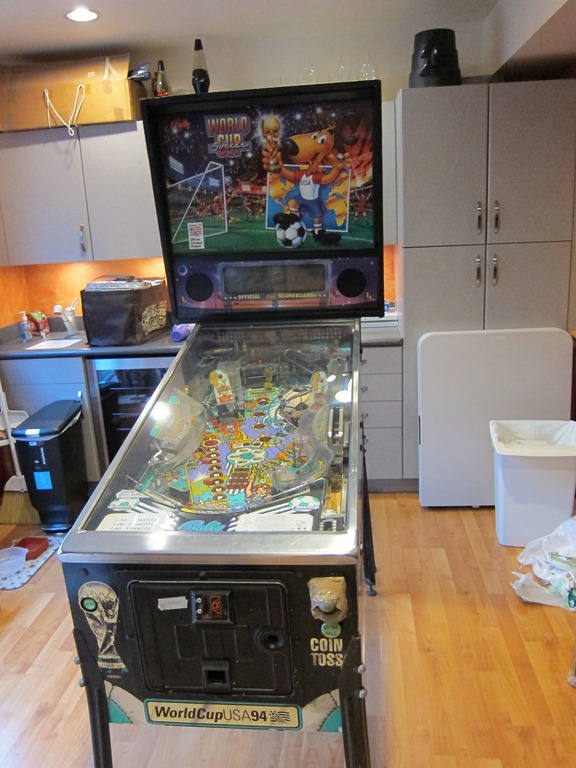
IMG_8960

Getting it picked up, legs on it, and ordering parts to recondition it took a bit of time.

And, I had an event where I needed the snowflakes to be part of the display, so I totally finished two of the snowflakes and put them out on the house, trusting that the weather would stay unseasonably dry. Here’s the bench test:

image

You can see the DC->DC converter to the left of the lower snowflake.

I should at this point mention that pictures or video never do these colors justice; they are much more intense than they show up here.

Waterproofing part 2

To keep the attached wires in the right spots, the wires and the Huzzah needed to be supported above the PCB which will be covered in epoxy. Here’s what I ended up with:

image

After I carefully poured epoxy over all the parts of the board that needed them, the boards got hung up to cure:

image

It being about 40 degrees in the garage, they did not cure overnight and eventually I had to pull them inside to finish curing. They looked like this when they finished curing:

image

I retested them. One of them worked perfectly, the other two did not; only some of the LEDs worked.

So, out came the air rework gun to debond the epoxy in an area and then I could trace from there. I ended up replacing about 5 LEDs; from what I can tell they were touching but no soldered, and the cold weather shrunk things enough so that the epoxy could get in there. I also had one pcb trace break (really?). Then, those two got an epoxy touchup to cover over the reworked areas. .

Finally, the huzzah box got hot-glued to the back and silicone was used to plug the hole.

Not perfect, but version 1.

image

You can also see the molex connectors that bring 5V into the snowflake.

Videos:


Snowflake from Eric Gunnerson on Vimeo.


Version 2

*Lots* of ideas for version two, which might be a commercial version.

  • The whole mounting and waterproofing approach is far too finicky and may not work very well. I’m considering vacuum-forming the snowflake out of thinner plastic with both a front and back, and those can then be solvent welded (or siliconed) together to give me something that is truly waterproof. It will also give much better support for the PC boards.
  • The approach of “click-together” pc boards worked, but it required fine-tuning for each and every joint and then detailed soldering for each part. And then rework when the stresses built up. Instead of click-together, I’m going to use overlapping boards that are connected with through-hole wiring. That will take me down to 10 easy-to-solder joints per arm, or about 60 in total. I also think I can get each of the PCs to be rectangular in format, and that will make panelization easier and waste less space. I think.
  • I really need a way to reflow solder all the LEDs, and it may be time to make/buy a tiny reflow oven. Or *maybe* get somebody to do that for me, though the initial quotes I looked at are higher than I expected.
  • Moving the ESP8266 onto the snowflake board, probably on the back. That would require adding a simple 3.3V regulator for power and (probably) programming pins. I’m currently using an ESP-12; I could probably get away with a simpler one but they are pretty cheap already so it may not be worth it.
  • Add more built-in animations. Color wipes in the x/y direction, flash and off animations, concentric rotating color blends could all be done.
  • WiFi coordination between standalone snowflakes, with a dedicated network just for the snowflakes, and *maybe* a separate gateway to connect to an existing wireless network.
  • WiFi connection to an existing wireless network to allow control of the snowflakes. This might encompass setting their default set of animations, being able to download new animations, or being able to do “command control” over the wireless network, either just setting the animation that’s being run or driving every LED independently.


Snowflake update…

Have made decent progress on the snowflake. I have two PCBs assembled and populated. The right way to do it would be to use a reflow oven, but I’ve settled on using my new hot air rework station and solder paste to do the data lines – since the pads that I need to connect are tiny – and hand soldering everything else, including the LEDs. I did reflow on a test LED and it worked, but I had to get things hotter than I would like.

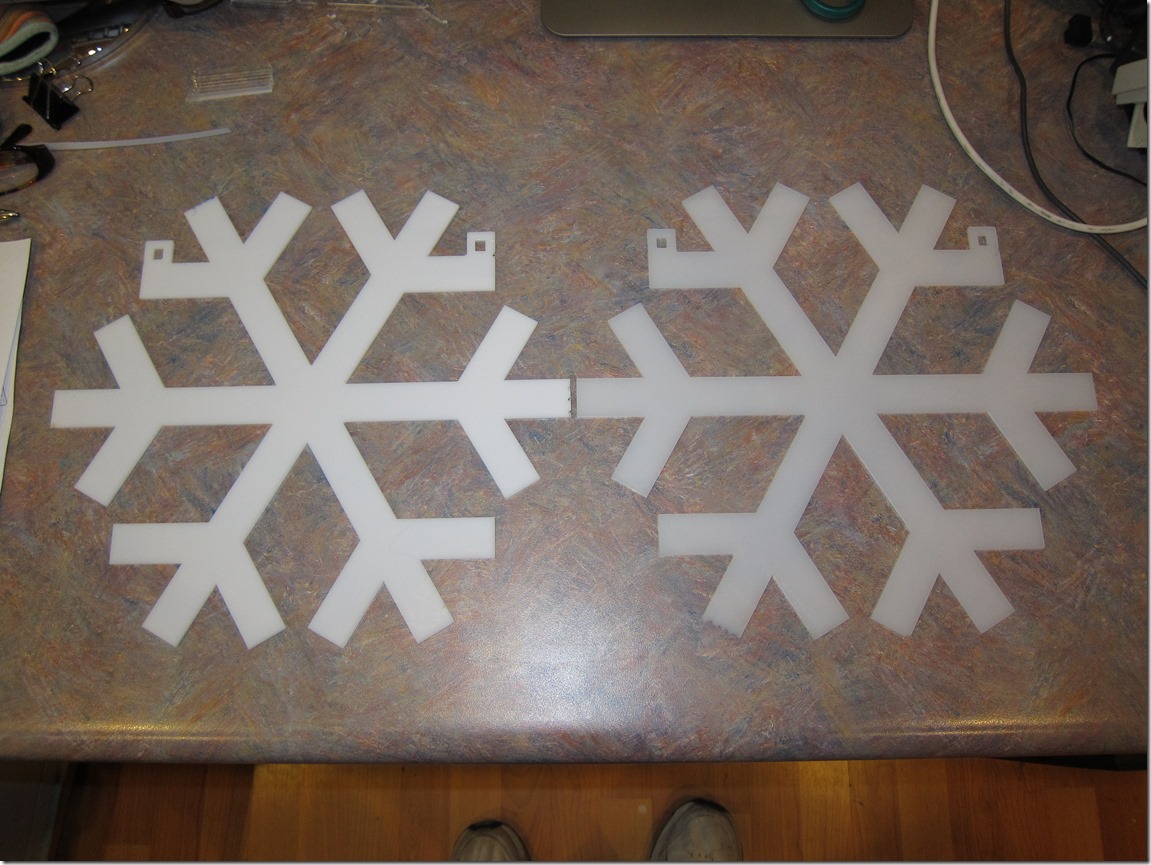
I finished the outline design and cut the snowflake fronts from white acrylic. This was a bit frustrating; the Glowforge is advertised as being able to cut about 11.5″ in the forward/back direction, but they haven’t been able to achieve that, so I had to cut slightly smaller than I wanted.

I used one sheet each of #7328 and #2447 acrylic so I could see which one I liked better:

IMG_8876

After playing around a bunch (something like 15 variants) with both plastics and with keeping them different distances from the LEDs, we settled on 2447 spaced about 10mm away.

Then it was off to Tinkercad to design a clip that would hold the front to the pc boards, which finally led to this. You can see the clips (printed in clear PLA) holding the snowflake at the right distance.

MVI_8888 from Eric Gunnerson on Vimeo.

After a false start or two, I think I have a handle on how I want to structure the animation code; it’s nice and mathy…

Now I just need to order some more Huzzahs to drive the other snowflakes, figure out how I’m going to handle the cabling, and buy some waterproof 12V –> 5V buck converters (I’m tired of worrying about voltage drop).

The video is powering the LEDs from a USB port using tiny wires, and the 5V supply is sagging down to around 4 volts because of the load. So, it will be brighter than this.


Snowflake PCBs…

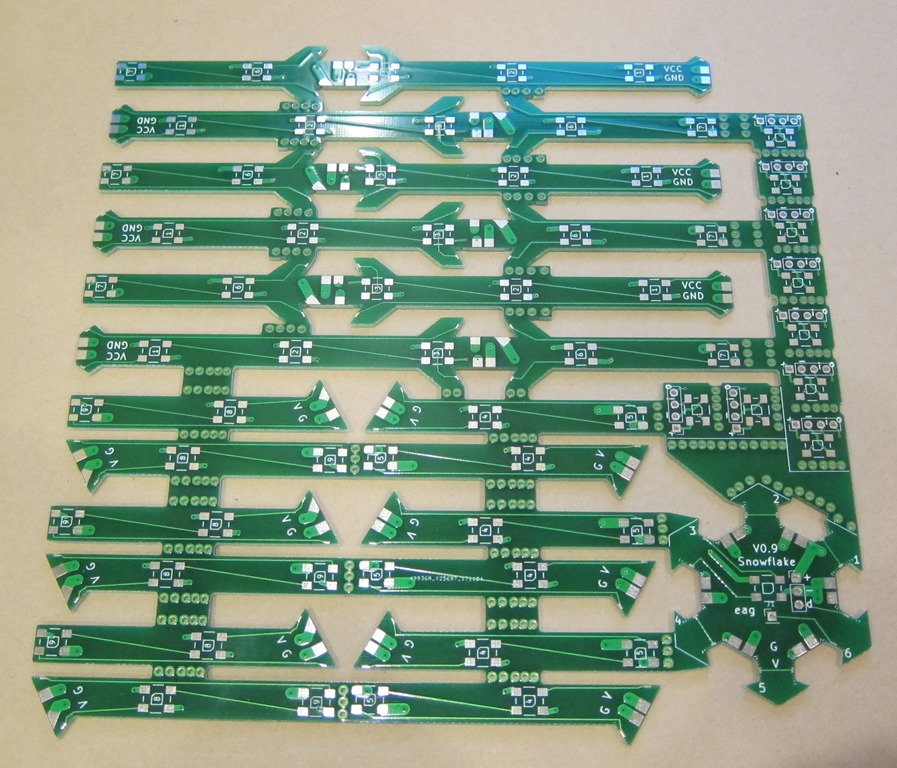
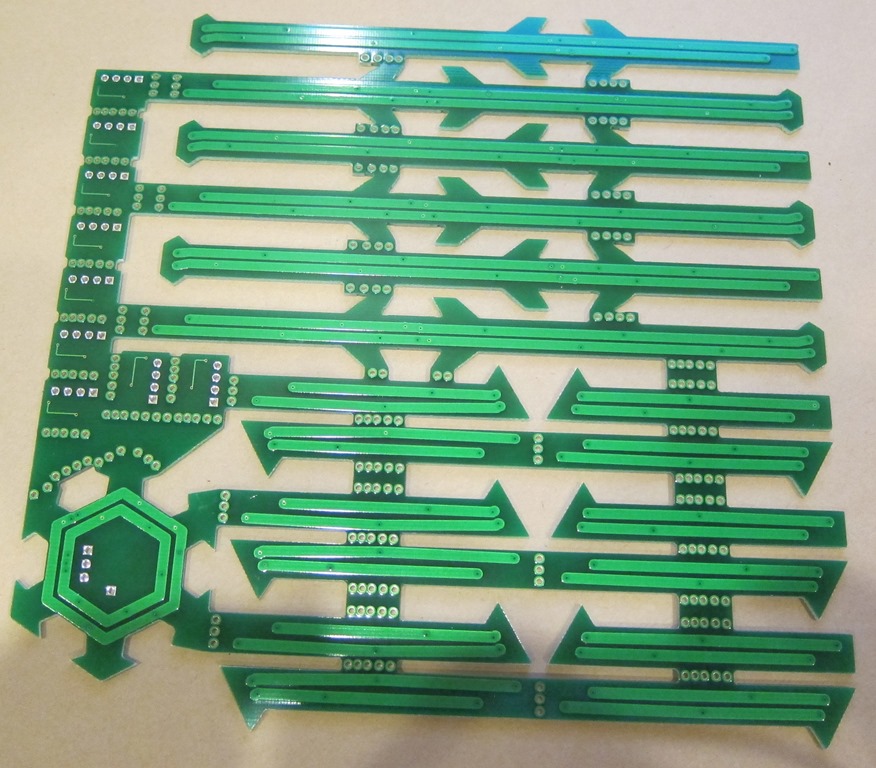
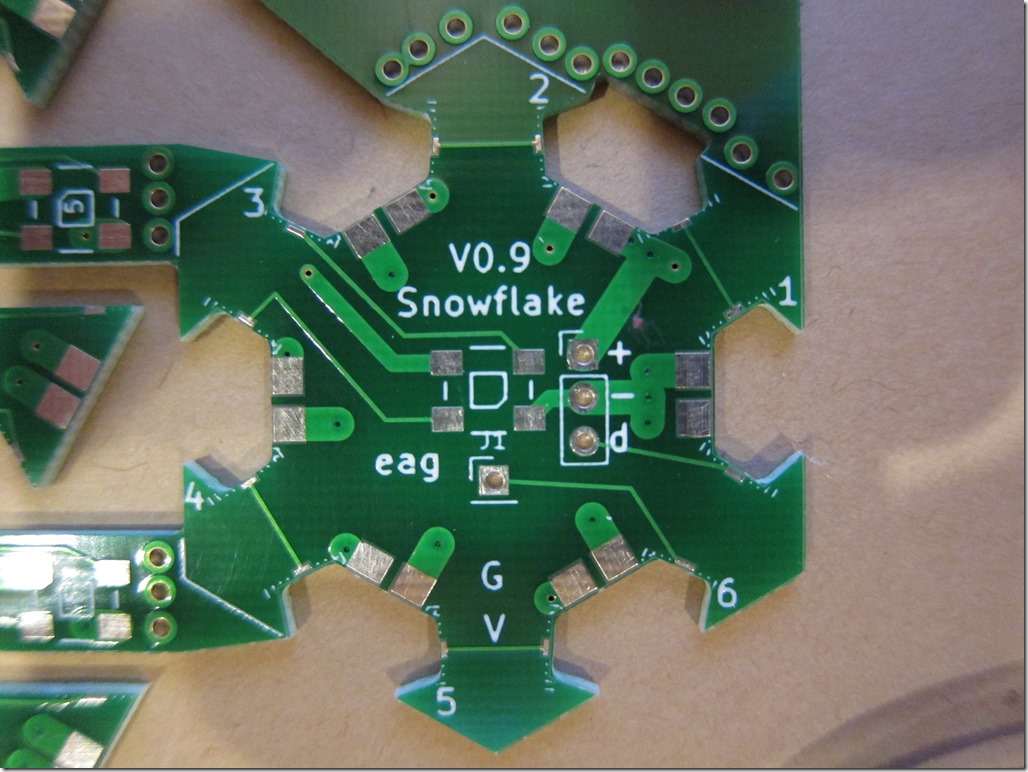
The PCBs showed up very quickly. Here are front and back pictures of them.

IMG_8864

IMG_8865

IMG_8869

They look pretty nice and have holes in all the right places. Because of the design, I need to cut them apart by hand.

I used my Dremel osciallating multi-tool, but frankly I think the normal Dremel would be a better choice.

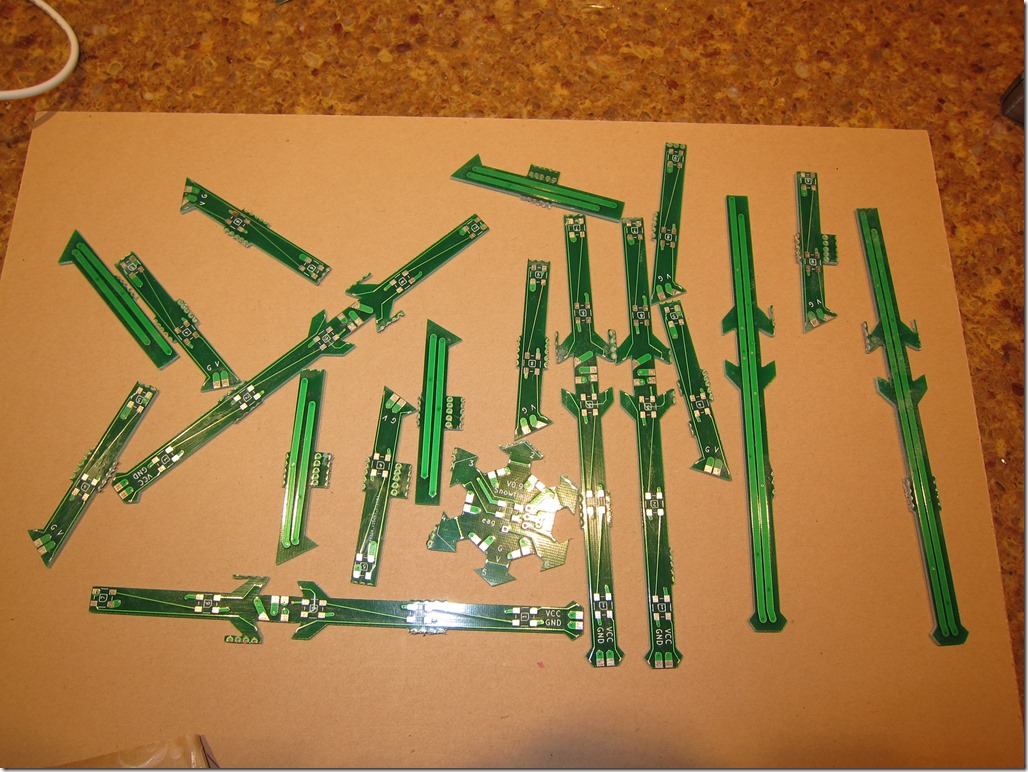
That gave me a pile of parts:

IMG_8871

Next, it was time to assemble the pieces. If everything was exactly sized, all the parts should have fit together perfectly. As it was, I had a few protrusions to file down and then I needed to file most of the pieces to get them to fit together. Took about half an hour.

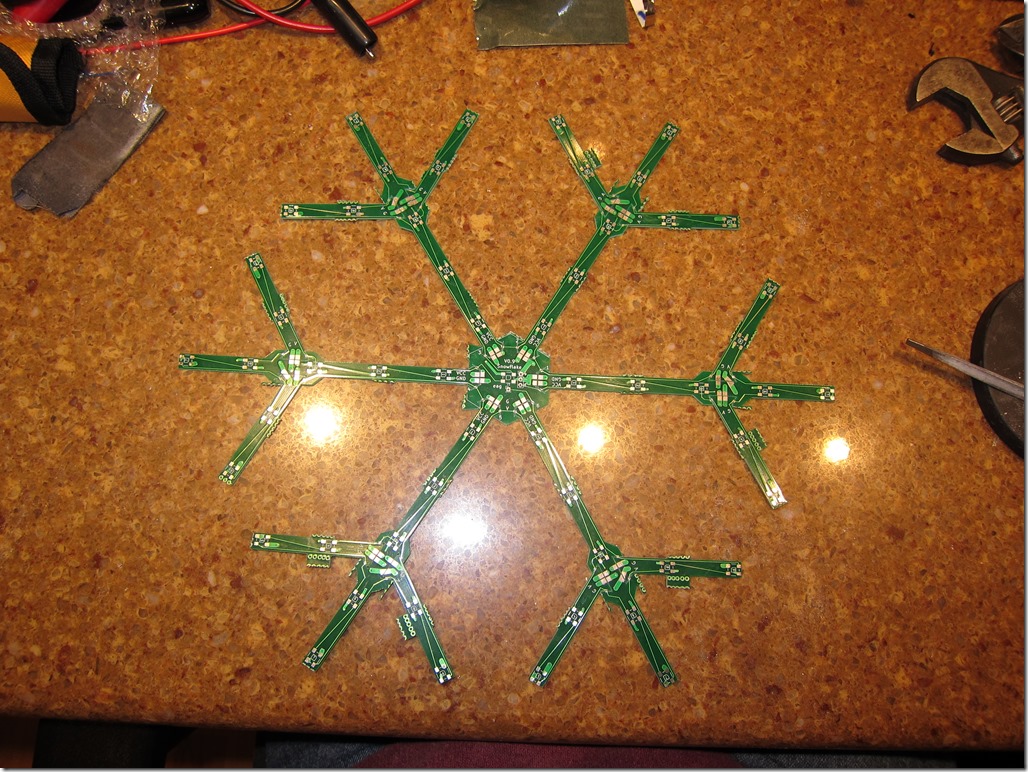
And then, the first view of the snowflake board assembled.

IMG_8872

The *plan* was that there would be copper right to the edges of the boards, and then they could just be soldered together.

What the fab *did* was pull the copper back from the edge by a little bit, so there was a gap between each of the pads that I needed to solder together. The power and ground pads are pretty big, and I could easily bridge them with a bit of bare copper wire.

The signal lines were another matter. The pads are much smaller, and with the copper lost by the fab, I just had a hairline of pad to solder to. I ended up using very fine wires to bridge the gap, putting the super-fine tip on my Hakko, and very carefully soldering the wires on. It was pretty exacting work, but it got easier over time.

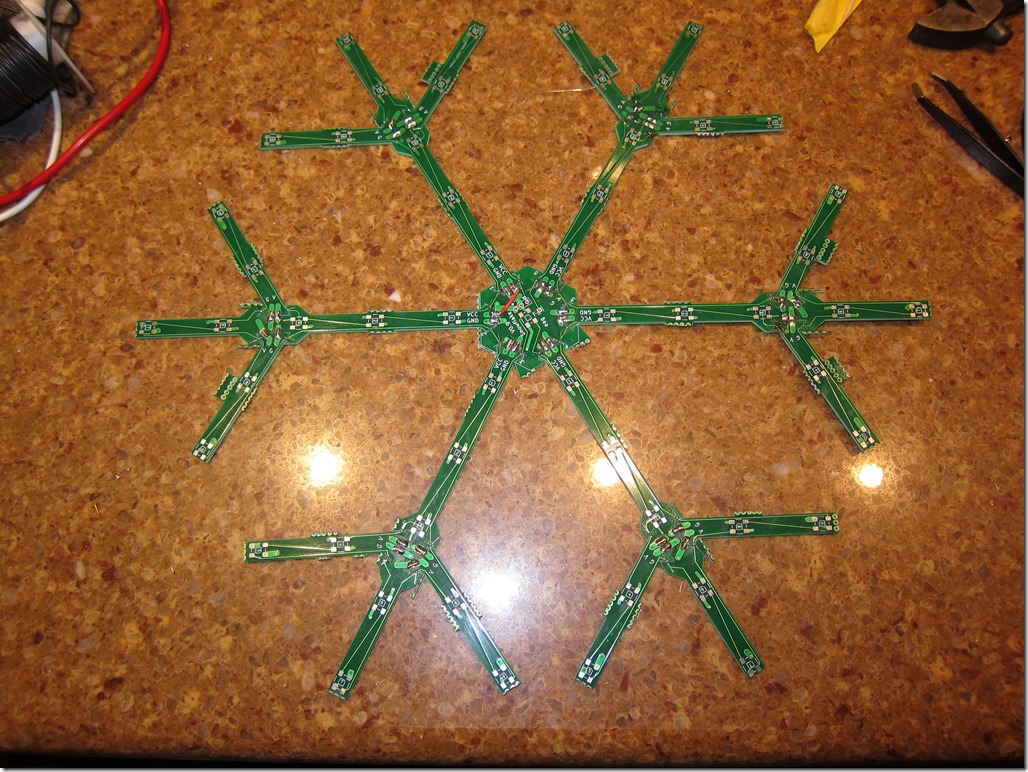
IMG_8873

The design was perfect except for a missing via that leaves a broken connection to the Vcc line. I fixed it with a short bit of red insulated wire.

I ordered a new hot air rework station so that I can reflow the WS2812 LEDs onto the PCBs, and I’m going to use that to solder all the little jumper wires that way.

While I wait for the new tools to show up, I’m going to write some code.


Snowflake #2–PCB design

I thought that I was done with the PCB design, but it turns out that I wasn’t close.

Basically, I ran into two big issues.

The first was the wierd angles that I had in my design; they didn’t pack together very well. What I really needed was a way to rotate the two short arms so they were at 90 degree angles.

I couldn’t find anything, so I went and wrote a utility to do it. On the way, I learned a lot about the KiCAD file format. It was a nice little exercise; I’ll note that it’s in pretty rough shape and you would need to recompile it to get the rotation you wanted (and to work on the file you wanted); maybe I will clean it up at some point. It’s C# code because that’s what I speak best.

I guess I should also note that I built a little .pcbnew parser to do it; it parses the file into a bunch of nodes, you change the ones you want to change, and then it writes the file back out the way it was before except for the changes. So, it will likely be useful for other stuff as well.

So, anyway, that gave me everything at increments of 90 degrees, which was good. Then I went off and started trying to understand if PC fab houses could build what I wanted. The answer seemed to be “yes” (though not in the current form), but they would likely charge extra and there was a decent chance they would make a mistake. The problem is that I have 4 different irregularly-shaped boards. You can’t use v-groove panelization because that only works with (mostly) rectangular boards. I was hoping to use the GerberPanelizer, but I couldn’t get any of my boards to show up in it; I suspect it’s because of their shape.

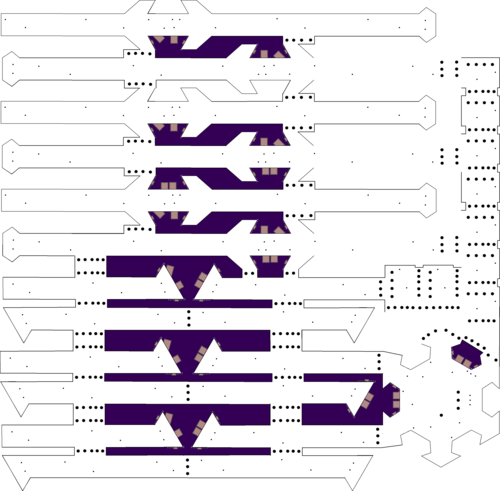
So, I went off and taught myself the requirements and spent a bunch of time coming up with this:

image

This is a hand-panelization of my boards. The idea is to come up with a design that can be fabricated as a single piece by the fab (and assembled/soldered/etc., if you are planning on having somebody do that) but can still be easily separated.

You do this by putting little breakaway tabs with small holes (I used large vias because KiCAD only supports holes in footprints). The idea is that after you get the pcb, you can carefully break off the parts with the weak tabs to separate the boards. The tabs are also called “mousebites”.

To make them breakable, you need to design things so that you have multiple tabs that are in a line and could easily bend. That isn’t even close to possible with this design, so what I’m going to do is cut the boards apart with my Dremel rotary tool or oscillating multitool. The rough edges will not matter for this application. If the design is correct, all the yellow edges will be cut with a router after the PCB is etched.

Oh, and the small boards on the right are little WS2812 breakout boards; I had a bunch of extra space in the square, so I added them in.

My first check is to upload to OSHPark and see what it thinks; I’m not going to order there but it does full visualization of the boards. Here’s what I got for the board and the board outlines:

Yeah, that’s not very good. The design looks fine. However, when I was switching between layers, I accidently chose the “Eco2.user” layer instead of the “Edge.Cuts” layer. They are rendered in the same color. All I needed to do was to turn off that layer, and then I could flip those lines over to the edge cuts layer, and that fixed the issue.

OSHPark still has trouble with the design, but I’ve exported Gerber files (one file per layer in the design tool) and looked at them in other viewers and they are fine. I think the OSHPark viewer is having trouble with the internal cutouts.

Because of the complexity of the design, I’m not sure how to spec it on the online ordering tools, so it is currently out to order.


Pages:1...891011121314...35