I created a video to explain how to assemble the lantern:
Stop apologizing about how agile you aren’t
Two people are talking about agile stuff…
Person 1: So, what kind of process do you use in your group?
Person 2 (apologetically, hanging her head low): Well, we’re not very agile. We are doing iterations and retros, but our planning isn’t very good, we don’t pair, and we rarely do TDD.
I’ve seen this interaction quite a few times, and I’ve finally decided that I need to say something.
Stop apologizing about how agile you aren’t
Seriously. Yes, I know that it’s frustrating to run into people who are more experienced and/or in environments where they can try things that you haven’t/can’t.
Knowing what those groups do is great, as it gives you data about what you might want to try in the future. . *Comparing yourself* to those groups is not. Focus on the positive and the achievable within your own environment.
The word for the day is “Thixotropic”
I had a small gluing project to do today; I needed to attach a small 3d printed pad eye to the back of my animated LED snowflakes (project info here). The pad eye looks like this:
The pad eye is printed out of PLA and is about 1.25” inches across. I needed to attach it to the back of a printed circuit board. Which would make my adhesive choice seem simple, but there are two complications:
- There are wires soldered onto the PC board and that part of the board is not flat.
- The boards are waterproofed in epoxy, and the coating is has some variation – perhaps 1/16”
That means that I need an adhesive that will bond well to the PLA and epoxy and fill the gap in between the two surfaces.
My first thought was to heat up the hot glue gun and use it. It works fine as a gap filler, but it’s not great in a thin layer between two big surfaces; it’s too easy to have the glue cool too fast and not really bond to the surfaces.
My next thought was to use epoxy. I have several epoxies in my workroom; they are the small hobby shop versions that come in small tubes or bottles. I really don’t like them very much; it’s hard to get the mixture ratio right and in this application they tend to be too runny. And they smell.
Out in the garage I have my serious epoxy:

That’s leftover from a custom subwoofer project I did a while back. It’s really easy to use; one pump of resin plus one pump of hardener and just mix it together. I have the 206 hardener, which is classified as a “slow” hardener; 20-25 minutes of pot life (useful life after you mix it before it starts to thicken up too much), 10-15 hour cure, 1-4 days to maximum strength. The nice part about serious epoxy is that it’s tunable; you can use the 205 fast hardener which cures in 6-8 hours or the 209 extra slow hardener with much longer pot life and a slower cure.
Anyway, I really like this epoxy, but it is really runny, so it won’t work for this application.
Or will it?
Welcome to the wonderful world of epoxy fillers. There are a lot of different fillers out there – here’s a nice article by System 3 (another epoxy company) that describes them and why you would use them – that can modify the properties of epoxy considerable. For this use, I am interested in fillers that modify the viscosity of the epoxy, and specifically interested in fillers that make it thixotropic.
A thixotropic fluid is one that flows when you apply stress to it and then stops flowing when that stress is used. The most common example used is catsup, but I think that peanut butter is a better example; you can make it flow around but when you are done, it sticks where you want it. And it’s sticky, like epoxy. That is a wonderful property for an adhesive; just stick it where you want and it will stay there until it cures; no drips or sags.
There are a few common thixotropic fillers; ground silica (known as cab-o-sil or aerosil), plastic minifibers, and – my personal favorite – wood flour.
This particular wood flour came from the little bag on my random-orbit sander, which is why I like wood flour; I generally have it sitting around. Note that it needs to be very fine; sawdust from cutting will probably be too coarse. The wood flour will make the epoxy wood colored; if you would prefer it to be closer to clear, the ground silica or plastic minifibers will work better.
Mixing it is pretty simple; mix up the epoxy, add a little wood flour, mix it up, and examine its physical properties. If it drips off of your mixing device, you need more wood flour. If it sticks like the aforementioned peanut butter, you are done.
I like to use small plastic cups for my epoxy mixing and plastic silverware; they are easy to find and disposable, and since I use the dispenser pumps to get the right amount, I don’t need to do any measuring in the cups.
All that is left to butter the epoxy onto the PLA pieces, gently press them in the proper position, and wait for the epoxy to cure.
Candle lantern design thoughts…
I’ve been spending some time doing a design in Fusion 360 for a laser-cuttable lantern, and I’ve discovered a few things. I’m recording them here to help others and to remind myself when I come back to this in a few months/years.
I started with a simple outline drawing of a tree that I wanted to use as the inset for the side panels:
I need to get that into Fusion in a way that works. Here’s what I came up with
From 2d to 3d
There are a couple of different approaches to doing this. If you have something that is simple, I recommend the “trace it yourself method”. In this, you insert the picture into Fusion as a Canvas (Insert->Attached Canvas), and then draw an outline in a sketch using it as a guide. I used splines and did a reindeer and rabbit outline pretty quickly, and then nice part is that manipulating the splines after that is simple and quick.
That was going to be a ton of work with the branches and I was both lazy and worried that it would be too complex to work well. So I took the alternate approach:
- Load the image into Inkscape and save it as an SVG.
- Use SVGtostl.com, upload the svg, and specify how thick you want it to be. You will be able to change this later though it’s a pain, so try to get close.
- In Fusion, in a new design, choose Insert->Insert Mesh, and choose the file.
- Switch from model mode to mesh mode.
- In the browser tree, right-click on the mesh and choose “properties”. My trees end up with 13000 facets, which is about 3 times as many facets as I wanted.
- Use the modify->remesh and modify->reduce options to get down the count that you want. You will probably have to experiment a bit to get it to work right. Start with Remesh, and preserve sharp edges and boundaries. You now have a mesh.
- Switch from mesh mode to patch mode
- Select the mesh in the browser
- Modify->mesh to brep. This is changing from the mesh representation – which you can’t really modify in Fusion – to the brep representation, which you can. This may take a while. At this point, you have both a mesh and brep version of the object in the tree. Delete the mesh version as it’s just taking up memory.
- If you look at the brep version, it has a ton of faces on it. This will slow things down, so it’s nice to clean up the faces. Modify->merge, choose “select chain”, and then click on one of the front faces. That should select all the faces.
- Click “ok. That’s going to sit and spit for quite a while, but eventually it should finish and you should just see one common face. Or maybe Fusion will hang and you’ll have to restart it.
- Convert the resulting body to a component, and save it.
Using the resulting design
The resulting design is very complex and will likely kill Fusion. It tried to use it to create panels for all four sides of the lantern, and that was a full failure; it would take a full 30 seconds to render.
What I ended up instead was doing the full design in Fusion without the complex branches. It looks something like this:
I designed one side of the lantern and then used pattern on path to duplicate it around 4 sides to make sure everything worked, and then used it to cut the top and bottom for the tab holes.
Then, I took the original side that I designed, converted it to a component, and did the compositing of the side and the branches in a design that only had those parts. That worked well from a performance standpoint and since all four sides are identical, I can just cut the single one four times.
To get this to work I had to move the components so they were okay left/right, use align to move the frame so the front is coplanar to the front of the branches, and then extrude a couple tools to cut off the branches where they were too wide for the frame.
Cutting on 2.7mm plywood (was supposed to be 3mm….) took about 5 minutes for each side, and a couple of minutes for the top and bottom.
Here’s a totally uncleaned/unsanded version. It would also look nicer if I taped the wood to protect it:
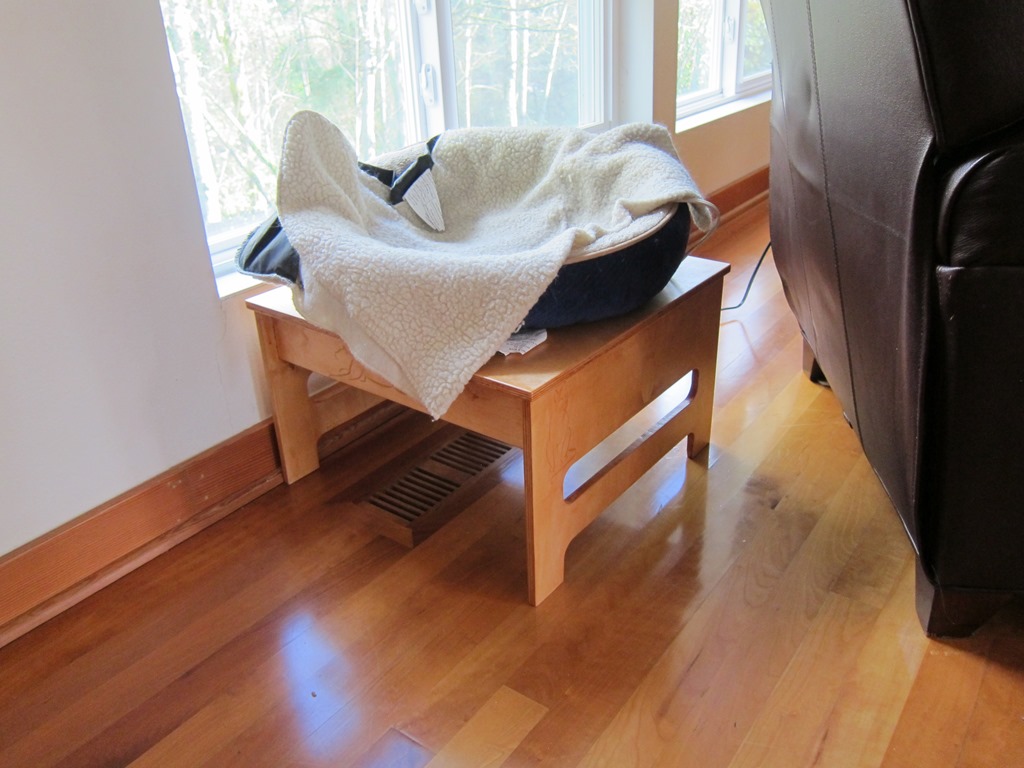
Cat bed elevation device
We have a couple of heated for out cat to hang out in, which she really likes. One of them lives in the living room near the windows, but unfortunately if she is in the bed she can’t see out the windows.
What was needed was a way to elevate her so that she could see out. Which seemed like a perfect opportunity for some CAD and CNC.
The design
I fired up Fusion 360 and started playing around. I started with the basic dimensions; the top would be 18” square (the bed is really pretty big) and it needed to be 11 inches tall. Then it was off to build the basic model.
In the past, I’ve used “through tabs” which are easy to do but not aesthetically pleasing. In this design, none of the tabs go all the way through, which makes it a lot nicer looking.
After a couple of hours I had the basic design:
The bottom cutouts on the ends are so that there are four discrete legs for support, and the holes are to make it look a little more interesting. I played around with another slot farther up, but decided not to for reasons that will later become apparent. Note that there are no visible tabs.
Here’s the inside of one of the ends:
This shows the cutouts that I will make for the end; there is the outline and slot that go all the way through, the recessed pockets for the tabs from the sides, and then the tabs that will go into the pockets cut into the top.
There are “dogbones” cut at the corners; these are needed so that the rectangular corner of the tab has someplace to go. This is using the new “minimal dogbone” add-in for Fusion 360, which is a great improvement over the previous version.
Material
I went to my lumberyard (Dunn Lumber) and procured a sheet of 12mm baltic birch plywood for $30. It comes in an exceedingly inconvenient 5’x5’ size, which means that I cannot fit it in the back of my pickup. I can, however, tie it to the top of my outback.
Cutting
I trimmed the 5×5 sheet into a 2×5 sheet for this project and a 3×5 sheet for later projects, and then set up my workspace. It’s a melamine shelf with some thin sacrificial sheets of 1/8” MDF on top and then the actual wood clamped on top.
Shaper suggests that you use double-sided tape to hold the wood down, which is a really good idea that I keep forgetting to do. I added the domino tape so the shaper can figure out where it is, and started cutting.
It takes multiple passes to go through 12mm stock, and after a few options I settled on 5mm, 10mm (the depth of the pockets), and 12.3 mm to cut through.
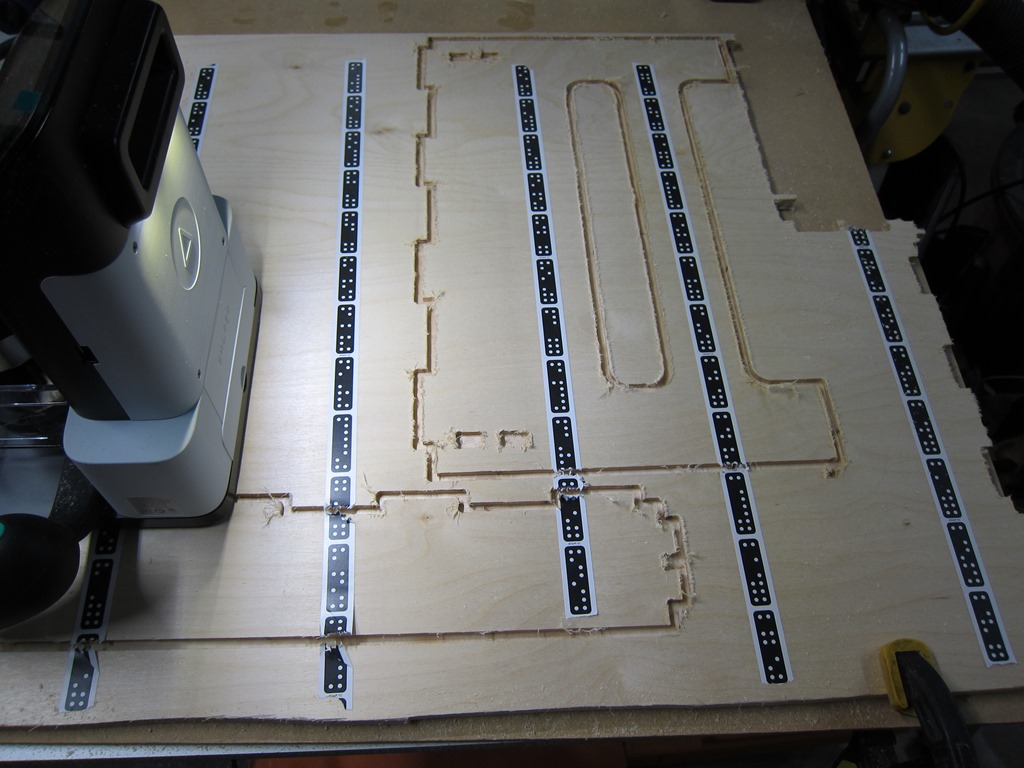
Here’s a shot partway through the cutting:
I took that picture because the Shaper crashed in the middle of the cut. It luckily remembers the layout so you can keep cutting when you startup, but you sometimes lose tracking before it finishes retracting the bit so there are small mistakes in the cuts.
I had about 8 crashes while cutting the parts for this. Unlike previous projects – where it would crash only while cutting and in reproducible situations – these crashes seemed to be much more random. I’m working with Shaper on it but haven’t figured anything out yet; in this case it cut flawlessly for about 45 minutes before any issues showed up, so I suspect it’s heat related.
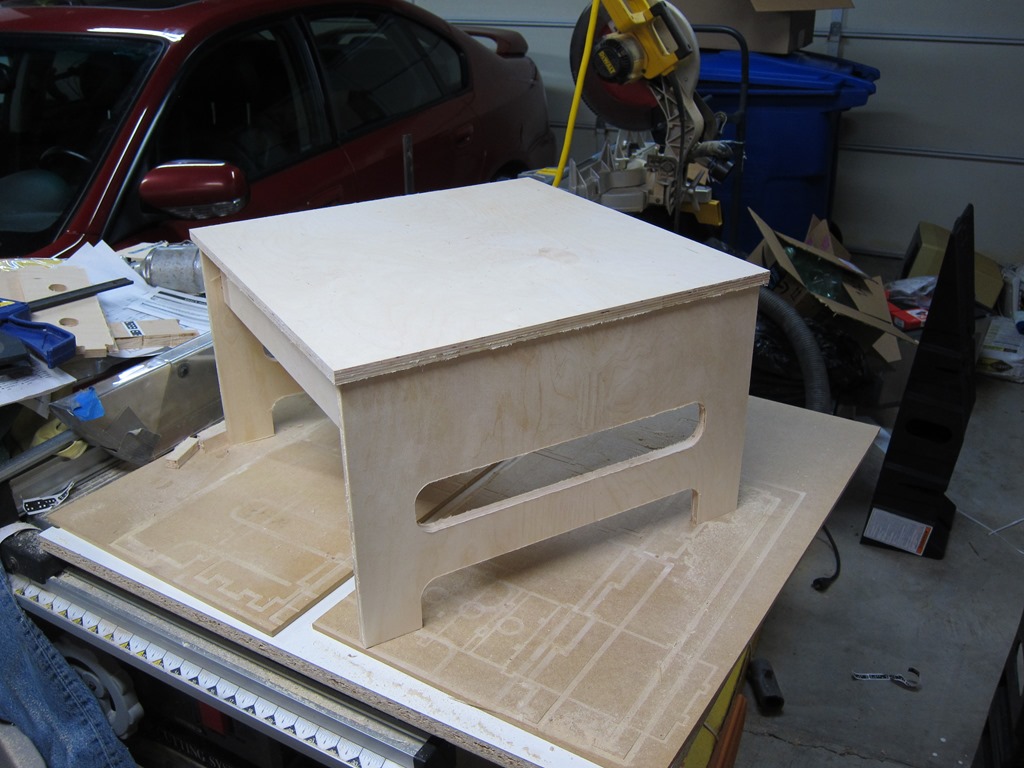
Anyway, eventually the last part was cut, and I could fit the pieces together. One of the joys of the CAD-based approach is that if you don’t make mistakes, things just fit together. I used my soft-blow hammer and ended up with this:
Definitely looks like a stool. You can still see a lot of fuzz that needs to be cleaned up and an overall sanding is in order.
It was at this point I realized that I messed and hid the nice surface of the plywood up instead of down, which means the display faces have a number of patches that should have been on the inside.
Sigh. Well, my cat won’t mind.
I spent a lot of time sanding and de-fuzzing the project, and it seemed like things were okay.
Identification
As you can see, it’s definitely a stool, but it’s not a definitely a cat stool. It needed something so that our cat would know that it was her.
After spending approximately 20 hours looking at cat drawings online, I came across a set that were very minimalist, and I picked four, two for the ends and one for each side.
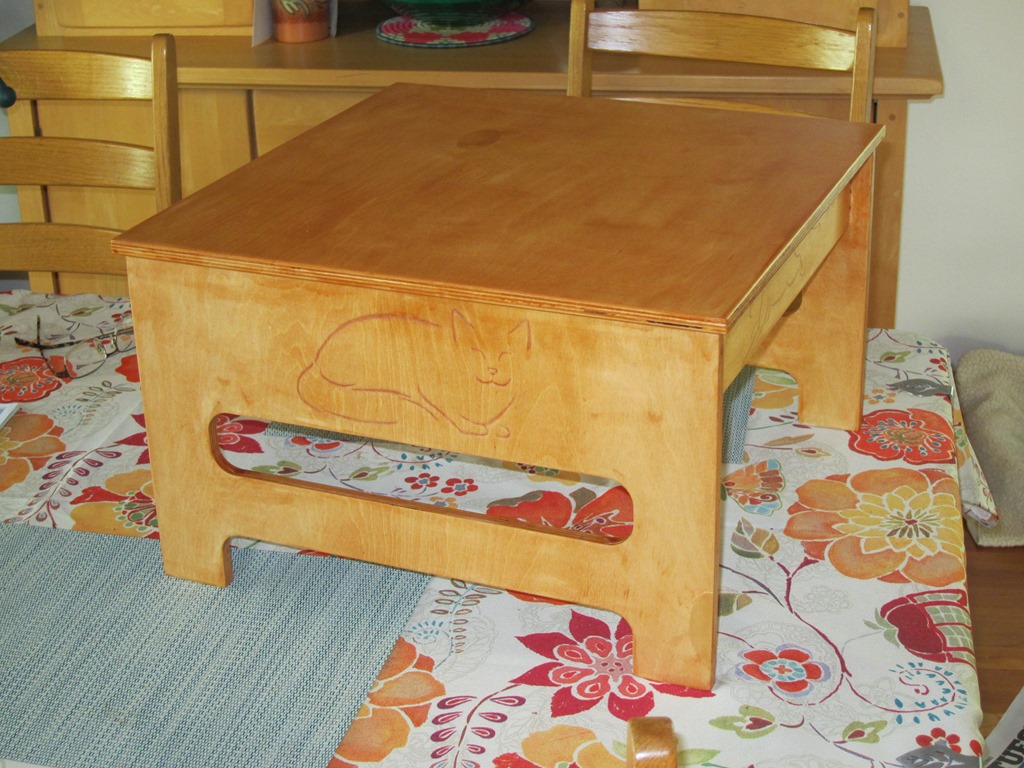
Those got cleaned up an image editor and then engraved into the wood with my GlowForge. That took about 45 minutes.
Assembly
The sides were glued together, assembled temporarily into the top for alignment, and clamped until they were dry. Then this was repeated to glue the sides to the top.
Finishing
I wanted something a little more golden than the natural color, so I wanted a bit of stain. I decided to kill two birds with one stone and get a polyurethane with stain.
Bad idea. Maybe a good idea if you are spraying the finish, but applying by hand every slight difference in thickness shows up as a difference in color, and if you get any runs they look pretty bad.
Lesson learned for later. After the first coat dried, everything got sanded with steel wool to knock down the raised grain, and a second coat finished it off.
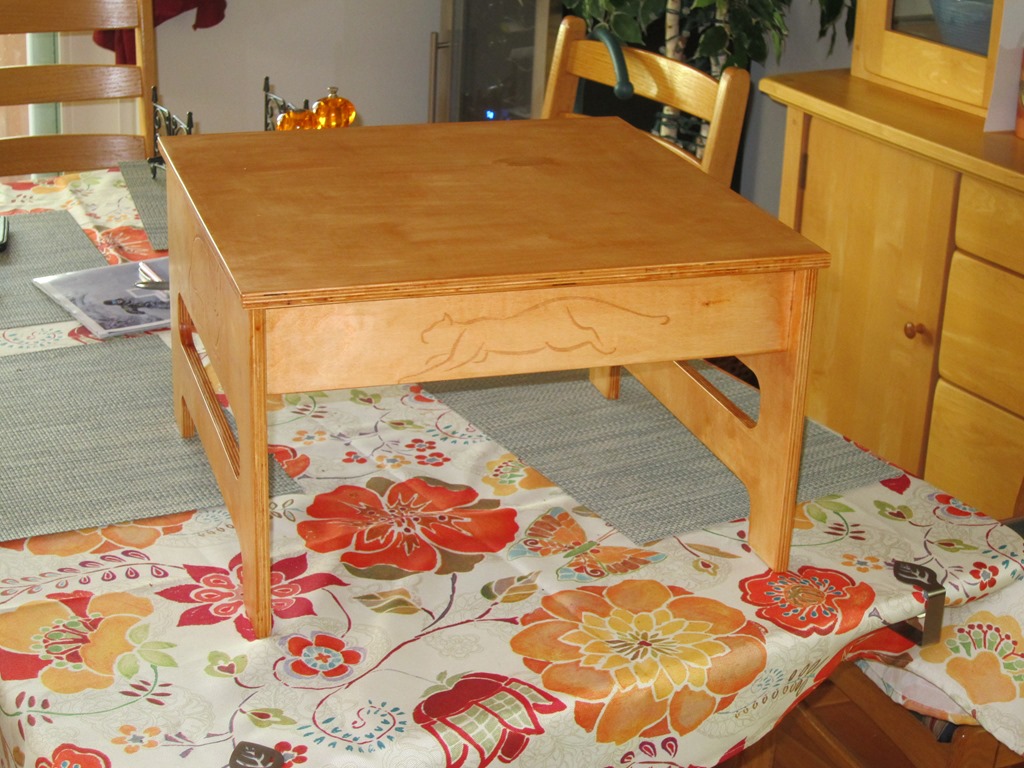
And an action photo:
As I have not obtained a model release from the cat I am contractually unable to show photos of her in the bed.
Shaper project is here.
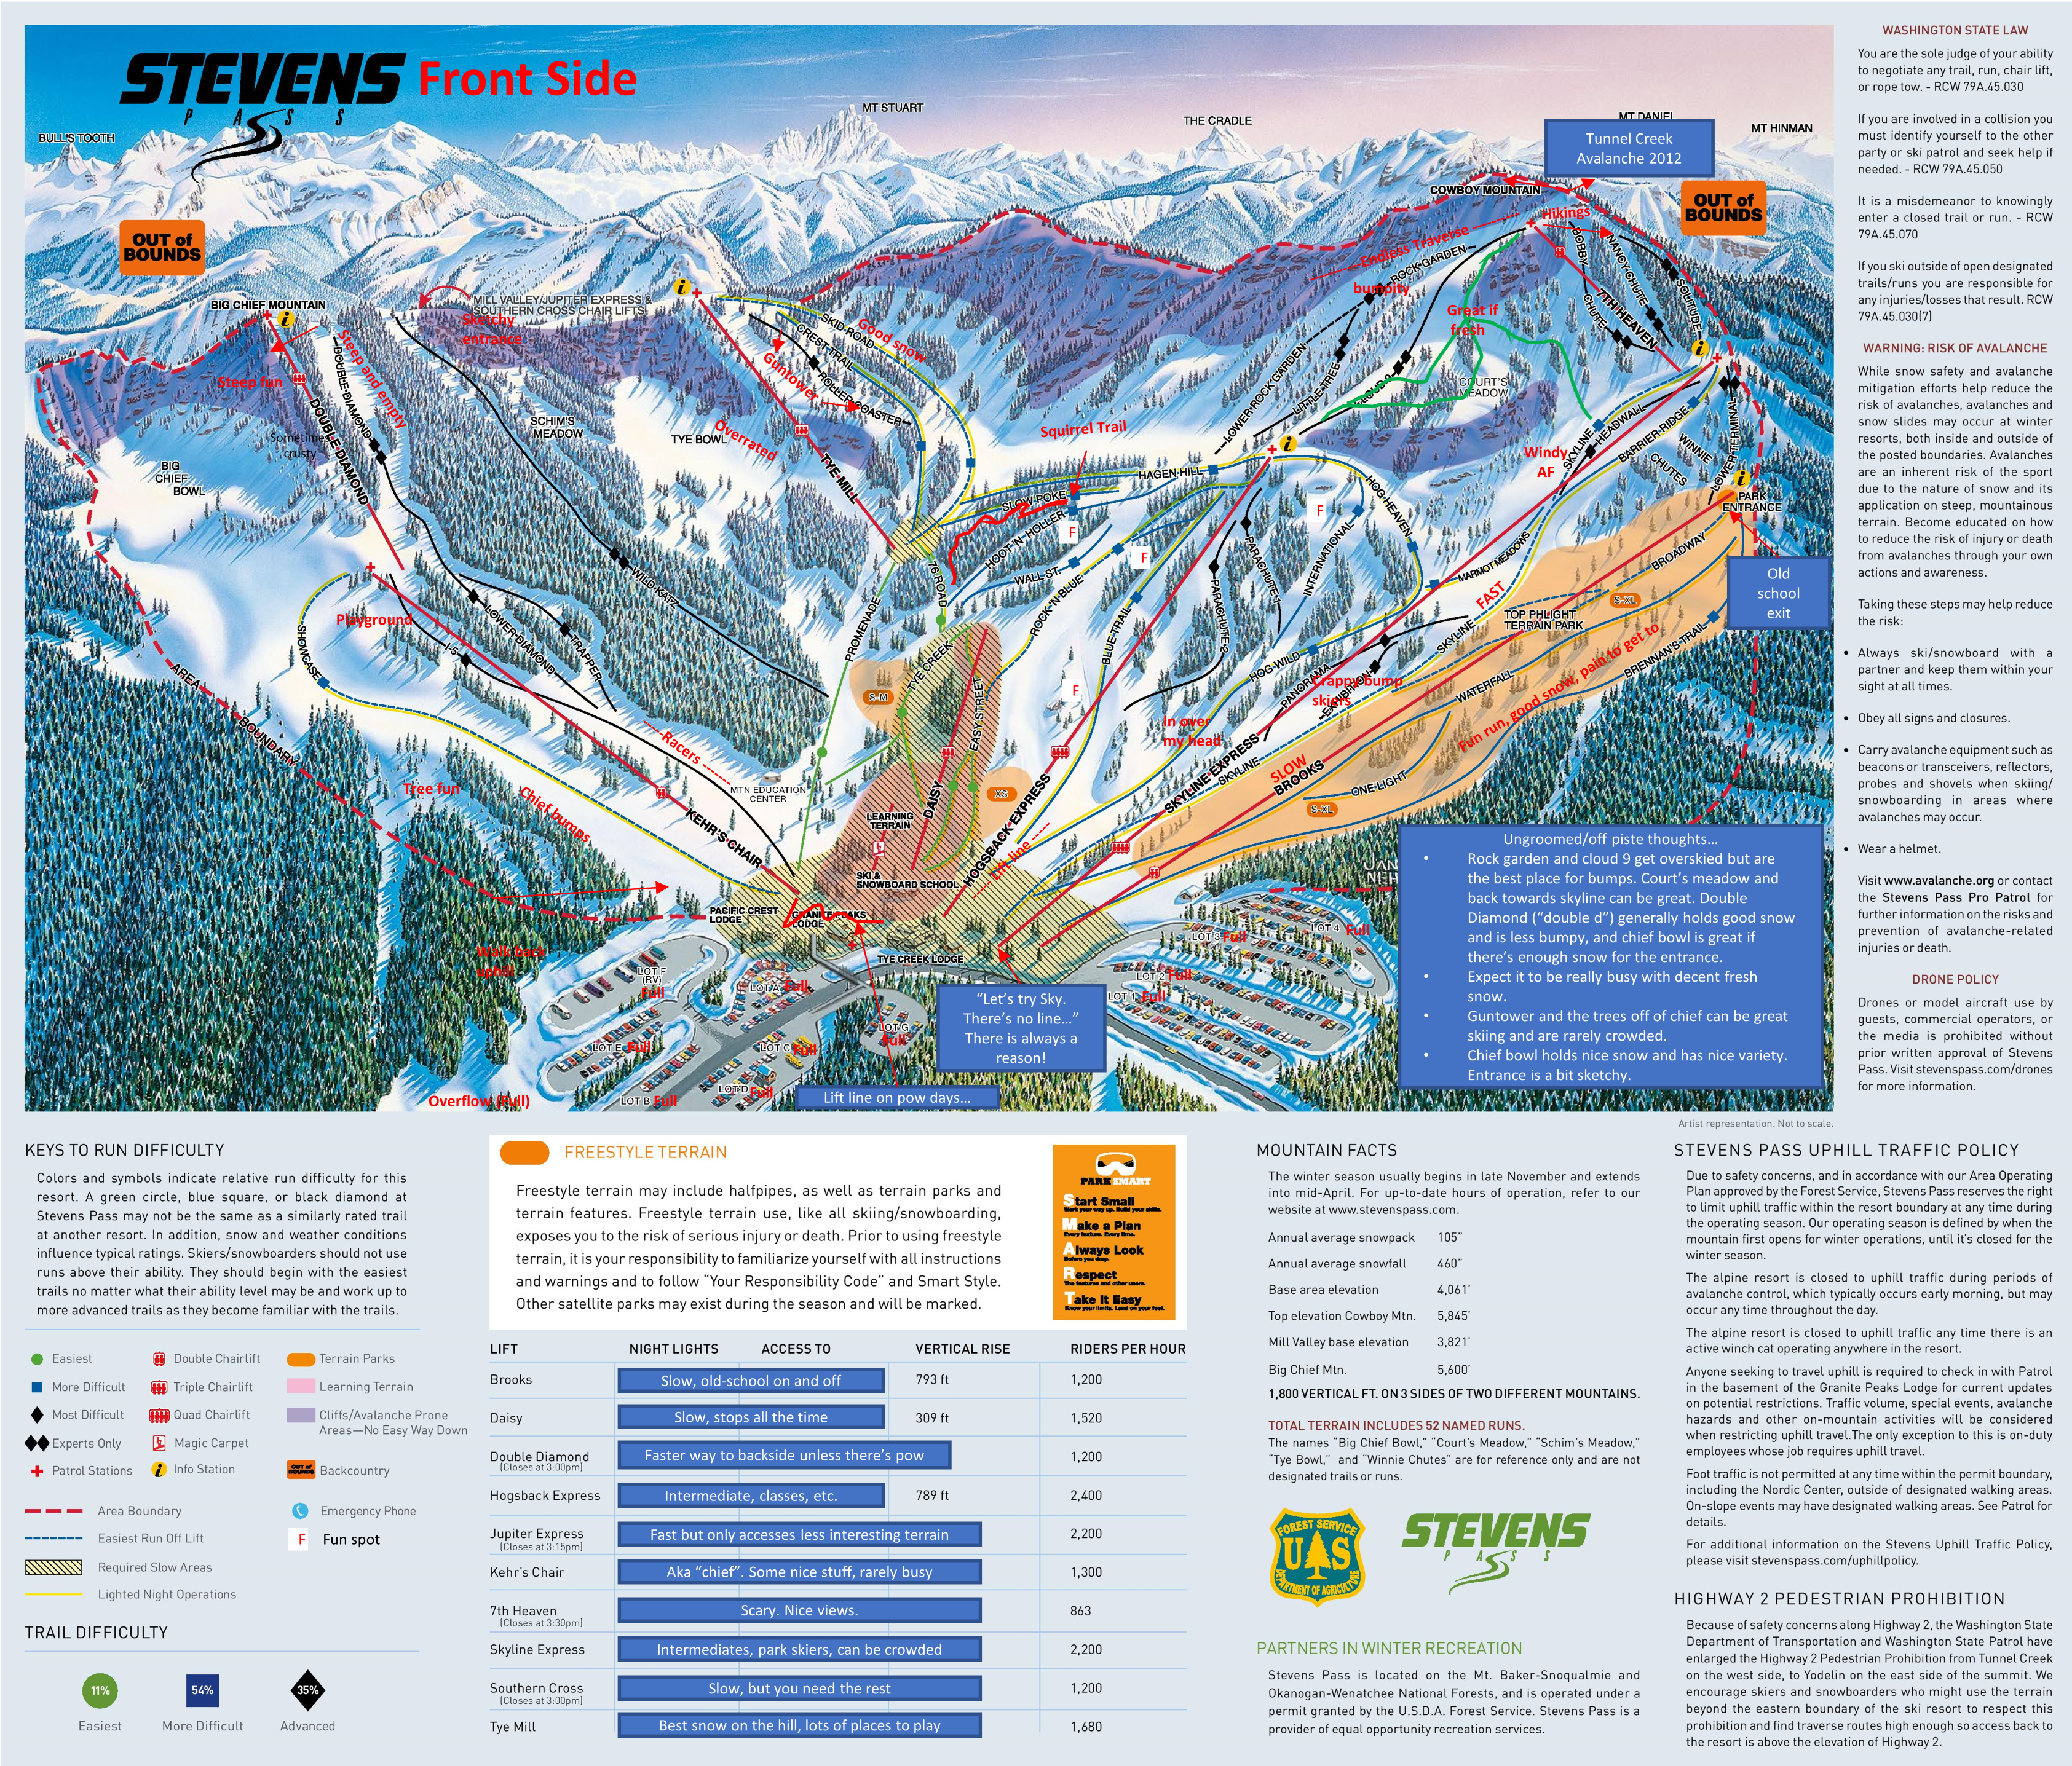
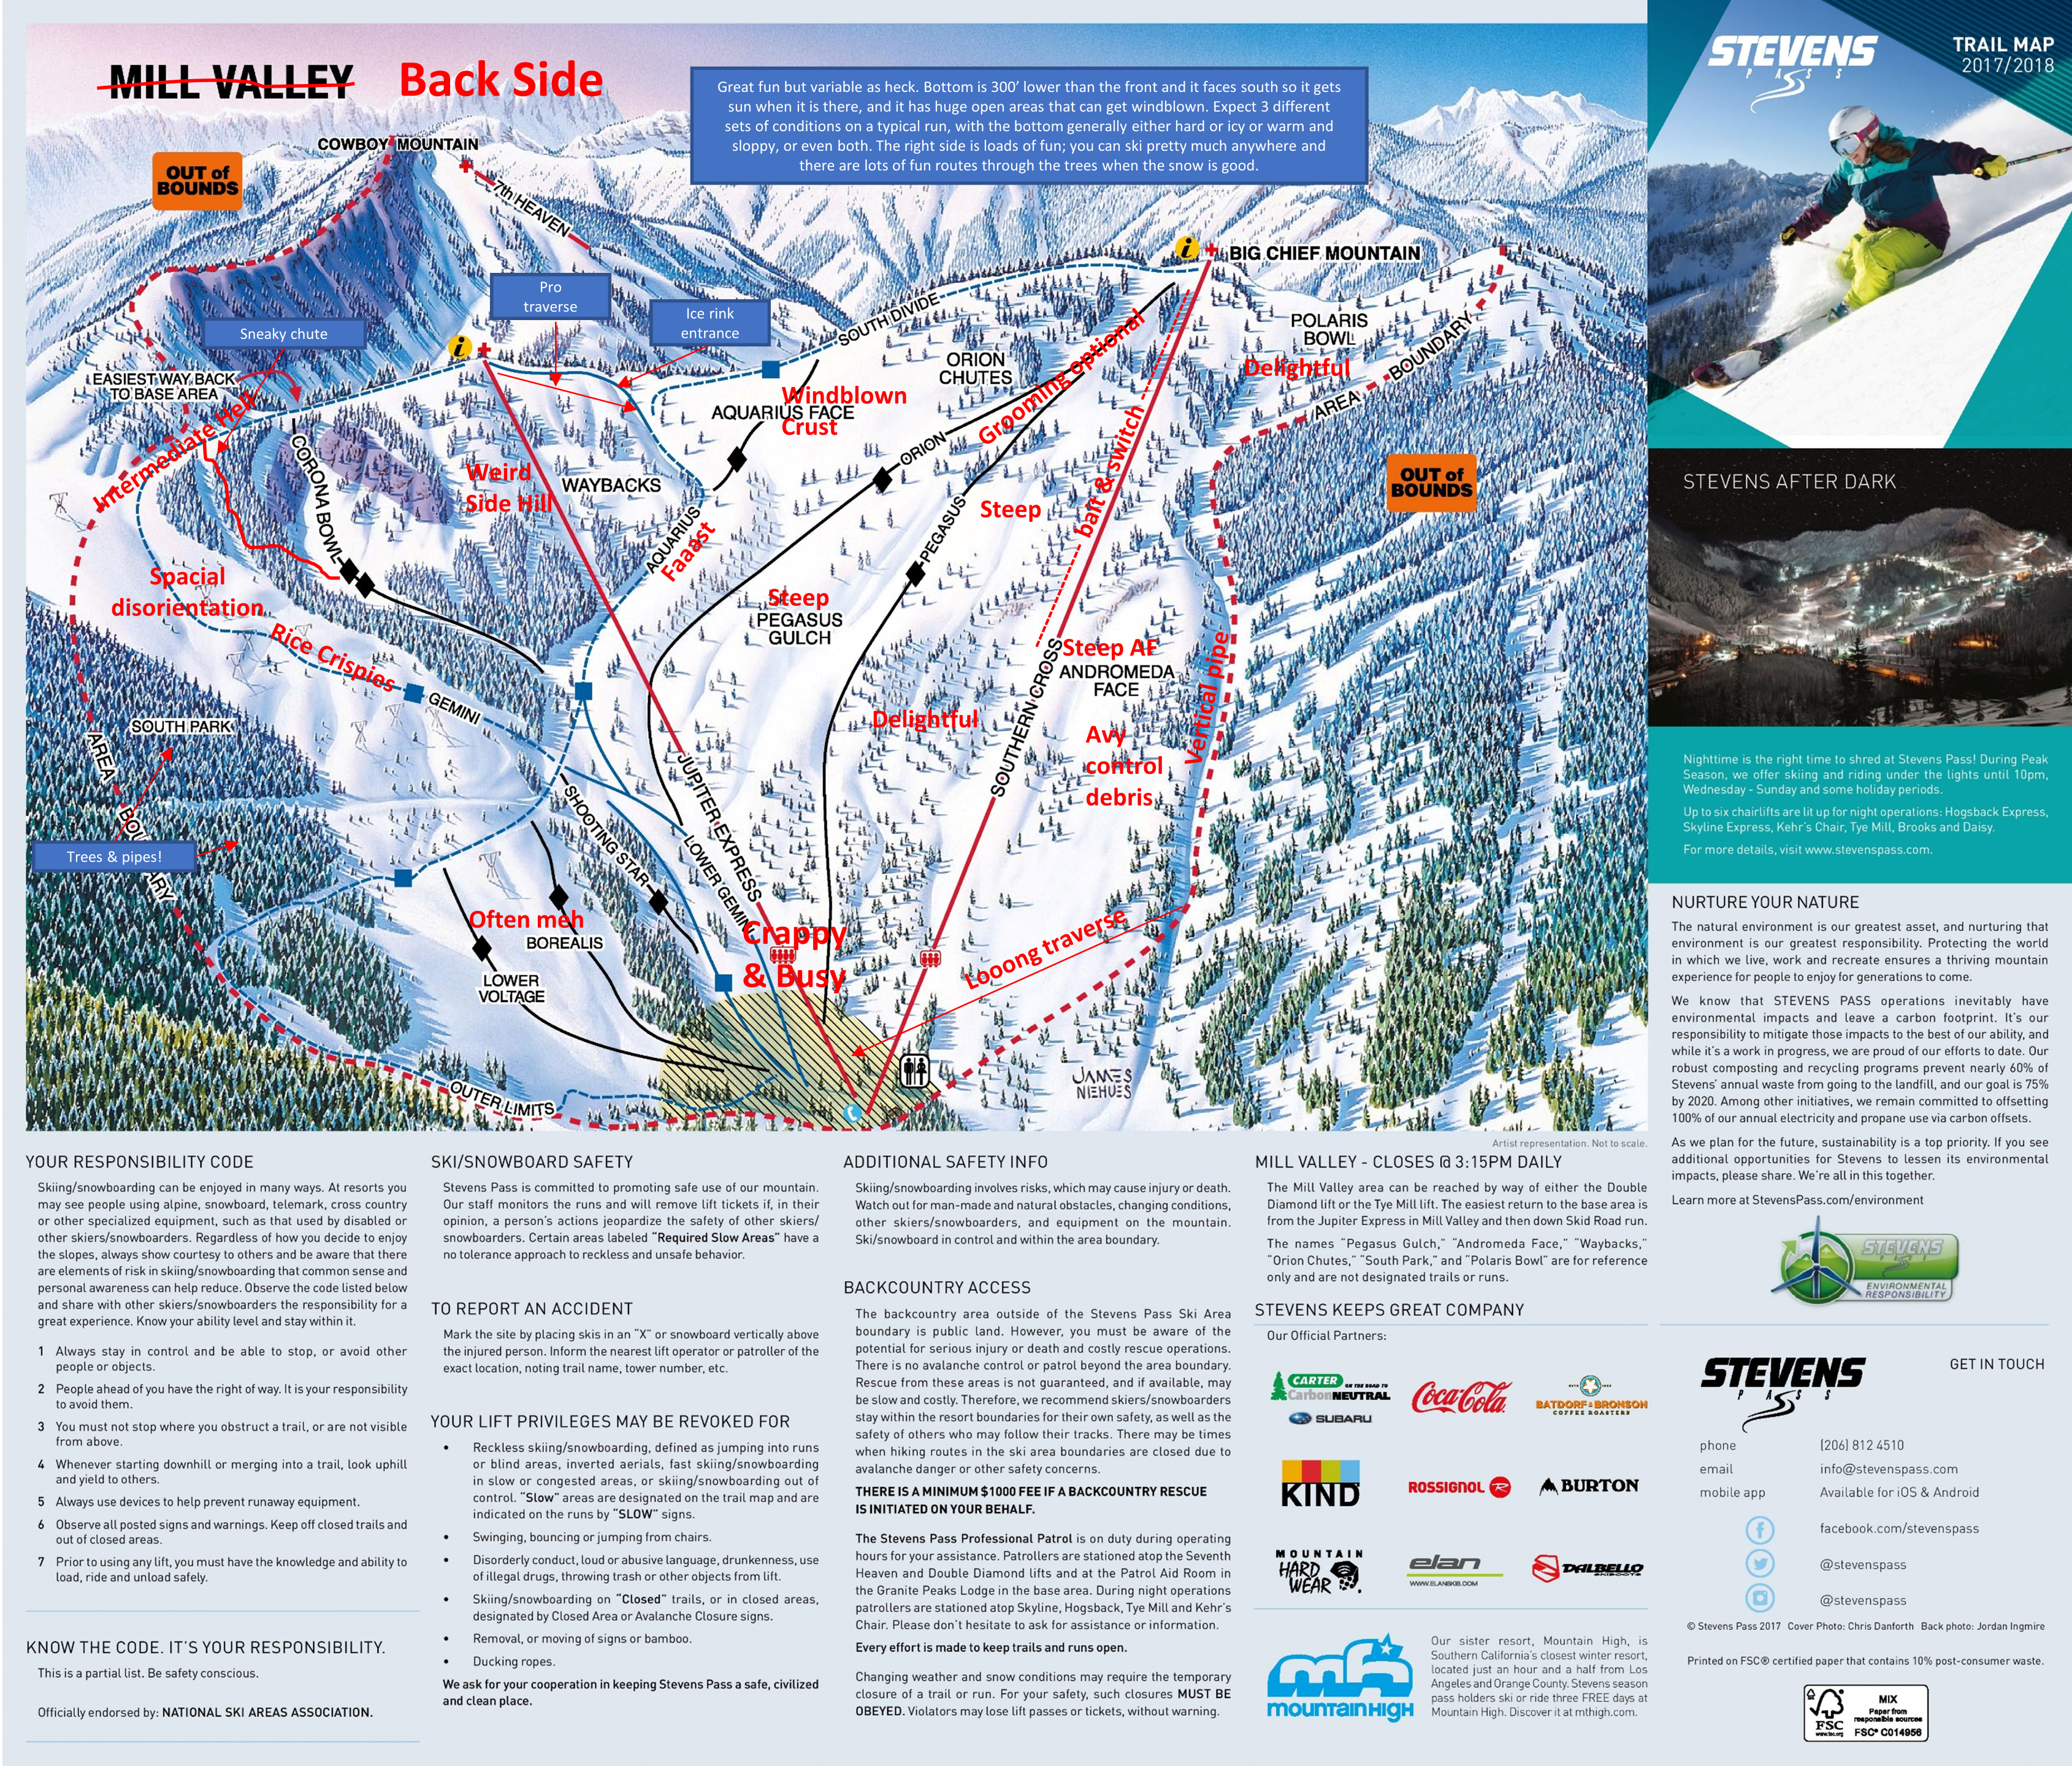
Stevens Pass Honest Trail Map
Just a fun little commentary:
Fame and fortune by being slightly better
I’ve been attending our local lean coffee agile lunch (“lean lunch” sounds like something different…), and our discussion last Wednesday included something that I was meaning to write up for a couple of months, so here it is.
The setup is that we were discussion why agile adoption – XP adoption specifically – was so poor when the results were so obviously better.
This issue is the way management culture works and the way the incentives are structured. Let me posit two different groups.
The first lead – let’s call her Traditional Teri – does the existing company methodology well. Her team does code reviews, they do decent designs, they fix the right bugs first, and they take corrective action early.
The second lead – let’s call her Radical Rachael – is an agile advocate. Her team does decent agile; they do pairing, TDD where appropriate, story-based design, incremental releases, experimentation, etc.
Just to pull some numbers out of the air, Teri is about 20% better at getting software to market than her peers, and Rachael is about 100% better.
Who will be more successful at most companies?
We would all love for the answer to be “Rachael”, but the answer is, in fact, “Teri”. Almost universally. Because the cards are stacked against Racheal:
- Rachael is doing something different and therefore risky. Just like “nobody ever got fired for buying IBM”, “nobody ever got fired for using the same slow and bug-prone development methodology”. If anything goes wrong, Rachael is at a big risk regardless of whether it is a result of her process choices or not.
- They have different levels of peer acceptance. Teri is better than her peers, but only by a little bit and her peers can see how to get to that better level. Rachael makes her peers *look bad*. If she is doing the right thing, then they are clearly doing the wrong thing, but her peers don’t understand how to do what Rachael does nor do they want to. This is a built-in incentive for her peers to actively make Teri less successful or appear to be less successful because it makes them look better.
- Teri is a joy for her manager Susan. Teri is never the problem team on projects, she has extra time to help out others, and Susan’s world is consistent and understandable. Rachael is a big pain for Susan, as she makes waves. Susan is forced to deal with different processes across the teams and field questions that come from outside the group as to why Rachael’s team is different. The outside discussions are very bad, as they make Susan look like Teri; now Susan has to convince *her* peers that what Rachael is doing makes sense, which isn’t good for Susan’s career. And like Rachael, Susan is running the same risks if anything goes wrong. The best thing for Susan to do is to actively hide what Rachael is doing, which means that Rachael won’t get credit for her team’s success.
- Rachael is running a “no drama” team; because of her team’s process choices, they write very few bugs and they don’t have to work extra hours to get things done. But that looks like a team under the conventional process that is lazy and not working very hard, and since it takes a lot of effort to understand how objectively hard a team’s work is, the feeling that they aren’t working hard overshadows her team’s productivity. This is frankly a bit of a problem for Teri as well, but to a much lesser degree.
The end result is that Teri has much better career prospects at her company. It’s *easy* to make a case why Teri should get a promoted and why she would be a good choice as a second level manager, and the discussions that Susan has to have to convince others that Teri should be promoted are comfortable. And Rachael won’t get that promotion because Susan not only has a harder time making the case to Susan’s peers, it is not conducive to Susan’s career aspirations to have those process conversations.
Backyard controller design #4 – Software
The controller software lives here on github. My current software development environment is Visual Studio Code with Platform IO installed on top of it. It’s quite a bit better than the Arduino IDE for my usage patterns.
I’ve done my best to build a flexible and well-abstracted design. With the exception of main.cpp, all of the C++ classes are written in the include (.h) files so that I don’t have to deal with multiple files per class.
Here are the classes and a brief description of what they do:
- Action – takes in a textual description of an action (on, off, toggle, plus some dim levels) and converts it to a numeric value. This is a nicer pattern to use than an enum as the parsing code can live here.
- Device – an abstraction for a device that I want to be able to control. It has a text name, a group name, an output pin, and a timeout (in 10 mS units). If you pass it a name and an action, if will implement that action if the name matches either the text name or the group name of the device.
- HardWiredController – the physical controller (not yet built) has a group of switches connected via resistors to the input line, giving a varying voltage based on which switch is pressed. This code uses the ADC in the ESP to get the current value, figures out what button was pushed, and performs the appropriate command.
- Main.cpp – the main setup and loop code. Mostly just delegates out to other classes.
- MainPage.h – the text of the web interface page for the controller
- Manager.h – the manager for all the devices. It creates an array of devices and then handles dispatching commands to them, getting status strings, handling timeouts, etc.
- OnIfAnyDevice.h – the 12V power supply needs to be turned on if any of the lights are on. This class looks at the state of the devices passed in through the constructor and turns itself on if any of them are on.
- StairSensing.h – The program needs to turn on the house lights if the stair lights are turned on. This code tracks whether the stair lights have been turned on and switches the house lights on and off as necessary.
- WebServer.h – The code that handles requests for the UI page and url action commands.
The main loop runs with a 10mS delay so that every time through the loop is roughly that long; that is needed to implement the timeouts in the device class. I could have done this in a more sophisticated manner but what I did is clear and good enough for the requirement.
The Manager and Device classes warrant a bit more discussion. They are use a software pattern called “Chain of Responsibility”; there are basically 5 devices that all look alike, and the manager just passes the action through to all of them and the device that the action belongs to deals with it.
This vastly simplifies the manager class – otherwise it would have to check every string and figure out which device to pass it to – and makes it really easy to implement group devices; the “lights” group refers to all light devices. It also makes it easier to implement the OnIfAnyDevice class, which otherwise would have required special case code.
Backyard controller design #3–Board & construction
In our last installment, we were trying to decide whether to hand-wire the controller or to go with the PC board. The PC board won out handily since it only cost $13.30 for the standard 3 boards from OSHPark.
Here’s a picture of the board with populated with the 3 MOSFETs and 5 resistors. I did the solder paste application by hand since I only need to do one of these. Standard solder-paste since the MOSFETS may switch up to around 8 amps and therefore may get a bit warm.
And here’s a picture after the reflow. Reflow done in my Controleo 3 toaster oven reflow-er. Looks just fine.
One little comment: One problem I had during layout was how to connect the top pin of the MOSFETS to ground in a way that could flow enough current from the front to the back. My first design started with a number of vias, but I didn’t like it. Then I realize I had an easier solution; I just use a single through-hold pad and hand filled it with solder. It will carry far more current than I need.
Build
In my original concept all of this was going to fit inside of a double-gang electrical outlet box, but I realized that a) I’d rather mix as little low voltage and line voltage as possible and b) the box I used was only half-depth, so no room. Which argued to use a box and mount it to the house. Here’s the one I chose:
It’s a good size and has mounting bars. I don’t really need the gasket because I’ll be cutting holes for the wires. $11.60.
The next order of business was to figure out how to connect the big 12-gauge lighting wire to small connections on the board. I am lucky enough to have a good local Electronics store 15 minutes from my house (if you are in the Seattle area, Vetco is worth a trip), and that yielded a couple of terminal strips:
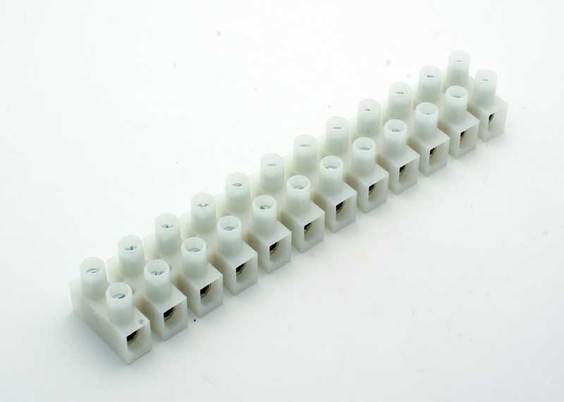
I think I bought two for $4.99 each, plus I bought some 18 gauge wire to go from the board to the strip (the big holes on the board can only support 18 gauge. Which led to this:
Those are all of the connections that take big wire, and the terminal strip color-coded with Sharpies.
Yes, I know I messed up the sequence; the 12V in at the lower right portion of the board really wanted to be there for each connection to the three 12V outputs. And it turns out that the wemos nodemcu layout I used was upside down, so the ESP-12 is hiding underneath the module rather than on top of it. There are female headers soldered to the board and male headers soldered to the nodemcu board. This allows me to easily remove it for reprogramming. Which was already required a time or two.
I used the same technique for the remaining controls I needed but they don’t map 1:1 to the board.
Here’s a few steps at once. I found an MDF cutoff and used that as the back of the board, and the screws that mount it also mount the terminal strips.
On the upper right terminal strip we have 120VAC coming into the box; that connects to a 5V power supply. There is a small 2AMP SSR that I had lying around that will switch on the 200 watt 12V power supply when it is needed. The “Pump on” output will connect to a similar SSR in the remote electrical box.
I did a full test of all the features, and they all worked. Well, except for the switching for the 12V power supply, which was broken by a refactoring I did in the software.
Umbrella lights
We have a shade umbrella with some chair under it, and one of the requirements was to have some light underneath it. I didn’t find any premade ones that I liked, so I bought 5 meters of 12V led strip and made my own. I made 8 strips that were 16” in length, attached wire, shrinkwrapped them, and then hooked them all together to a single supply. I only took one picture during construction:
But I did get this picture of them in operation:
Box installation
The box got installed on the wall and the various wires were hooked up. This is under my covered kitchen deck so there is no real chance of any water getting in.
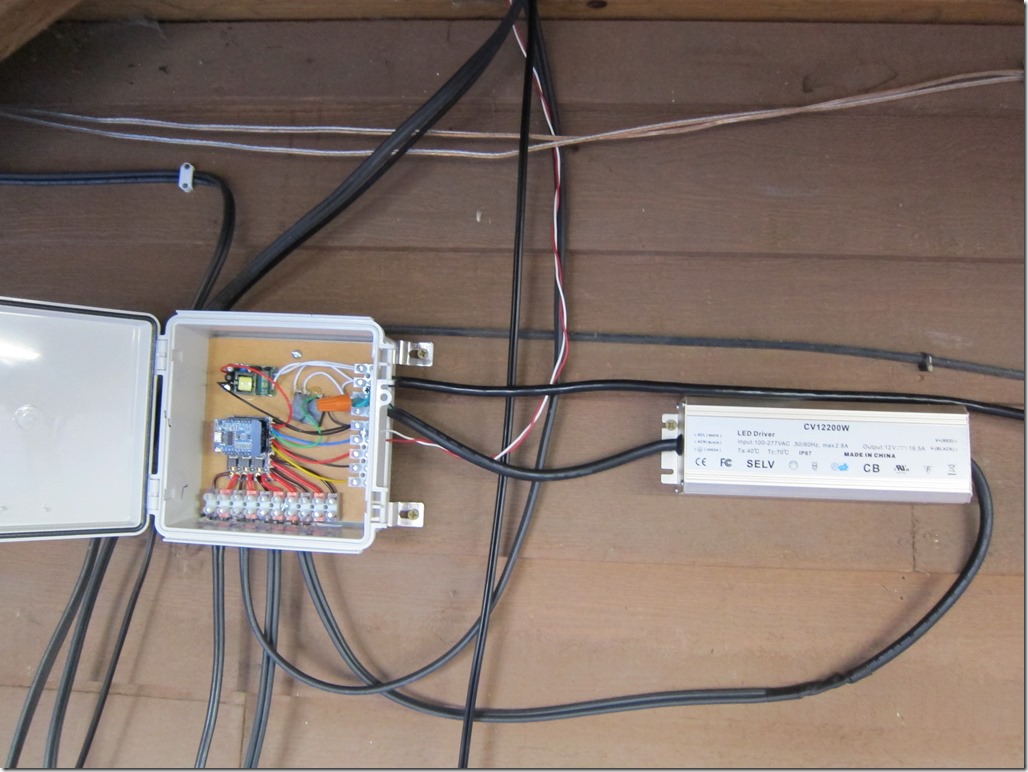
The AC comes in from the far right; that is a 15’ extension cord that plugs into a GFI with an in-use cover; directly under that is the 12 volt 16.5 amp power supply which then feeds back into the 12V input for the board. The red/white wire carries a 5V signal to the SSR in the electrical box that controls the fountain. The three main loads are hooked in along the bottom.
There are two things missing in this picture; the 12V line that used to run the stair lights is not hooked in, and the stair lights are not connected into one of the existing lines. It turns out the transformer for the stair lights does not put out 12V with no load; it puts out 17.3V. I did a conservative design on the board that would support 15V without damaging the ESP, but 17.3V was too much. I therefore built a small in-line voltage divider and used that to connect the stair lights in.
As of now, everything works fine delta one bug that I am chasing down.
I’ll write up a post about the software next.
Backyard controller design #2–schematic and board layout
My original plan for the controller was to do all the wiring by hand on a perfboard (“old school”); it’s not that complicated and I wouldn’t need to wait for a board. But I decided to do a pcb board to see how much it would cost and because I wanted an excuse to try out Kicad 5.0.
I started with the schematic:
We have the Wemos D1 mini (clone, actually) in the middle, with 5 outputs (PUMP, 12VPOWER, HOUSE, BED, AND UMBRELLA), and two inputs (STAIR_SENSE and controller). If you haven’t seen labels used in a schematic before, every pin with the same name is logically connected though there is no wire drawn between them.
On the right we have three drivers for the landscape lights using the NPN transisitor/MOSFET circuit I discussed in the last post. All of those outputs connect to the 6-connector header (screw terminal) strip.
On the upper right, the Wired_Controller1 header will be for a (possible) hard-wired controller for the lights and pump. It’s connected into the analog input of the ESP. In the actual handheld controller there will be four switches hooked across a voltage divider so that the switches will give 1V, 0.75V, 0.50V, or 0.25V when pressed. The ESP code will figure out which switch was pressed and therefore which action to take.
In the middle is the AC_Switching1 header. It contains the two outputs to control the remote solid-state relays for the pump and 12V power supply. It also contains the 5V and ground from the 5V power supply that will run the ESP.
On the left we have the parts for the stair light sensor. We have a voltage divider that will convert from the 12 V that will come in to a value that the ESP can tolerate. There was a bit of calculation there. The valid ESP8266 input voltages range from 2.5V (for the lowest guaranteed high value) to 3.6V (the maximum input without damage). We want to choose the voltage divider ratio to work well within that range.
My first choice was to use 330K for the upper resistor and 110K for the lower one; that would give a 4:1 ratio. That would put the lowest guaranteed high value at 2.5*4 = 10V, and the highest tolerable value at 3.6*4=14.4V. I decided I wanted a bit more range on the high side, so I opted from 330K and 100K resistors, giving a 4.3:1 ratio, and a voltage range of 10.75V to 15.5V. I considered overvoltage protection, but given the ampacity of the supply a simple zener likely wouldn’t be enough and I would need an SCR crowbar to handle overvoltage. I decided to skip it in this version as the power supply is a regulated one.
That’s all for the schematic; not really that sophisticated. Oh, the NPNs are really 2N2222; I chose the 2N2219 because it already existed.
Here’s the board layout. It’s a weird mix of through-hole and SMD components as I already had both the MOSFETS and the NPN transistors. I started with the header for the landscape lights because they will be pulling some hefty current; that meant I wanted to keep the traces short, and it also meant that I wanted to put the 12V in nearby in the upper right. The controlled where the MOSFETS ended up, which controlled where the NPN transistors and their resistors ended up. I reordered the output pins on the header so that they matched the order of the output pins on the ESP module; I could have remapped the pins as well but this was a bit simpler. The AC switching header also got re-ordered to make the connections simpler. And then I tightened things up a bit to minimize the size of the board. At that point, it was about $20 to do a board from oshpark, which was pretty much the cheapest I could find.
That’s relatively cheap, but I’m not excited about having to wait for it to make it back to me. The footprints for the screw terminals is not based on a header that I have; I bought some terminal strips before I decided to do a board design, but I need to buy some better ones for this sort of design. I need to get real terminals so I can get real dimensions, and I might see what I can do with all SMD devices; smaller terminals and transistors could cut the size of the board by 25%.
Two more things to mention. You’ll notice that there is not a copper pour for the ground. It’s probably not required for a board operating at these speeds, and I would have to be careful around the ESP8266 antenna because having copper underneath it would mess it up.
I did another layout with through-hole resistors in case I wanted to hand build it:
Back to the problem in hand… If I was willing to wait for a PCB to show up, I could wait for some new MOSFETS and transistors, and that would certainly make things smaller. So, I went MOSFET hunting, and I found the IRLR7821PbF, available in a TO-252AA package at $6 for 5 MOSFETS. Sound good.
I pulled up the datasheet and started reading. It’s pretty similar to the IRLB8721 that I had currently specified, but on Page 2 I found the output characteristics graph:
Looks like the one we saw in the last post, right? Except this this one starts at 2.5V and 2.7V curves. Looking at the 3.0V curve – to be conservative – and we see that with 10V drain to source, we can get a little more than 10 amps of current at a junction temperature of 25 degrees. At 3.3 volts, it’s closer to 12 amps.
What that means is that we can drive this MOSFET directly from the ESP8266. We can lose the NPN transistors to drive the MOSFETs plus one of the resistors.
So, off to do a new design with this MOSFET. I decided that I’m going to mount the board, run wires from the board to some terminal strips that I have, and then hook the real wires to those terminal strips. That will make it easier to hook up and I can make the board smaller so that it will be cheaper.
After a lot of iteration, here’s what I end up with:
It’s about 30% smaller than the original board; part of that is done by letting the ESP board overhang the end of this board, but they will both be in an enclosure (3D printed, I think), so there’s no harm in that. All of the heavy current stuff is contained on the right side of the board.
I first head to OSHPark, which tells me the board is 48mm x 37mm. That’s less than half the size of a credit card, so, tiny. They will make me 3 boards for $13.30, and oshpark does really nice boards, with an ENIG finish, but they take a couple of weeks to show up. I head next to pcbshopper.com and find nobody cheaper, except allpcb.com. I used them for the boards in my dodecahedron and they’ve done good work, and I can get 5 boards in 5 days for $10, shipping included. They must be blackmailing DHL to be able to ship so cheaply.
I’m trending towards OSHPark since I need to order the new MOSFETs in anyway.


