7 (11) Hills of Kirkland 2018

Before or after you read this, I recommend watching the Relive video of the ride. Hell, you should probably do that instead of reading this…

I have done 7 hills more than any other organized ride. Way more than any other ride; I think I have ridden nearly every year since 2005.

As I got ready for yet another trip around Kirkland and points nearby, I was thinking about why I like this ride so much. And I think it’s a number of things:

  • It’s short. In the early days, there was only the 38 mile route now known as the “classic”. These days I always ride the metric; for a couple of years I signed up for the full century and then found *really* good reasons to only ride the metric, so I’ve just decided to stick with the metric.

  • It’s hilly. In the days before I got stupid and thought up Sufferin Summits, it was a really hilly ride, but these days it’s just moderately hilly. But in manages to throw in some nice challenge hills; Seminary and Winery. I do better on routes with a lot of up and down as they bother my neck muscles less, and the route that it uses is exactly the kind of route that I use for the rides that I lead.

  • I could ride it in my sleep; the route is engrained in my brain and I know the area extensively, which means I have zero concern about getting lost or taking a wrong turn.

  • It’s a fundraiser for a charity that I like.

  • It’s the first organized ride I do every season.
  • Those were good enough reasons in the early days, but early in this decade I added a new reason; my mother passed away early in the morning before a 7 hills ride after a long illness. I’ve found that when I’m in my “long ride” mental state, I can spend a little time remembering her and somehow it just works well.

    In 2017 I skipped 7 hills; I’m going to claim that it was weather-related, but I was in the middle of transitioning from a carb-fueled athlete to a fat-fueled athlete and not in great shape. I now have near a year of a different diet under my more-loosely-fitting belt, and I’ve been able to be more consistent in my training this spring. I’ve also been trying to make my easy rides easier and my harder rides harder.

    How will 2018 fare? My tentative plan for the upcoming months is to do a century (was going to be Flying Wheels but I have a conflict so it will probably be a solo one), Tour de Blast (which did not go well last year), DORMAR (a self-supported backwards RAMROD), Sufferin’ Summits, and then probably Passport 2 Pain in September. That’s a lot of rides, and I’m hoping my fitness coming into the season is good.

    Planning

    I signed up for the metric. And… well, the night before I pulled a neglected bag of cheez-its and a honey stinger waffle out of my old carb-fueled bike food store and set them on the counter. I don’t eat this stuff at all in my normal diet any more, but as I mentioned, I have some long rides planned, and while I can do 45 miles without food, I don’t think I can do 150. Which means I need to experiment a bit with light carb replacement during rides.

    The morning of

    I wake up at 5:30 to the sound of the birds outside, and quietly get dressed. Then it’s out to the kitchen to… well, not to do much of anything. I’d normally eat bacon and eggs but they take a long time to digest, which requires a lot of blood supply, which means less blood for your muscles. So, I sit around, do a bit of stretching, and try to figure out what to wear. I will be wearing my limited edition Sufferin’ Summits Jersey, that is for sure.

    The forecast is annoying. There is little chance for rain – which is great – but the starting forecast is for 55 at the start and maybe 63 at the finish. Which puts me in a quandry; above 60 I don’t need any covering for my arms or legs – maybe just a vest to wear at the start – while at 50 degrees I need arm and leg warmers. The expected temps are precisely at the transition between the two, which makes it maddening. I throw on arm warmers and leg warmers, get all the rest of my stuff together, and head out and load the car.

    Well, that’s not quite true; I’m not going to do this ride totally fasted. I mix up 2 scoops of Superstarch – a cool time-release glucose source – with a half a scoop of Endurox to make it slightly more palatable in a glass of water and drink it down. That will support my glycogen reserves during the ride but won’t provide a quick enough does of glucose to bump my insulin up and interfere with fat metabolism.

    The ride

    The start is pretty much like any start. I ditched my leg warmers due to the peer pressure of all the cyclists riding past me without them and had to make a trip back to the car to retrieve a forgotten water bottle.

    I generally only ride with people on this ride who I happen to meet during the ride, but my friend Mike is there and we start together, taking a quick detour to make sure that we ride through the inflatable “Start” arch, because if you don’t the ride doesn’t count. We ride along and talk as we make our way up Market (hill #1) and Juanita (hill #2), and then turn to descend down Holmes point road. This is a really fun descent normally, made a lot less fun this time by a lot of riders and car traffic, so we settle for a safe yet far less exuberant trip down. Which brings us to the base of hill #3, Seminary road.

    This is a decently hard climb at 414’ and a max gradient of 13% or so. I send Mike off ahead and tell him not to wait because he’s a much faster climber than me, and settle in. This is the hill where first-time participants realize that maybe this ride is a bit harder than they expected, so there are a lot of people riding pretty slowly. My legs feel good and I’m climbing at around 250 watts, a decent pace for me. I pass a lot of people and get passed by a few, and I hit the top faster than I expect. Seemed easy. A short break to take off my jacket and a quick descent and portage to the next hill.

    Norway hill is a nice little climb; a bit of undulation to keep it interesting and about as long but not quite as steep as seminary. I ride kindof conservative but there’s a group of 4 behind me that I don’t want to catch me, so I put out a bit more power in the top half, including a short section at over 300 watts. My legs feel pretty good, and I ate a few cheez-its on the way up that are sitting pretty well.

    We now get into what I think is the worst part of the ride. Part of that is just the geography; we need to get from Norway (hill #4) to Winery (hill #6), and there aren’t a lot of great route options. They also need to fit in a food stop in a parking lot near the hospital. I stop long enough for a nature break and to grab a small Clif bar (barette?), blueberry something something flavor.

    I haven’t talked about hill #5 because it doesn’t really exist; there’s a little climbing before the rest stop, and little climbing there, and that’s what we call hill #5. They used to use a slightly different route that had a slightly more defined hill, but even then it wasn’t much of a hill.

    We’re heading north now, we have a nice descent down brickyard road that is slightly marred by too many cyclists, and then curl back south on a mostly flat portion of the ride through the Woodinville winery district. People try to fly on this section for some unknown reason and I get passed by a few, but its far better to rest the legs a bit because of what is coming up.  I finally arrive at the base of hill #6, which if you were paying attention you already know is Winery Hill. At only 307’ of total elevation gain, it’s not a particularly long hill, but it is a nasty hill, with a 17-18% pitch at the beginning, and some slightly-less-nasty pitches later on. Kindof a set of stairsteps.

    I arrive near the back of a group of 25 riders or so, and start climbing. My legs feel good, so I ratchet up the effort and am climbing at about 500 watts through the steep section. As I’m picking my way through a clot of riders, some smartass in the group says, “remember, you paid to do this”.

    Okay, so, you might be able to guess who the smartass is…

    The hills flattens for a bit and I catch by breath, go hard up the second steep section, and then hard up the third steep section, and then try to maintain a decent pace up the long steady section, and I’m at the top, riding hard and turning left past the bagpiper towards the next part of the ride.

    Wait, the bagpiper?

    Yes, 7 hills has a bagpiper who stands at the top of Winery hill and plays. It’s another reason I really like this ride.

    A later check of my data shows that I cut 17 seconds off of my PR for Winery Hill, which makes me feel pretty good. I am even happier to note that I share 527th place on the climb with my friend Kent, who is a way better climber than I am.

    I make a quick stop at the next rest stop to top off my water and eat approximately 1/8th of the clif bar.

    Decision point…

    After you descend back down into the Sammamish River valley – the one you just climbed out of – you reach a decision point. You can go straight, do one final hill, and be done. Or you can turn left onto the metric century route.

    I turn left, and we head across to to the east side of the river valley and start up what I call “the 116th surprise”. It’s only about 50’ of elevation gain, but it makes up for it by being in the 15-16% range. Surprise. That makes me happy because a number of my routes features surprises, and the cyclists who ride with me always expression their appreciation. My unexpectedly strong legs carry me past another clot of riders and I turn off to finish the rest of the climb up education hill. Or partway up it.

    I feel a special bit of ownership around this part of the route. The route we used to do involved a descent down a 15% + hill that ended at a stoplight on a fast arterial. A few years ago it was a bit wet when we did that descent and the combination of wet brakes and a little sand at the bottom made it more terrifying than usual. I suggested an alternate route to the organizers, and we’ve used that route since.

    Next up is Novelty Hill which at 515’ is the biggest elevation hill we will climb today, which I guess is a bit novel. Beyond that, it’s not particularly steep (10-11% tops) and has no unique scenery. It does feature lots of vehicular traffic flying by at 45-50 MPH, though to be fair the shoulder is pretty good. I talk with one of the official support riders – the sweep for the century riders – on the way up for a minute or two before deciding to leave him up behind. We’re doing a loop in this section with a stealth hill or two, but it’s mostly boring. I play leapfrog with a couple of guys that I will refer to as “Chris” and “Scott”, because for some reason I am convinced that I actually remembered their names, and we are soon descending back down Novelty Hill.

    On the way down we will see a long line of riders ascending the hill, which makes me happy I am not them, but I wish them luck. My attitude towards the ascending riders is considerably more charitable than my attitude was towards the descending riders I saw on my ascent.

    We turn off on a chunk of Old Redmond Road that time forgot for hill #9. At 174’ and no more than 8%, it’s a short and easy one. As we’re rolling along “Chris” says, “it looks like we’re riding about the same speed, we might as well ride together” and introduces himself and Scott. We ride together and talk for about 90 seconds before “Chris” says that he needs to slow down for Scott – who is not having a good leg day – and I ride off ahead alone, completing the shortest spontaneous “let’s ride together” segment that I have participated in.

    After a quick descent, I am faced with a second trip up Education hill. It’s what I like to refer to as “re-Education Hill” as it’s the second time we climbed the hill. I like to refer to it that way, but it’s pointless to do so because I am all by my lonesome at this point. I can’t see any rabbits on the hill – a “rabbit” being a rider in front to try to catch up with, not the plentiful real rabbits that you hope will stay away from your wheels – so I check my internal store of motivation and find that while the gauge is hovering near “E” and the light is on, there is still a wee bit left, and I call on that to head up the hill to the tune of 220 watts or so. I am getting a bit tired.

    At the top, I hit the last rest stop. They specialize in utterly pedestrian turkey and cheese wraps, and I eat about half of one, another 1/8th of the Clif bar, and maybe a few more cheez-its. A volunteer gets me a water refill, I take a quick nature break, and then sit down in a chair. After 30 seconds, I realize that if I sit longer than that, I won’t want to move – as evidenced by the 3 guys in the chairs who haven’t moved since I got there – so it’s back on the bike. I descend back down to where the metric route branched off and get on the main route to the finish.

    This part is going to be fun. Partly because it’s hill #14 – and therefore the last one – and partly because I will have plenty of rabbits to chase on the climb, as the classic route riders are on the route for me.

    We are climbing the more popular part of Old Redmond Road, and it will take us 391’ up, but even the steep sections aren’t very steep. I go hard up the first pitch and barely make it over the crest without blowing up. The rest is mostly easier, until I finally turn left onto 132nd, and my climbing is done for the day.

    In this section the traffic lights break the riders into clumps, and I’m at the front of my clump and therefore have no visible rabbits. Except maybe one I can vaguely see way ahead of me. I ride down a short hill, turn left onto 116th which is mostly downhill with a few false flats, head down Northup which is fully downhill with no false flats, passing a few people, and then we turn onto Lake Washington Blvd for the final run to the finish. There’s a triathlete in front of me that I half-heartedly – for I only have half a heart left – try to catch going up a small little hill, but it doesn’t work, so when we get to Carillon point (yes, there is an actual carillon involved) I throttle back and spin along the waterfront to cool my legs down. Overall I feel pretty good; my legs are tired because I pushed them hard but I feel fairly strong and could keep riding.

    Then it’s onto the finish line festival and a somewhat perplexing set of booths, I get my strawberry shortcake (another reason to do the ride), eat the strawberries and whipped cream and a tiny part of the shortbread, and then hop back on the bike to ride back to the car and go find some lunch. Which turns out to be a Qdoba taco salad.

    Strava route

    Stats:


    Miles 61.91
    Time 4:22:55
    Up 4,462’
    Work 2449 kj
    Speed 14.1 mph

    That’s a pretty good effort for me, though its a bit slower than I have done in the past.

    For the day, I had my two scoops of superstarch (about 200 calories), approximately 27 cheez-its (150 calories) and about 1/4 of a clif bar (50? calories), for a total of 400 calories. Oh, and the wrap, for maybe another 100. That was enough to keep me going strong for the whole 4.5 hours, which means that the majority of the 2450 calories I burned came from fat. My stomach felt great.

    No breakfast means I had a calorie deficit for the day of something over 3000 calories, and I’ve been doing my best to eat that back since.


    DLE (Globes of Fire) Part 5 – First Board!

    When a new telescope is completed, one of the big milestones is known as “first light” – the first time that the telescope is used as it is intended.

    Now that I am the proud owner of a reflow oven – a modified Black & Decker toaster oven fitted with Whizoo’s Controleo3 reflow oven kit – and I have a new version of my boards back – it’s time to think about how to build these things in a reasonable way.

    The plan is obviously to switch from hand-soldering to reflow. To do that, the first thing that I need is a stencil that I can use to apply solder paste. Thankfully, kicad makes this really easy; you can modify the solder pad tolerances in the program, and the pcb editor can write out SVG files (thanks to Rheingold Heavy for this post). If I have the pads, I can easily cut a stencil, likely out of mylar because it’s a bit cheaper than Kapton is.

    That would give me a way to do a single board if I could hand-align it closely enough. But each of the globes needs 12 of these boards, and hand-aligning is a pain.

    So… what my real plan to do is to cut holes in a piece of hardboard (or cardboard) that will hold a number of the boards (12 or 24) and then a matching stencil. If I align the stencil one, then I can put solder paste on all of them.

    IMG_9223

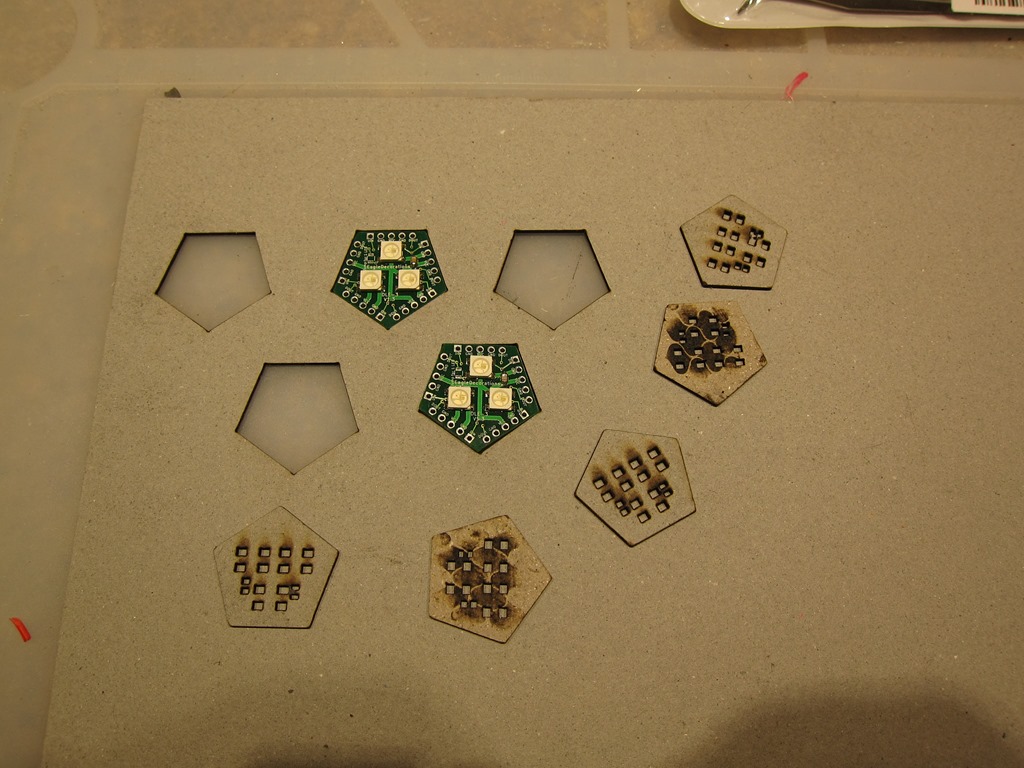
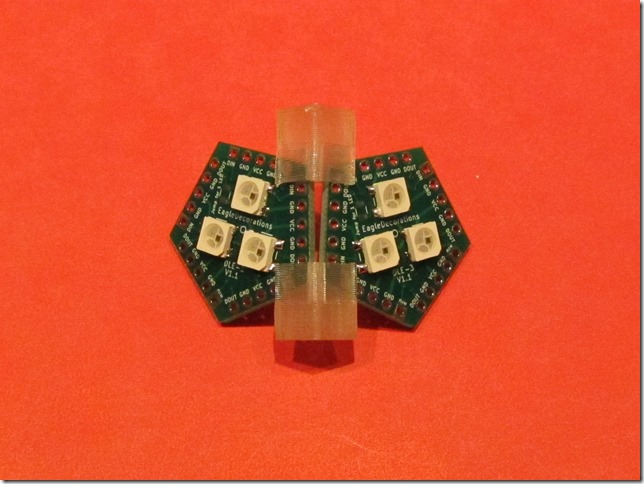
    So, here’s the test. I took the pad svg and the board edge svg, joined them in inkscape and then cut them on the glowforge. As you can see, the boards fit perfectly into the cutouts, and the solder pads cut correctly. Next I will need to do a better version of this, with different colors for the pads and board edge so I can turn them off and off when laser cutting. I’m also probably going to cut holes for some posts that will give me registration between the board with cutouts and the stencil.

    You can also see the first two boards that ran through the reflow oven. I did the solder paste without a stencil and I also skipped baking the LEDs since they showed up in a factory-sealed pack and have been sealed since, and both boards came out fine. And a 10 minute reflow cycle is a lot quicker than hand soldering…


    Bespoke bicycle Holder

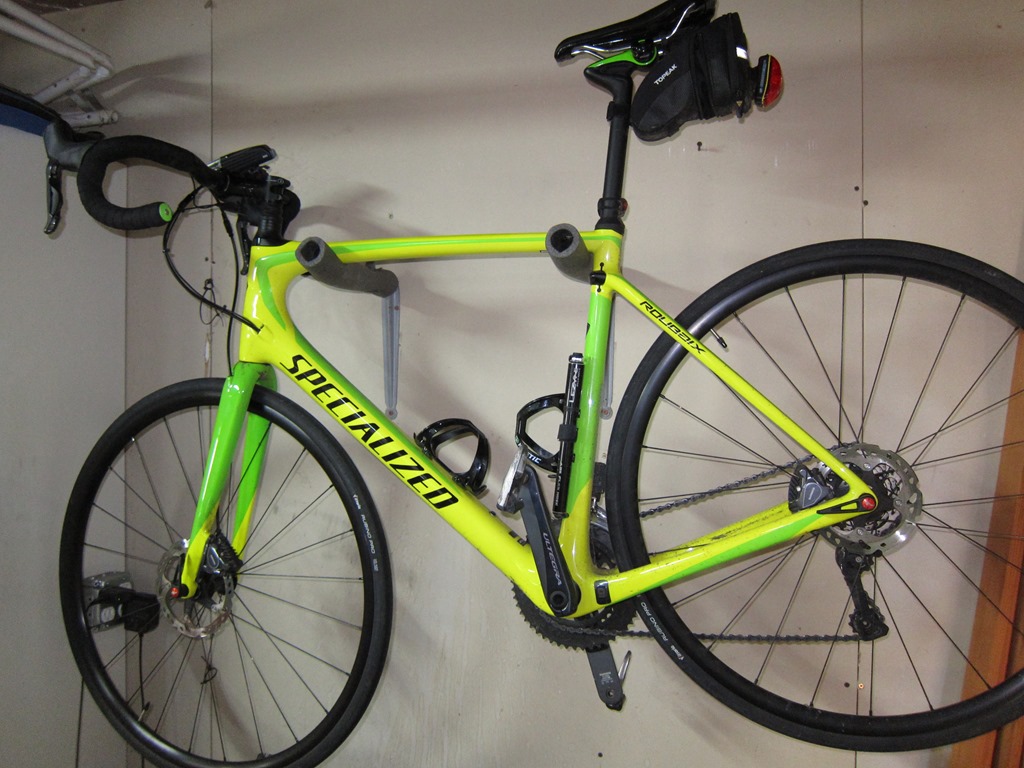
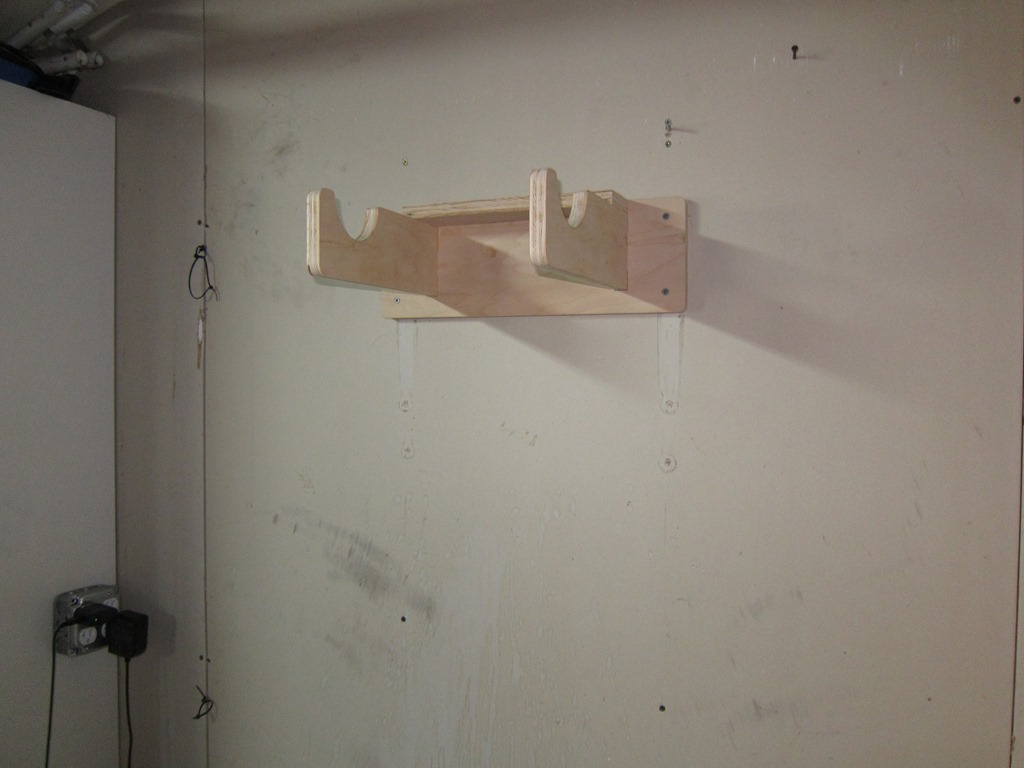
    My nice bicycle currently hangs on two old shelf standards that are screwed into the wall, with some foam on them to protect the frame.

    IMG_9219

    It works, but the foam has seen better days and if we got a quake, it could easily shake off the ends.

    It’s time to build something a bit nicer, so I dug out some leftover hardwood plywood I have (maple, I think) and spent a little time with Fusion 360, and came up with the following design:

    image

    This is a render in oak. The holes are 16” apart so they can screw directly to the studs, and the hangers are a bit closer together so it’s easier to hang the bike with batteries on it. The arms that hold the bike have two hefty tenons that stick all the way through the back piece.
    Off to the garage to use the Shaper Origin…

    Cutting

    The cutting mostly went pretty well, but it took longer than I expected and I worked past a point of being too tired and therefore had a couple of issues. I’m using a piece of maple plywood that I had lying around that is unfortunately not very wide, so I had to put some auxiliary pieces off to the side with shaper tape on them so that it could figure out where it was. This mostly worked, until I got to the last cut on the last piece, and partway through I bumped my setup and that piece – which was partly clamped but not correctly clamped – moved.

    That is *bad*; the shaper throws up a big banner that says “the markers have moved and you are SOL”, or words to that effect. I tried a cut after that, and they were right, so I finished cutting through with an abrasive disk on my dremel and cleaned up with a little sanding drum.

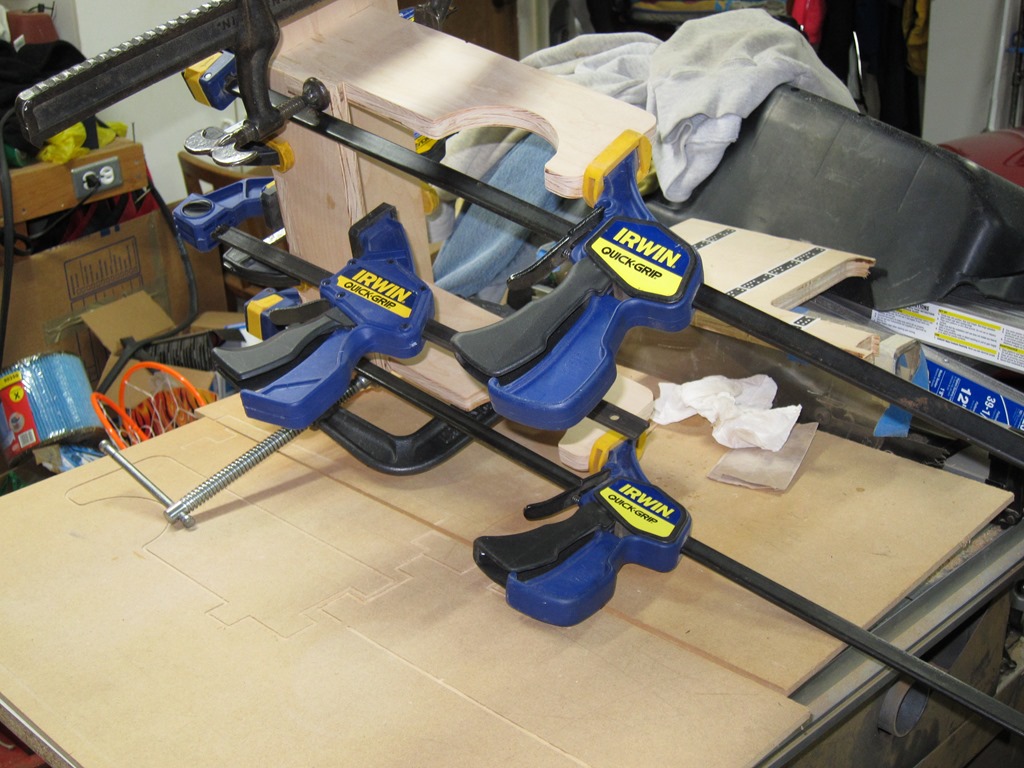
    A little sanding, and it was time for gluing and clamping. The nice part of the holes and tabs approach is that there is a ton of surface area, so lots of material for the glue to grab onto. It’s probably strong enough with the glue because of the way the geometry works; the arms that hold the bike can only pull straight out, and even that is difficult. So, no fasteners required, but a lot of clamps.

    IMG_9217

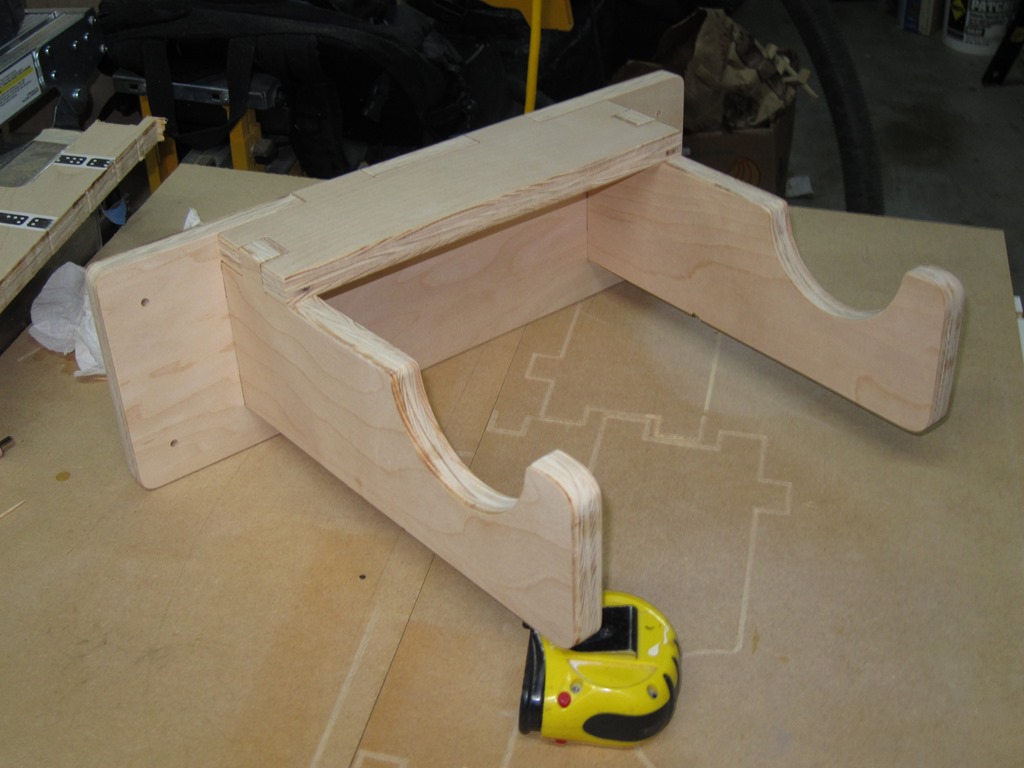
    Give it 4 hours for the glue to set, and we are left with this. The dark coloration looks like a burn but is really just the plywood.

    IMG_9218

    Overall, it came out mostly okay; in some places the fit isn’t as tight as I’d like – which I attribute to some wiggling because of how I did the cutting – but it’s more than functional.

    Four 3” screws to mount it – yes, that’s overkill, but it’s so easy with an impact driver…

    IMG_9221

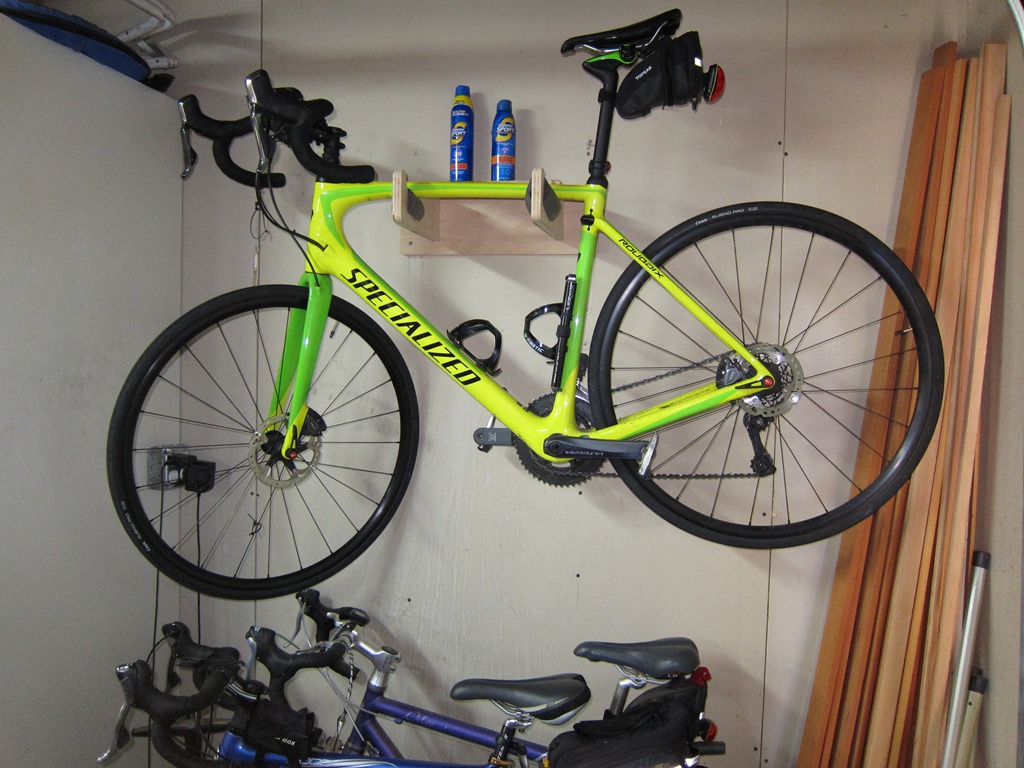
    and we’re done. I’m hoping the sunscreen shelf will help remind me to use it before I leave. I used some short pieces of the foam from the old holder to pad the new one.
    IMG_9222


    Draft: Compound miter saw table…

    I have a decent DeWalt compound meter saw next to my garage; it lives next to my table saw on a stand like this:

    Image result for dewalt dwx723

    The stand is nice a rigid and easy to take places, which is nice. It does have a few issues:

    • The legs stick out towards the car that is parked next to it, taking up space.
    • There’s no good place to stack stock; it will fall off of the rail.
    • The lack of support between the saw table and the extensions is annoying.
    • The table is about 1” higher than my table saw, which means you have to move the saw table to do even a small cut on the table saw.
    • It lives right where a small outfeed table would be nice.

    I’ve been playing with some ideas on how I might build something in my second shaper origin project, and here’s what I have so far.

    image

    It’s drawn to use 18mm baltic birch plywood. The drawing is pretty rough; no connection tabs, no holes, just a bunch of rectangular solids so far.


    Provisioning and using the ESP8266 controller

    The ESP8266 controller is preprogrammed with the ability to connect to your local wifi network and be remotely controlled.

    Provisioning

    Initially, the controller does not know how to connect to your network, so it sets up its own network. Here is how to set it up:

  • Using your phone/laptop/tablet, connect to the network named something like “EDP_1002170403”. The password is the same as name of the node.
  • One you are connected, open up your browser and navigate to http://192.168.4.1. That should enter the provisioning page. Enter the SSID of your wireless network and the password, and click on connect.
  • If everything is working correctly, that will connect to your wireless network. You can find out the IP address by looking for the “EDP_…” name in your browser’s host table, or you can hook the esp board up to your computer and watch what it writes out the serial port when it boots.
  • Controlling via http

    You can control the LEDs via http by sending textual commands to controller. The format looks like this:

    http://[ip address]/message?content=[message]

    Controlling vs UDP

    If you want realtime control of the LEDs, http may have too much latency, which may result in unexpected pauses. The controller also supports communicating through UDP.

    To connect via UDP, use the same IP address and pass commands directly. The internal controller code runs at 100 Hz; if you drive with UDP messages at 60 Hz everything should just work great.

    Supported Messages

    All commands are three letters long, followed by another character (the examples use an underscore (“_”), followed by numeric parameters.

    The following commands are supported:

    Alternate

    Alternate between two colors.

    alt_r1,g1,b1,r2,g2,b2,time

    r1, g1, b1: the rgb values (0,255) for the first color (0-255)
    r2, b2, b2: the rgb values for the second color
    time: the time for each color

    Example: alt_0,100,000,000,000,000,250

    Blend to

    Blend from the current color to a specified color

    rgb_r,g,b,time

    r, g, b: the rgb values (0,255) for the new color
    time: the time for the blend

    Example: rgb_255,255,255,1000

    Color rotate

    Rotate through a bunch of different colors.

    col_speed,brightness

    speed: the speed of the rotate
    brightness: The brightness of the colors

    Example: col_5000,200

    Flash decay

    fdc_decay,min,max

    decay: the speed of the decay
    min: the minimum pause before the next flash
    max: the maximum pause before the next flash

    Example: fdcx250,10,500

    Full control

    Full control is used to control the color of all the leds directly.

    ind_chunk,data-bytes

    chunk: the number of leds to apply each set of data to.
    data-bytes: colors express as two digit HEX values in the format RRGGBB

    Example: ind_011,000044440000004400

    Each color in data-bytes will apply to 11 LEDs. The data-bytes contain 3 color values:

    000044 – a blue value
    440000 – a red value
    000044 – a green value

    Save

    Save the current animation so that it will use that animation when rebooting.

    s

    Set pixel count

    Set the number of pixels that the controller will use. This will result in a reboot of the controller.

    n_count

    count: the number of pixels

    Example: n_13


    DLE (Globes of Fire) Part 4

    It’s been very long since my last update, and a fair bit has happened.

    Hardware:

    I did a rev 1.2 of the board and sent them off to allpcb for a small run (10 IIRC, so 120 of the LED boards and 15 of the end boards).

    The boards showed up quickly, and didn’t work. Well, two of the LEDs worked sometimes, but the third would not.

    Clever me, I did some led moving and I managed to route the VCC line for LED #2 right across the data out pad when I did some moving. I could break the pad by hand and get them to work, which through trying to be quick led me creating a circuit that would work for all the colors except white because I didn’t break the trace completely. Which led me to think a new real of LEDs was bad and waste a couple of days trying to track down what was going on.

    I took the opportunity to do rev 1.3:

    image

    I bumped the VCC and ground tracks up in size, redid the VCC routing, and just generally cleaned things up to be nicer. I also added (finally) a 100 nF decoupling capacitor to the right of the #1 LED, which should help eliminate glitches in the future.

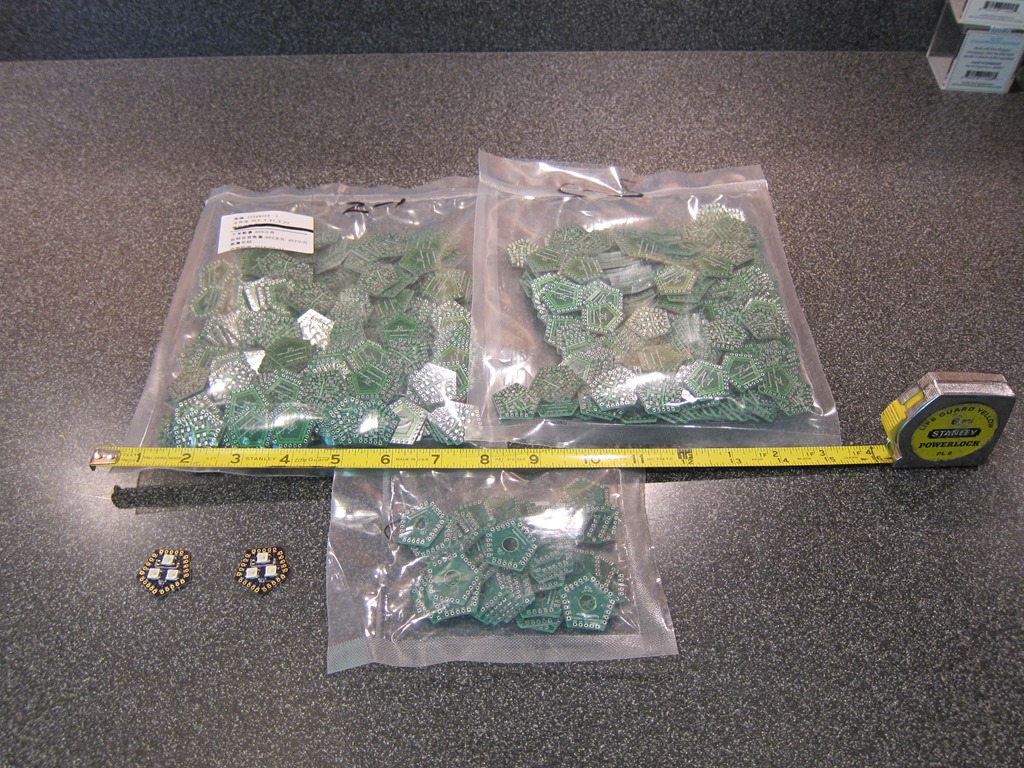
    I spun a small verification order (3) through OSHPark because it was only $5, and those worked great. After that, I pulled out my little list of material costs, went back to reprice the PCBs, and found that JLCPCB would do my full first order for $83 delivered, which was about 30% less than the $120 I had written down. Given the temporary nature of PCB special deals, I put that order in, and today found this on my doorstep:

    IMG_9215

    Well, technically they were in a *box* on my front porch. That is 600 of the LED facets in the two bags at the top and 50 of the top facet in the small box. And the two pretty purple boards are the test ones from OSHPark.

    Assembly

    I’ve gotten pretty good at soldering the LEDs on the facets, but my plan all along was to reflow them. Towards that, I picked up a few things:

    That’s a nice little Black & Decker TO1313SBD toaster oven.

    And:

    That’s a Controleo3 toaster oven conversion kit. We’re going to hot-rod that oven, adding a full computer control to it (the blue board on the left), add an extra heating element, a lot of insulation, and even a servo to open the door.

    All of this will give me a reflow oven; you can put a board with solder paste and components on it, hit a button, and it will heat the board at a certain rate until the solder melts and then cool them down at an appropriate rate. It’s going to live under the garage near the laser cutter, and my guess is that I’m going to need a bit of ventilation for it.

    Firmware

    I am at what I think is the V1 firmware, for approximately the third time. This took a whole lot of time and effort, with the usual fun of running two different codebases on two microcontrollers connected over USB.

    Provisioning

    The first time setup for IoT devices can be a bit of a pain, as they have to get your wireless ssid and password. In playing around, I found that iOS doesn’t let you enumerate wireless networks or change connections programmatically, which meant it might be a real pain to set up multiple nodes by hand.

    Then, I had a small bit of insight, and realized that I already had a device that could easily enumerate all the wireless networks; the ESP can do that an I already had the code because I needed it for testing. It was merely a matter of grafting it onto the existing code.If you connect to the network for any node and give it an SSID and password, it will verify that it works and then pass it off to all of the other nodes so that they can auto-configure. That code is all done, and it’s pretty cool to watch because the current firmware shows the state of the connection by flashing. Okay, maybe that’s only a little cool.

    Animation

    I wrote a few of the simple animations that I want; some color rotations, a flash and decay animation, and a blend from the current color to a new one.

    I also wanted to be able to go fully to the metal and control every LED remotely and quickly. That led me to a better Http server for the ESP, a brief flirtation with TCP, and finally an implementation based on UDP. The server is fast enough that you could send the data for all 33 leds 500 times a second and it would work; it is currently constrained to 100 Hz because that is the speed the animation loop runs at, and I expect that for real applications sending data at 60 Hz would be fine.

    I am particularly happy with how the command processor worked out; the implementation is nice and clean.

    The wireless information is stored in permanent memory, and it is also possible to store the current animation so that it will resume on startup.

    Software (app)

    I want to have an app to control all of this. It needs to support both Android and iOS, which made Xamarin the logical choice; I can support both and I can write C# code which is a huge plus in my book.

    Like many open-sourcy software, it can be a real pain at times, but I’m able to build an app that deploys to my phone and debugs, and that’s a decent first step. I’m working on network discovery right now; once the provisioning is done, the app needs to enumerate all local ip addresses and see if one of my controllers is hiding there.

    And I’m using Xamarin Forms, which is built on top of XAML, which I guess is an advantage since I did XAML professional for a fair bit, but it’s a bit of a mind-bender as usual.

    I wanted to do something different for discovery, so I wrote a graphical pinger. Here’s a video.

    The app still needs a lot of work; it needs a way to do the initial provisioning, a way to list the different animations it can do, a color picker, etc.


    Firepit rolling base

    A quick little project that I knocked out in a couple of hours today…

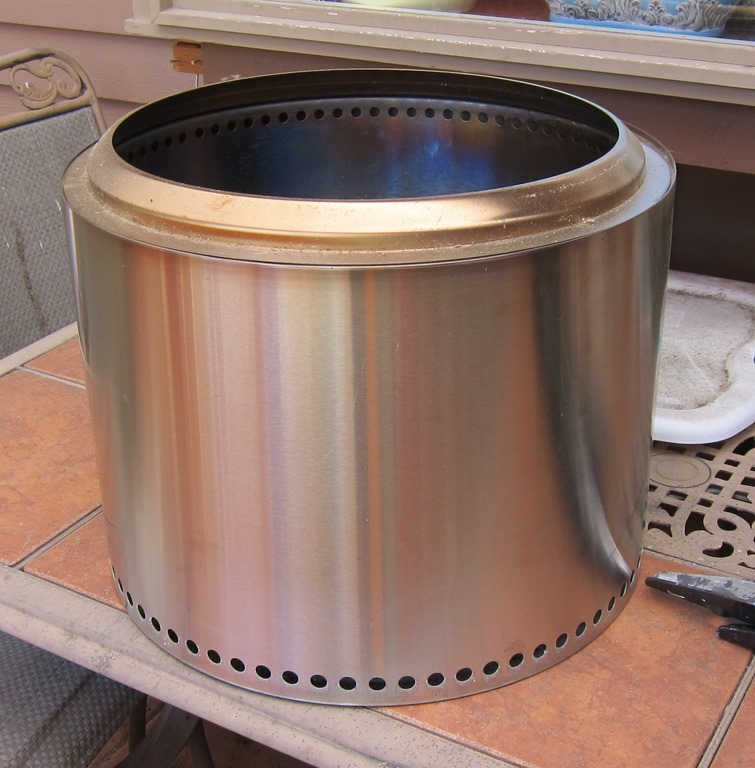
    My wife an I own a Solo Stove Bonfire. And yes, it does work every bit as well as they say.

    The problem is the somewhat fickle Seattle weather; we might have a fire and then the firepit would sit outside and get rained on. It’s stainless so it’s supposed to not corrode, but there are a still a few issues. The obvious thing is to put it under cover when you are done, but it’s really really hot and I’m quite lazy.

    A few days ago, I came up with a plan. I will start with the Solo Stove:

    IMG_9202

    My original plan was to buy some angle iron to make a frame, but walking around I found an alternative material:

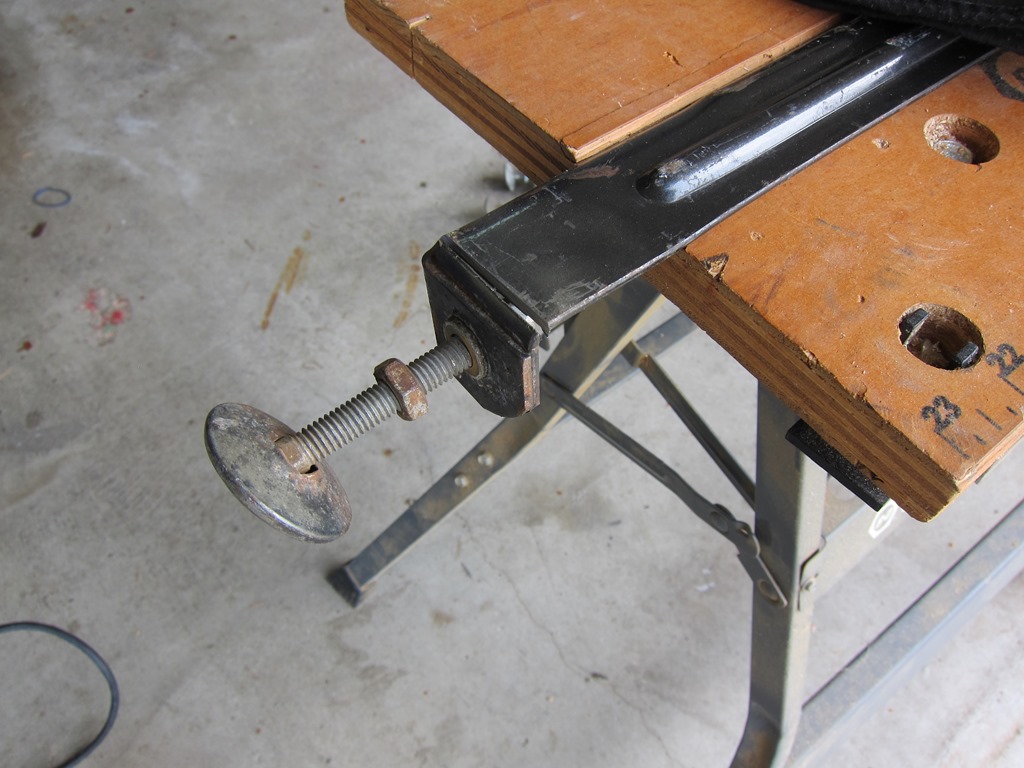
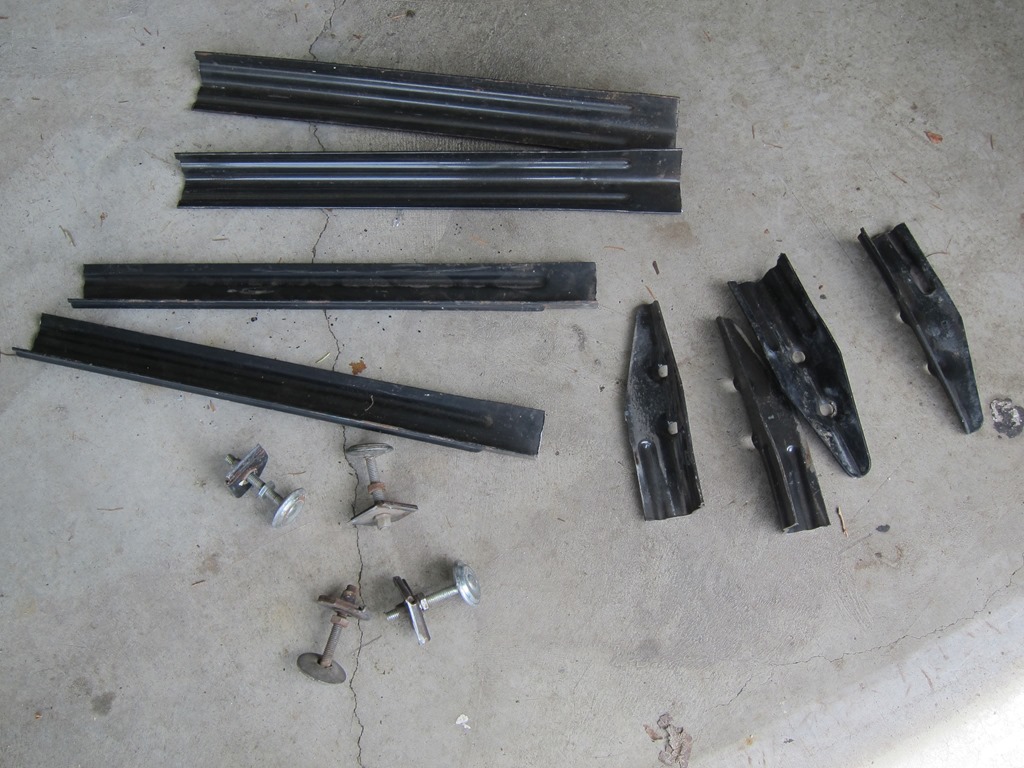
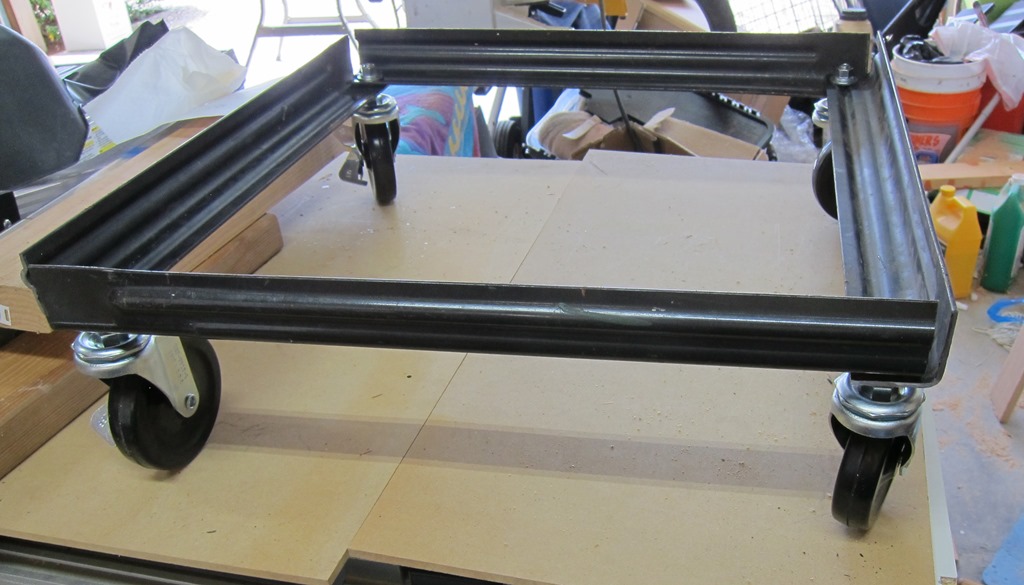
    Four pinball legs that I got with the World Cup Soccer ‘94 that I bought last fall, since replaced with pretty new ones. These legs were just waiting to head to the dump.

    IMG_9203

    and four leftover casters from my Glowforge table project. I didn’t take a picture of them.

    Leg modifications

    The legs need to be converted from their current form into something more like angle iron. The first step is to cut off the feet. Out comes the 4” angle grinder, on goes the accessory handle and a 4” metal cutting disk, and the feet are cut off.

    IMG_9204

    The process is repeated at the other end to cut off the mounting holes. The length is based upon the diameter of the solo stove, which is 19.25”. After a few minutes of cutting and a lot of sparks, we end up with the following:

    IMG_9205

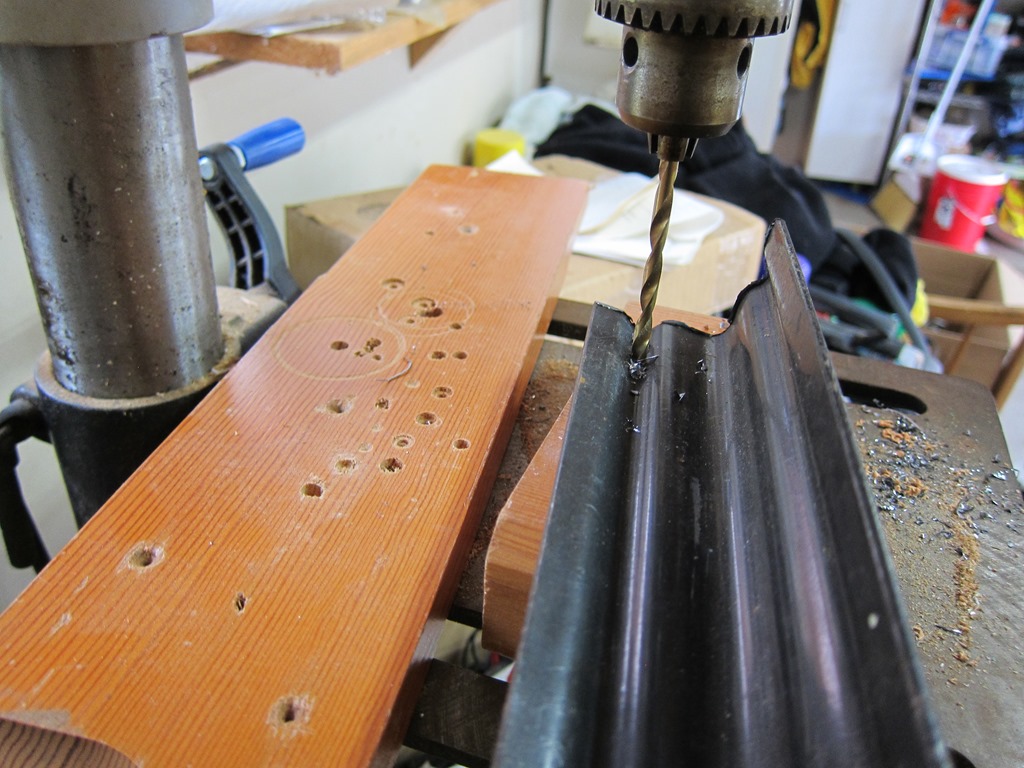
    Next, I need mounting holes in the corner that the casters can go through. The fluted design of the legs made this a significant pain in the ass, even with a drill press. Here’s the first hole drilled with a 1/8” bit IIRC; I would enlarge it with a 2/8” bit on the way to a 3/8” bit. The drill press is a huge help in this sort of work.

    IMG_9206

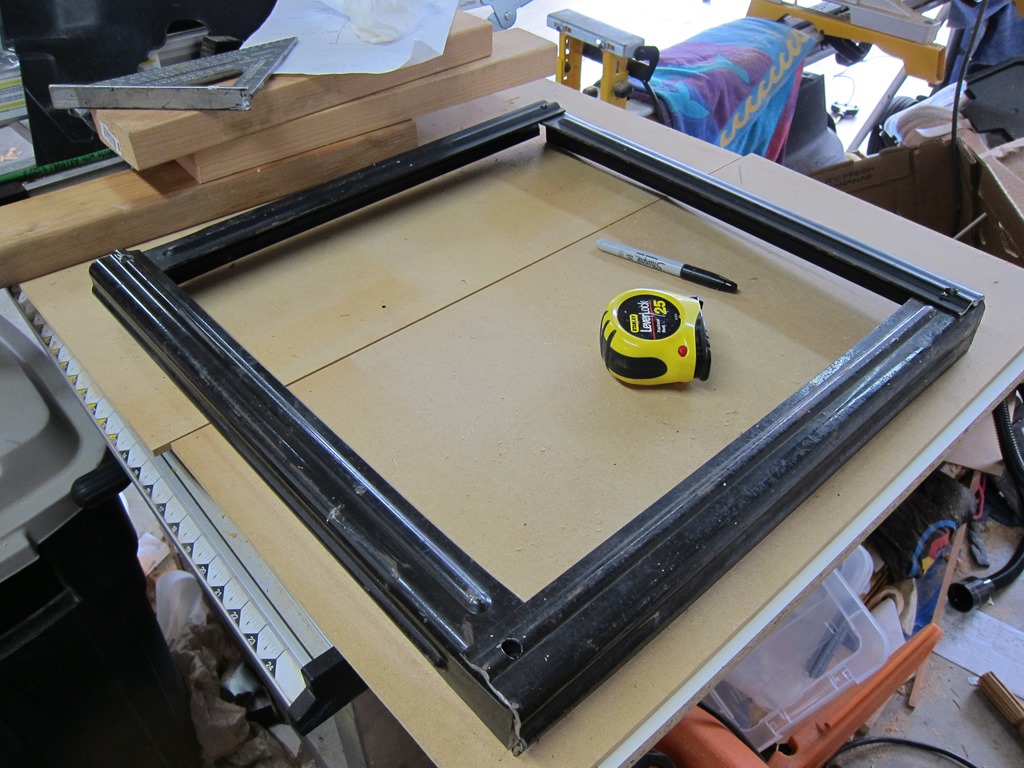
    Next it is time to do the layout so I can mark the holes where the metal pieces will overlap and connect:

    IMG_9207

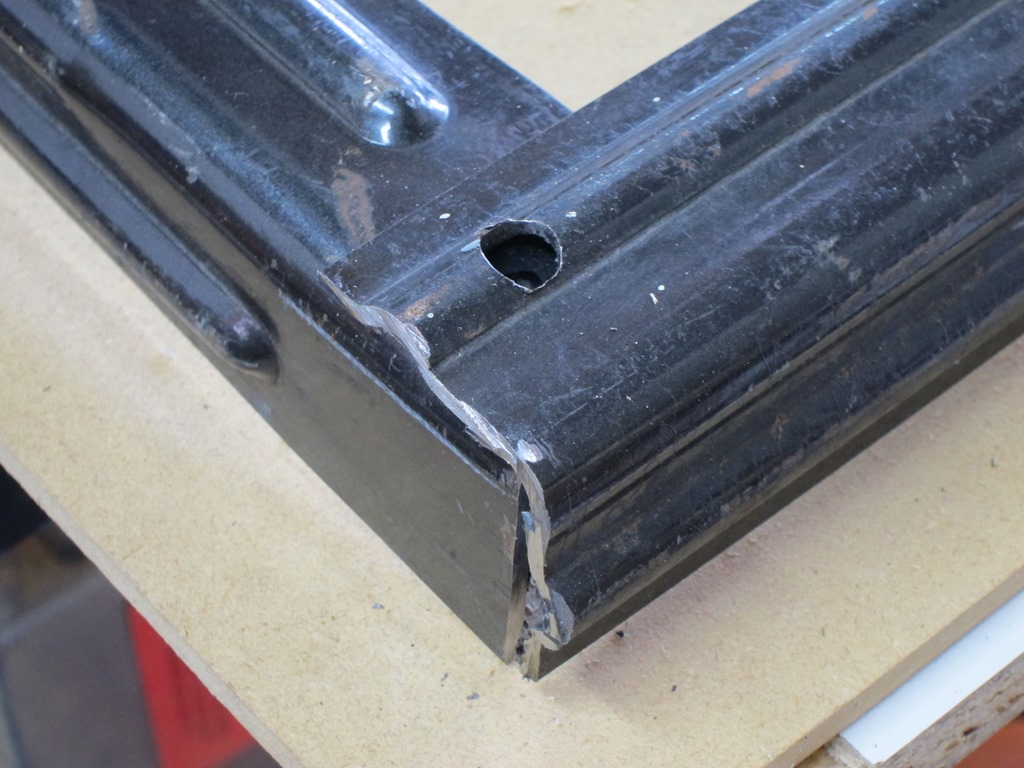
    This is really not precision work, though I will note that I realigned this corner because the two pieces should be symmetrical:

    IMG_9208

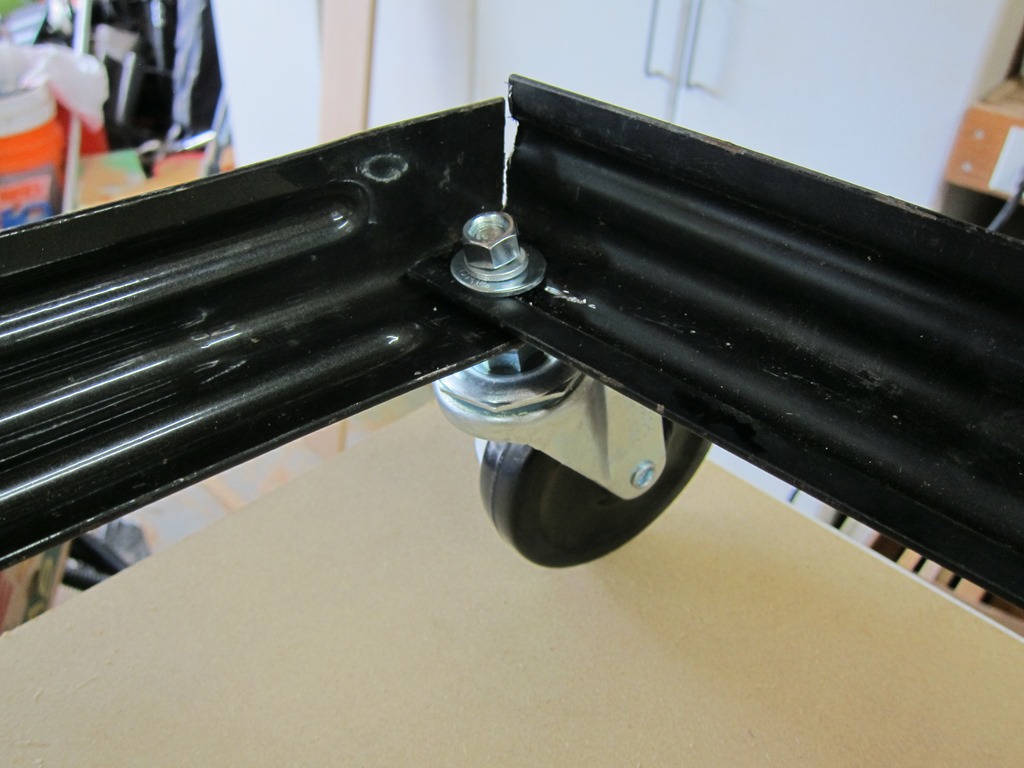
    Then, it was back to drill 12 more holes (three pass x four pieces), and then it was time for assembly, in which our caters finally make an appearance:

    IMG_9209

    Tighten up all of the nuts, and we have a frame:

    IMG_9210

    I had toyed with the idea of painting a stainless steel color, but I’m cheap and lazy, so it’s like this for now.

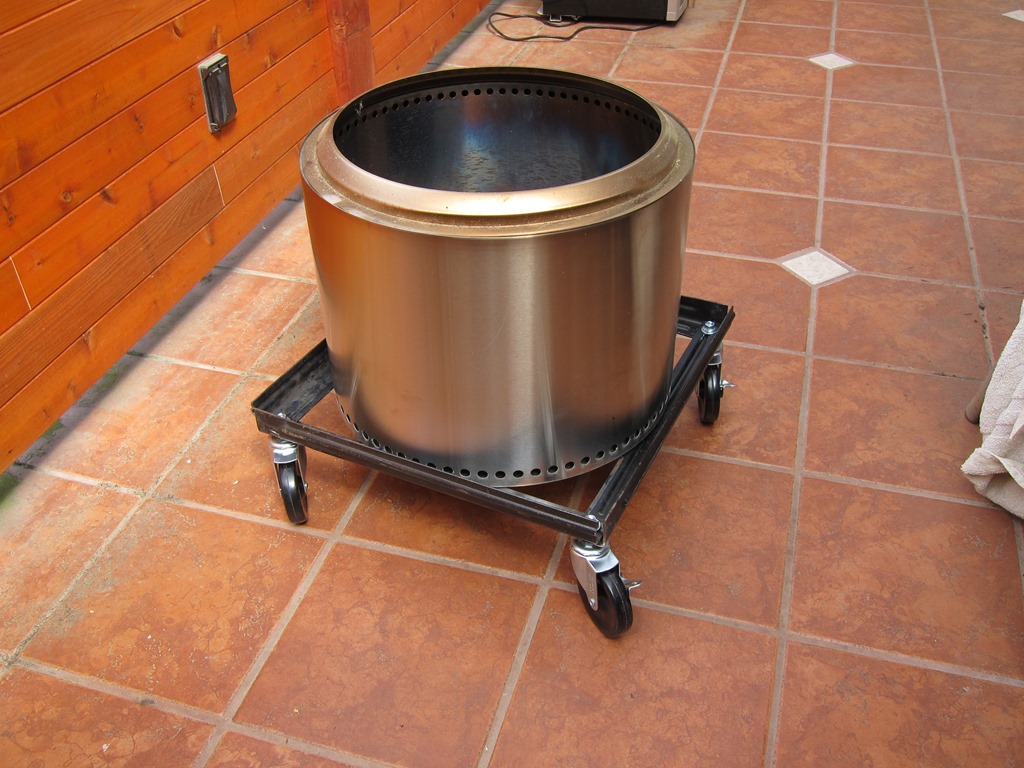
    Beauty shot of the Solo Stove sitting in its new frame:

    IMG_9211

    Total cost was $2.09 for a new metal cutting blade and about $2.00 for 8 nuts, 4 flat washers, and 4 lockwashers.


    An inexpensive glowforge stand…

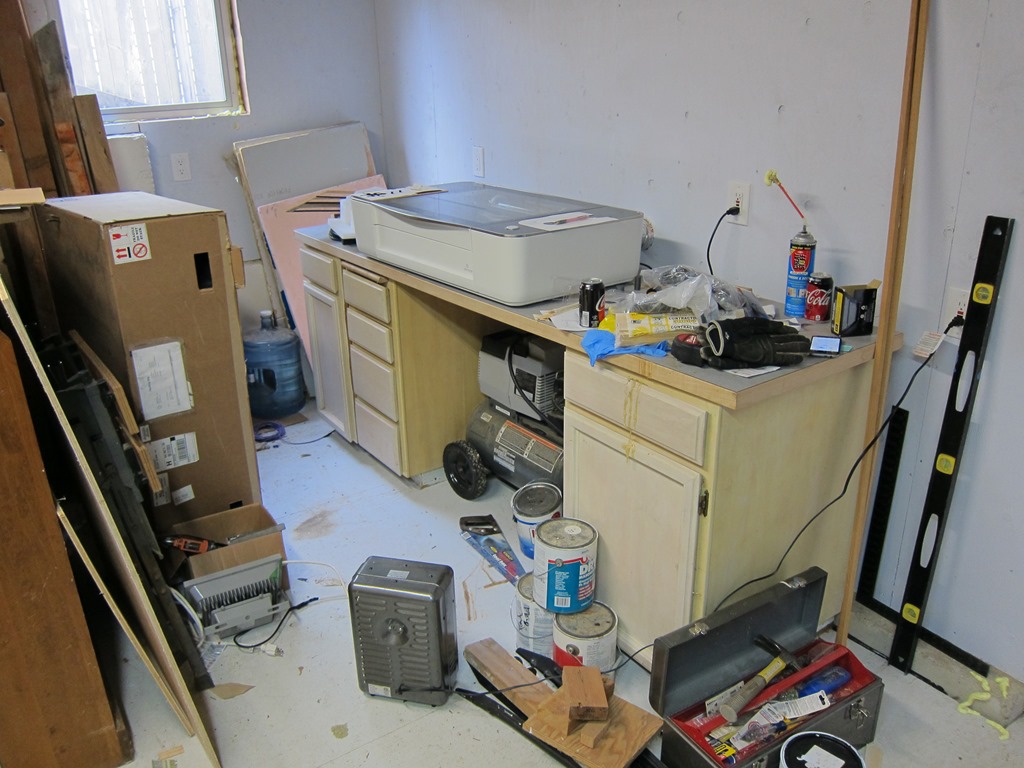
    My glowforge lives in a workshop I have that I’ve been working on fixing up. The workshop was bare studs but now it has plywood walls and some improved electrical.

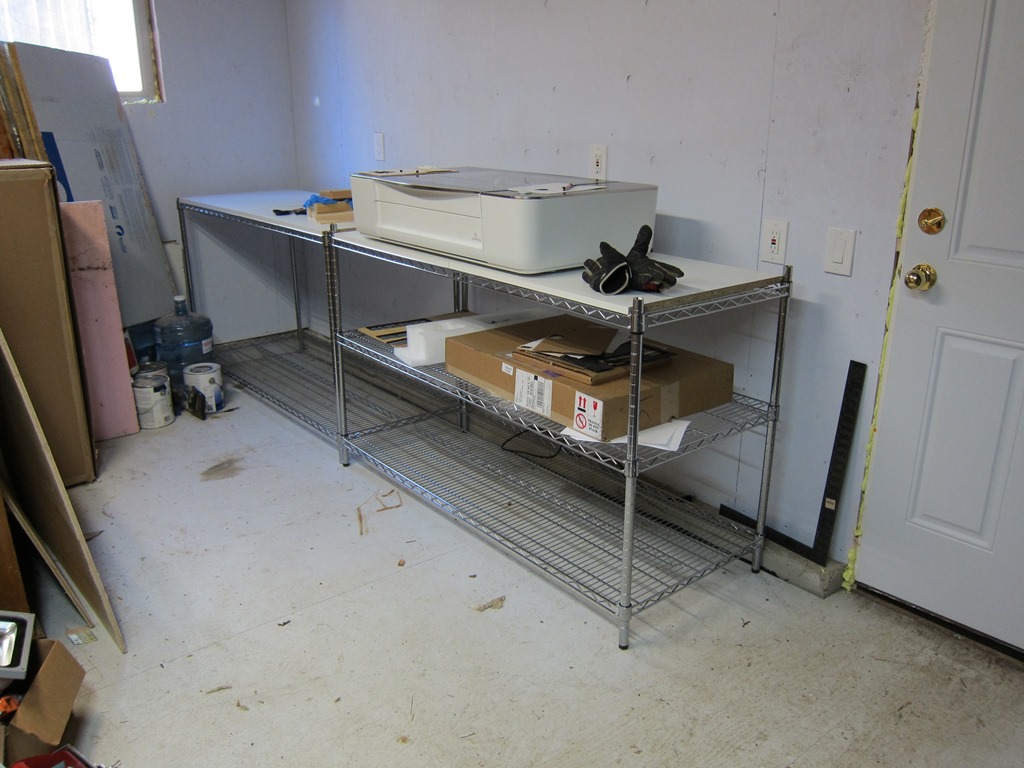
    IMG_9196

    As you can see, it’s sitting on top of some old and tired cabinets that I don’t use for storage because they don’t work very well, and a counter that sags in the middle. I need something to be better at holding both the glowforge and the other stuff I want to do down here (in particular, I need a place I can put a reflow oven for some electronics projects).

    My initial thought was to price out some replacement cabinets and a countertop, but that quickly started looking like $800 – $1000 for the cheap stuff. So, what other alternatives could I use?

    I was inspired by Mike’s table in this forum post:

    That’s just a cheap home depot storage rack, only using part of it. I found a rack that was like it at Home Depot, and it was only $60:

    But… It was only four feet wide, and I wanted some space to put my laptop and other stuff next to the glowforge. So, I started looking for racks that were wider but still 24” deep. The ones I found were a lot pricier; something like $150 or so.

    Time passed, and I ended up on Costco’s website, and decided to search there.

    1

    What have we here? 60” wide, 24” deep, and a full 72” tall. $170, so not super cheap, but pretty close to what I wanted. I could put four shelves at the bottom for flat goods, and then one shelf at the top, and the glowforge would be at waist height. And wheels if I wanted them.

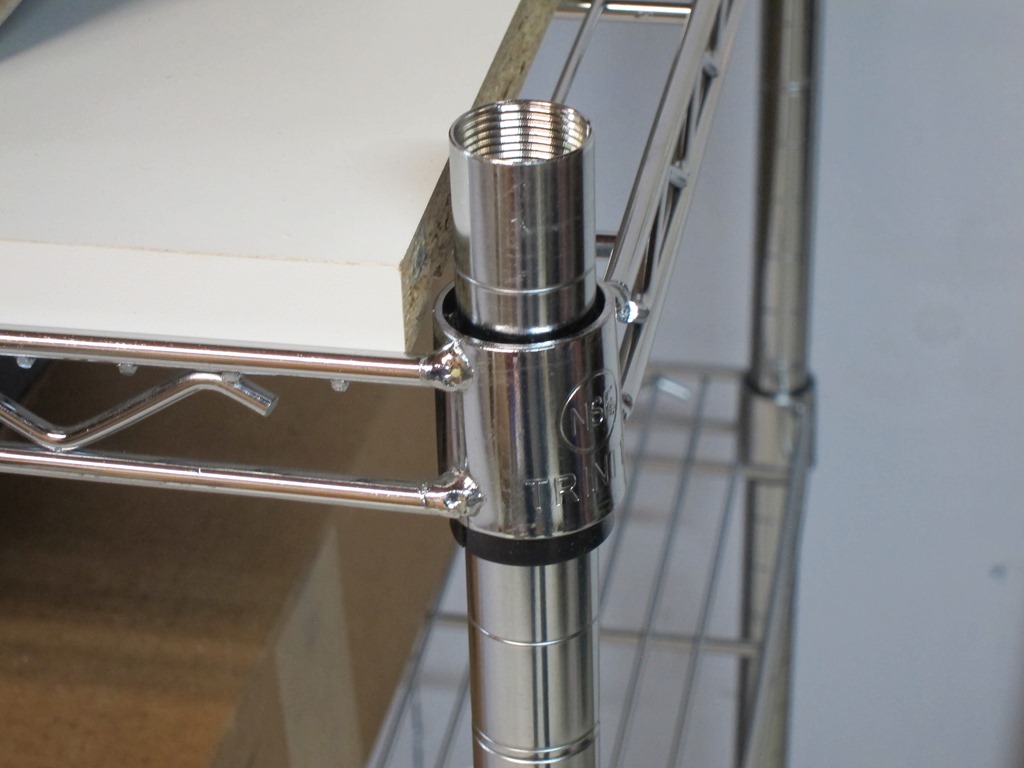
    It took about a week to ship, and the box it showed up in was heavy. 104 pounds heavy. I dragged it off the front porch and into the garage, opened it up, and found that it was just what I expected. 5 shelves, and – to save on shipping costs – the corner posts come as two sections that screw together. I did some measurements, and realized that if I didn’t use the casters (it comes with both casters and normal feet), the length of he bottom posts was almost exactly counter height, which meant I could do a build that was pretty much at counter height.

    And… if I only used 3 shelves on that, I could use the remaining parts – the upper posts and other two shelves – and build a second countertop-height system to go next to the first:

    IMG_9197

    So, that $170 got me two counters – one to hold the glowforge, and one to hold whatever else I want to put next to it. But if you didn’t want the second counter unit, you could easily put the other two shelves on the glowforge part and get a lot of storage for flat materials. And have it on wheels if that is useful for you.

    There was only one problem. Wire shelves aren’t the nicest things to put stuff on as small items fall through the openings, and you can’t write on them either. What I needed was a countertop to go on top. There are a few options:

    • Buy one of the ikea countertops – like this or this – and trim them down. I would need two in this case, and that would be another $120. Decent idea, and I like the black look. So yes for fancy, but no for this setting.
    • Buy a full sheet of melamine. My lumberyard will sell me a 48” x 96” sheet for $35, and that would do both counters with some left over. Downside is that the 1/2” sheets are about 65 pounds and a bit of a pain to transport. And the exposed edges aren’t white.
    • Buy some pre-drilled shelf panels. These are meant to be used for the sides of cabinets with shelves in them. $38 each, and I would need two of them.

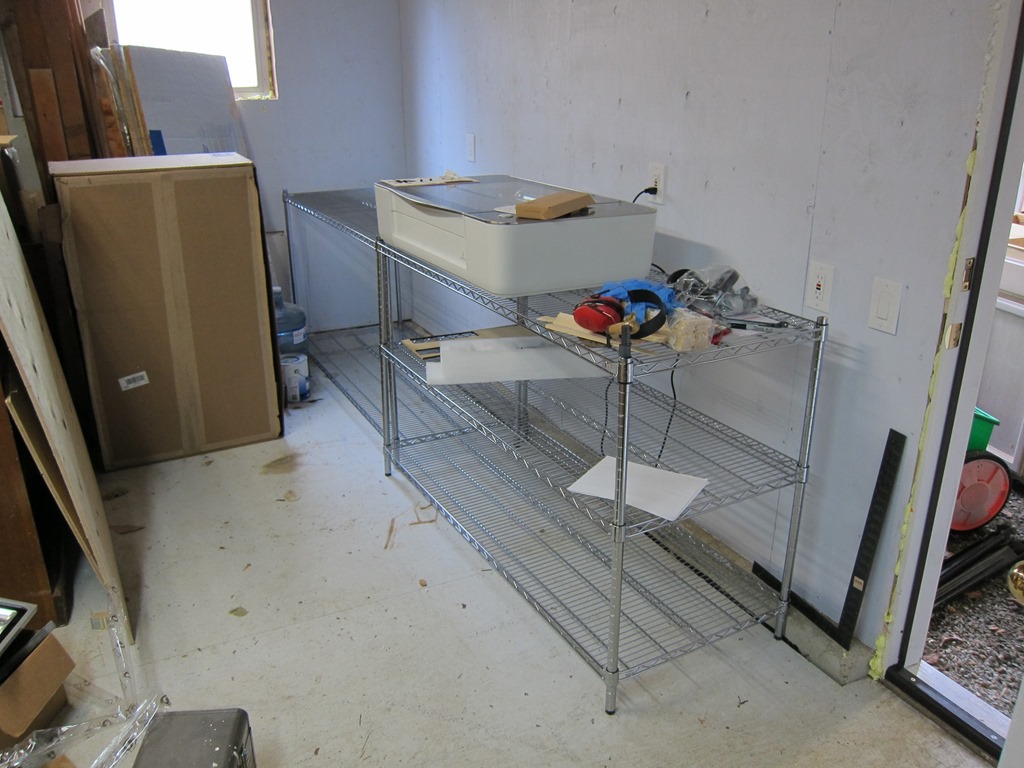
    I was going to go with the big sheet for $35, but then I got to looking around and remembered that we had some extra Ikea shelves hanging around. They are about 29” x 24“, so I’ll just need to trim a bit off of them to make them the right depth (if they are trimmed to 23.5” they will fit between the front and back wire sections and not slide around). When I went and did that, I found that two of the shelves are almost perfect in length between the posts, and everything looks quite tidy. Here it is.

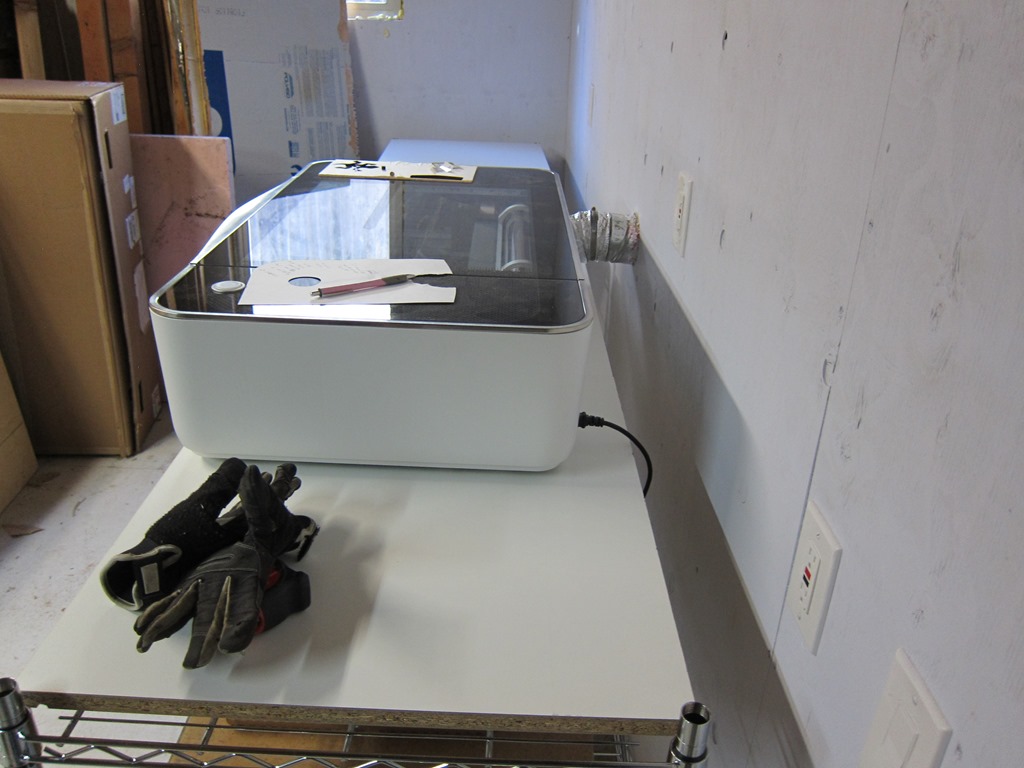
    IMG_9199

    Plenty of space for a laptop on the right side, lots of storage for stock underneath. I might build some vertical storage on the left side; not sure yet.

    IMG_9200

    The shelf is plenty deep; I have mine towards the front to make the exhaust fit better. What I really need to do is trim a couple inches off the duct.

    If you are going two countertop-high units, you’ll want to drop the first one down one inch so that everything is level. It looks like this.

    IMG_9201


    Building the Globe of Fire (Dodecahedral Light Engine)…

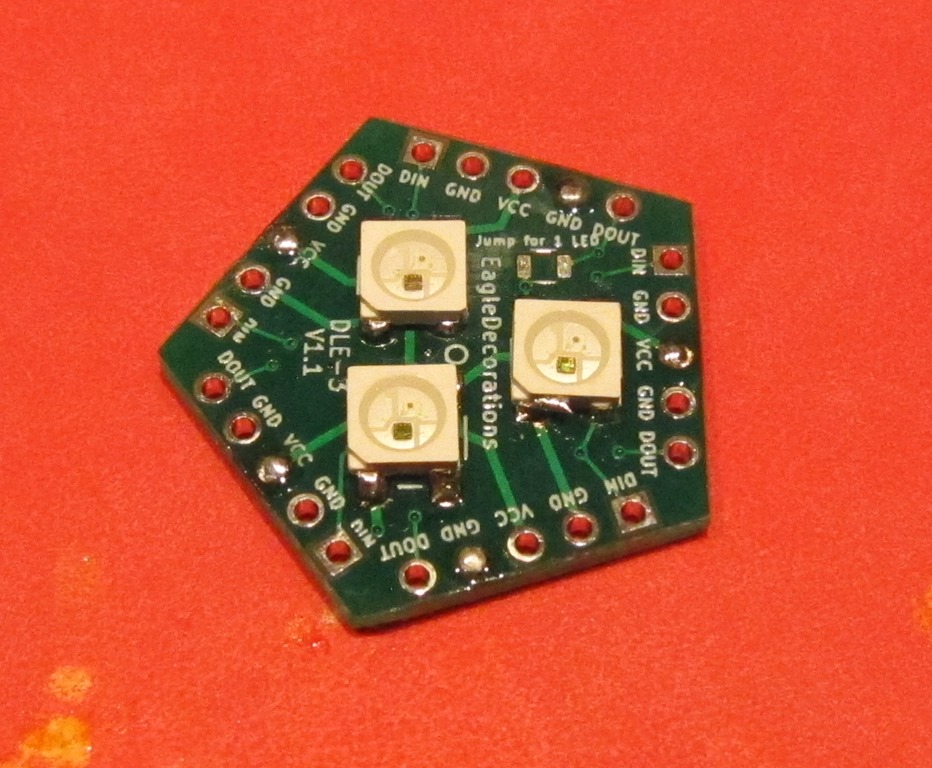
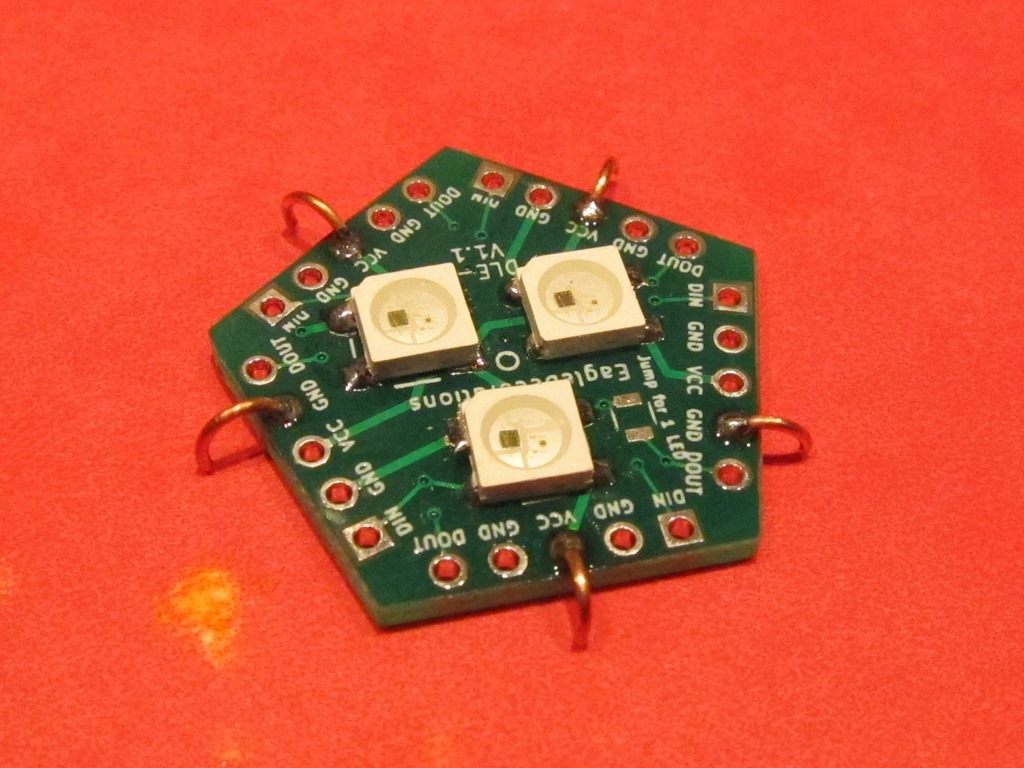
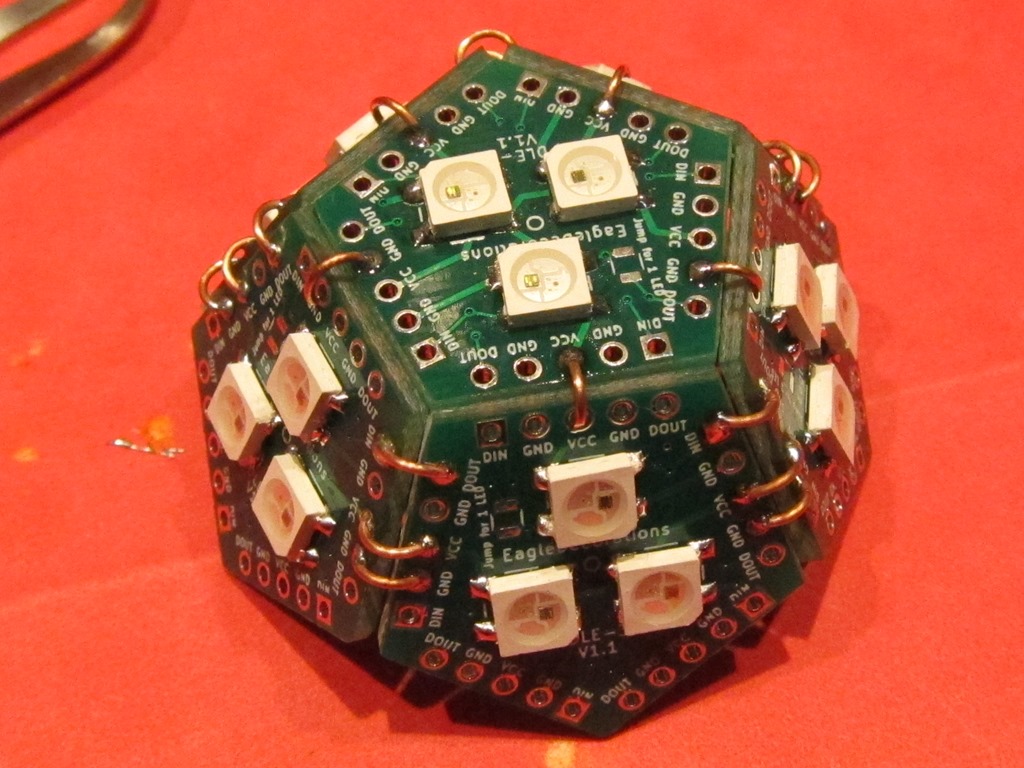
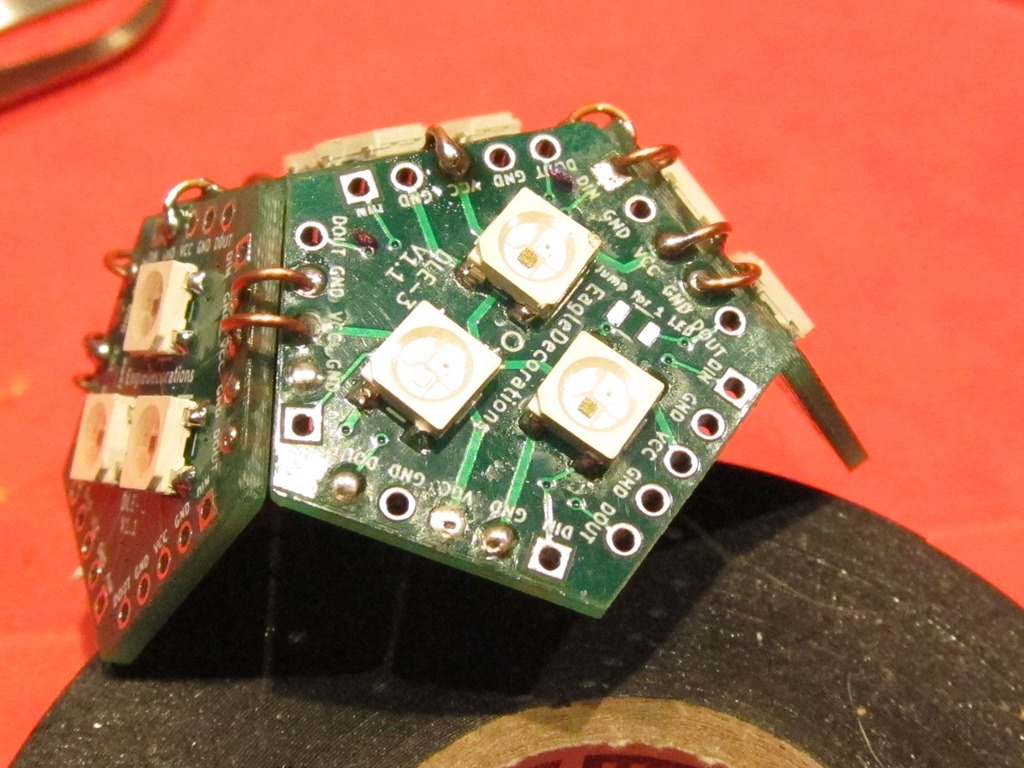
    This guide will describe how to build the Globe of fire. You will need the right tools and good soldering skills to build it successfully.

    Please read through the entire guide before you start assembly.

    The kit comes with the following parts:

    image

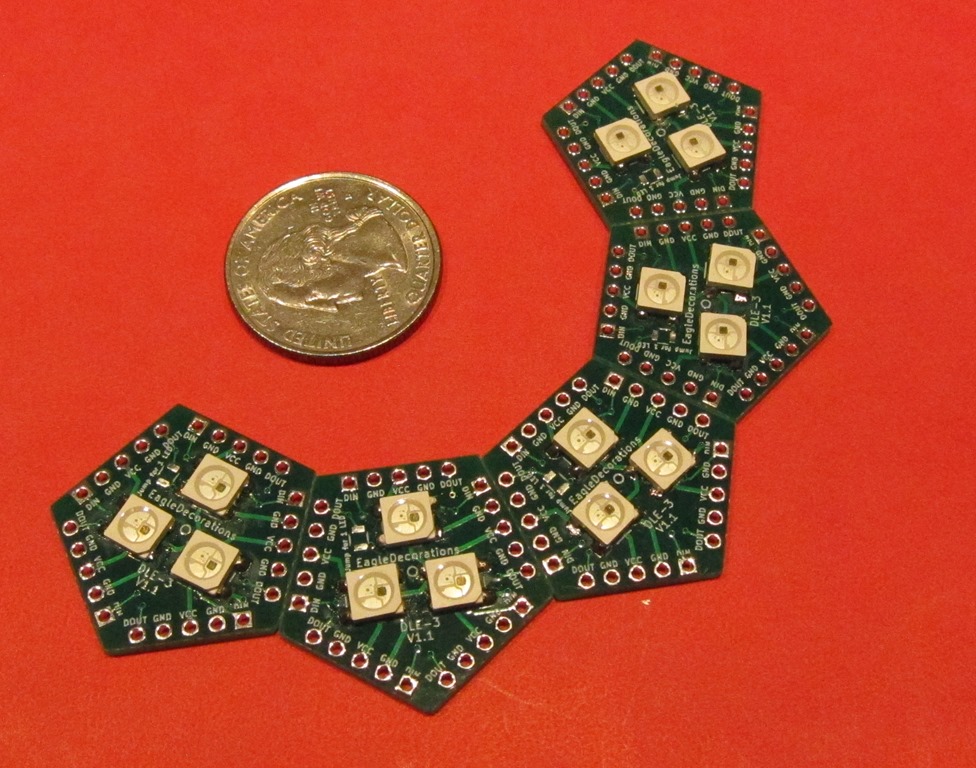
    • 12 polygonal face circuit boards, each with 3 WS2812 LEDs already mounted (you will only use 11 of these)
    • 1 bottom face with a big hole in it
    • Connecting wire that will be used to connect power and a control signal to the globe.
    • 4 assembly jibs to hold the polygonal faces at the proper angle
    • 1 1/4″ bolt and nut to serve as a base
    • 1 stand to hold the completed globe up
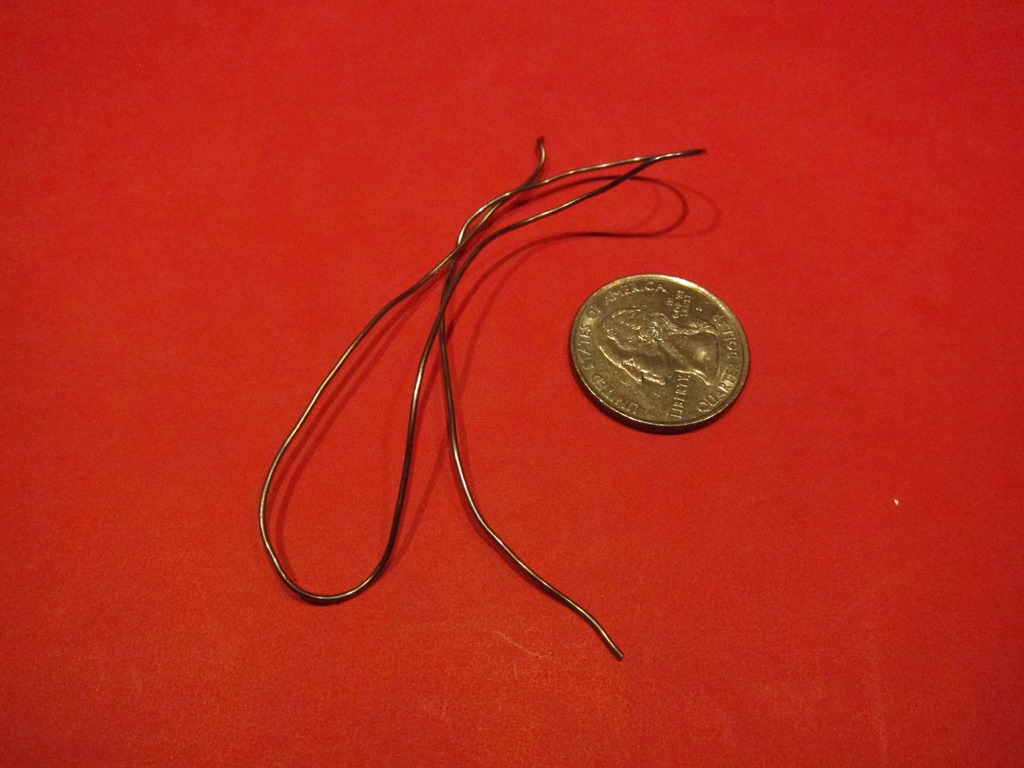
    • Approximately 60 tiny half-circle wires, used to connect the polygonal faces together.

    11 pentagonal faces with WS2812 (aka “neopixel”) LEDs already soldered on. There is an additional face without LEDs with a hole for mounting the DLE.

    To build the kit, you will need the following tools:

    IMG_9080

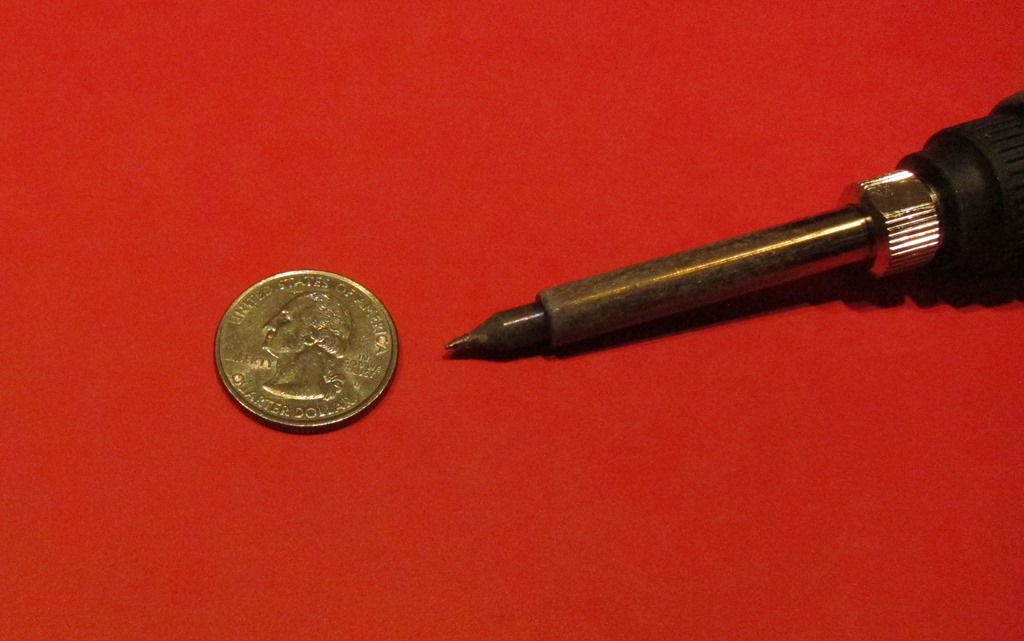
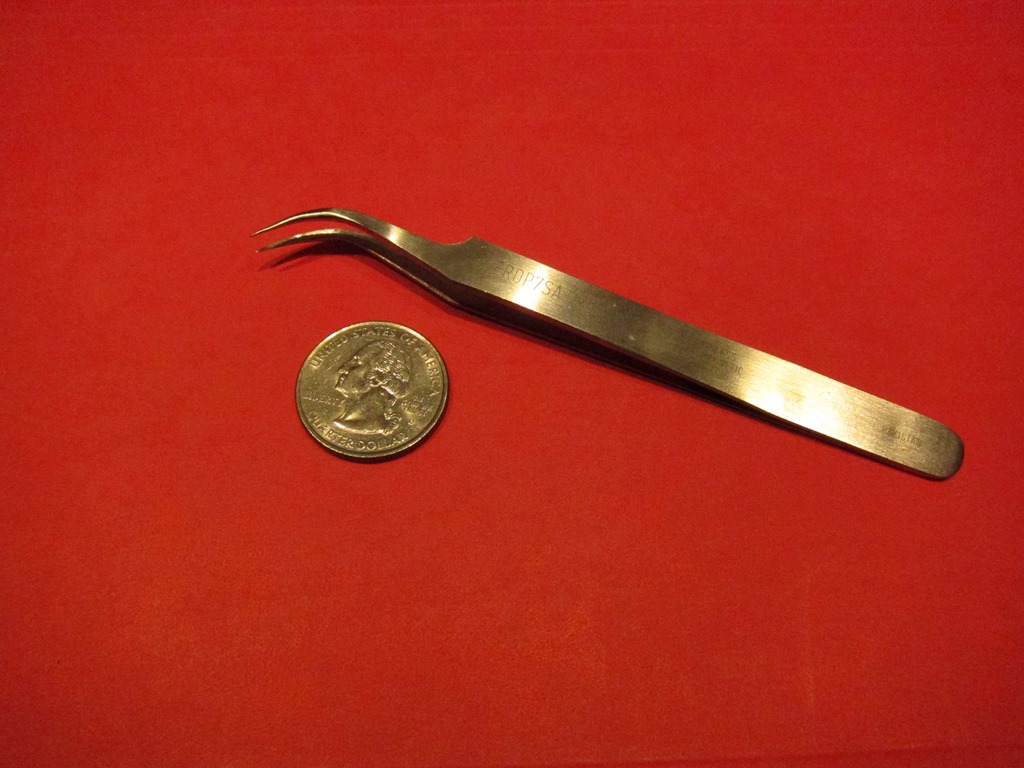
    A good soldering iron with a fine tip.

    IMG_9081

    Fine tipped tweezers.

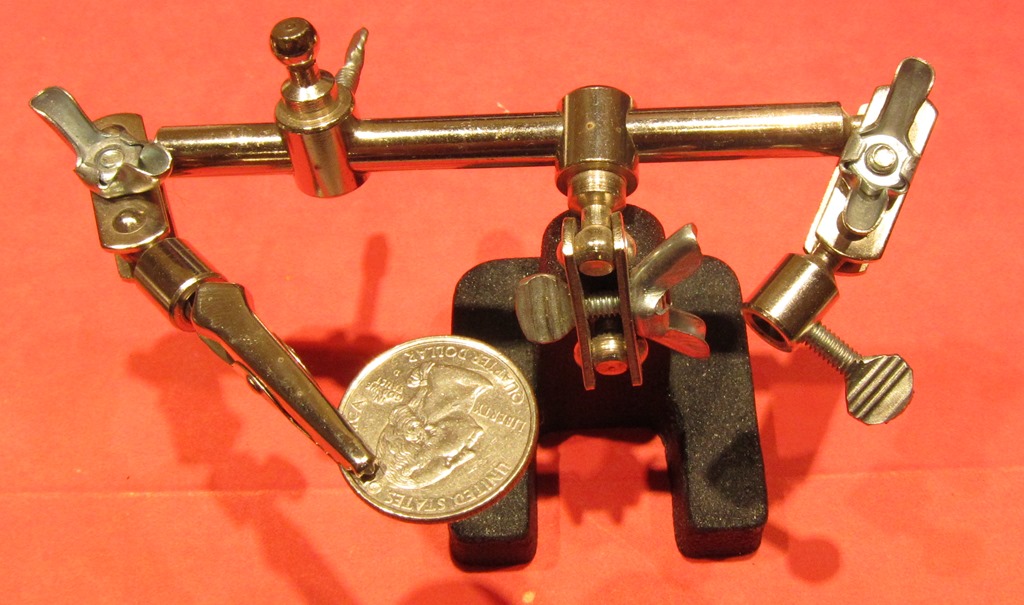
    IMG_9111

    A third hand. Assembly will be very hard if you can’t hold the pieces in places while soldering.

    IMG_9084

    Solder

    Assembly

    The globe consists of two rings composed of 5 faces each plus a top and a bottom. We will be joining together the power (VCC) and ground connections so that the LEDs all get power and ground. In addition, we will be connecting the data output from one face (DOUT) to the data input of one adjacent face so that the signals will travel correctly to all of the faces.

    It will likely take a couple of hours of soldering to complete the assembly.

    If you would like a refresher on how WS2812 LEDs work, there’s a good discussion on StackExchange here.

    Building a ring

    The tiny half-circle wires are very tiny and easily lost. Put them in something to keep them together. If you lose some, they are made out of 22 gauge solid copper wire.

    Five of the pentagonal faces are used to build a ring.

    IMG_9087

    Every face of the pentagon has identical connections so the orientation of an individual face is not important.

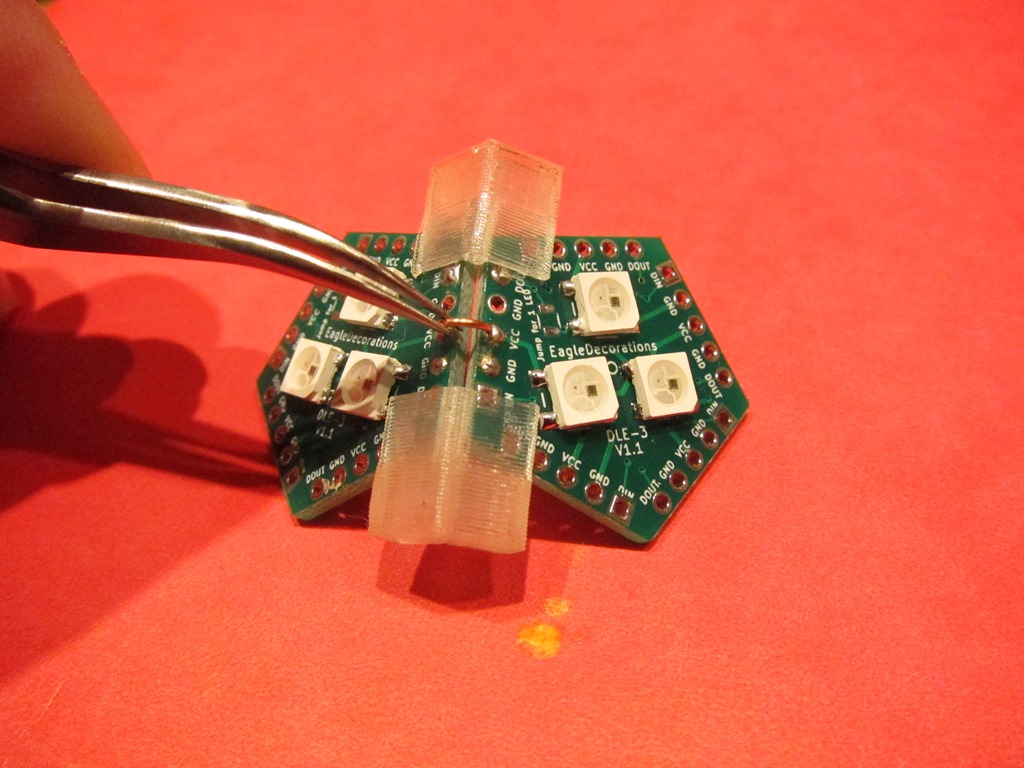
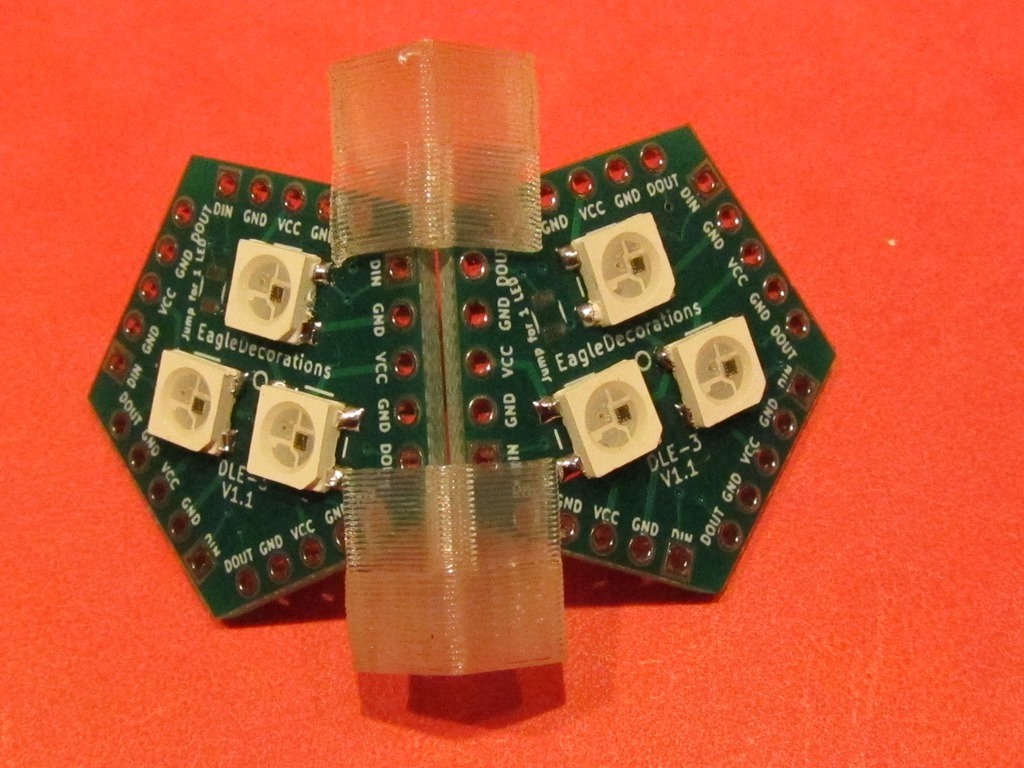
    The alignment clamps are used to hold the boards together at the correct angle (116 degrees):

    IMG_9089

    Note that the two boards are parallel and there is only a small space between them. Also note that the left and right boards are aligned horizontally; the two VCC holes are aligned with each other.

    Here are two wrong ways to do it:

    IMG_9090IMG_9091

    In the left one, the two boards are misaligned vertically; the two VCC holes are not aligned horizontally. In the right one, the boards edges are not parallel.

    The board alignment doesn’t have to be perfect, but it helps to have them pretty close.

    In some orientations, the alignment clamps may contact the LEDs. If this happens, don’t push that clamp on fully; it will still work if near the edge of the board:

    image

    For the faces in the ring, we will connect both VCC and GND, and then we will connect the data output from the left face (DOUT) to the data input (DIN) on the right face. We will start with VCC.

    IMG_9093

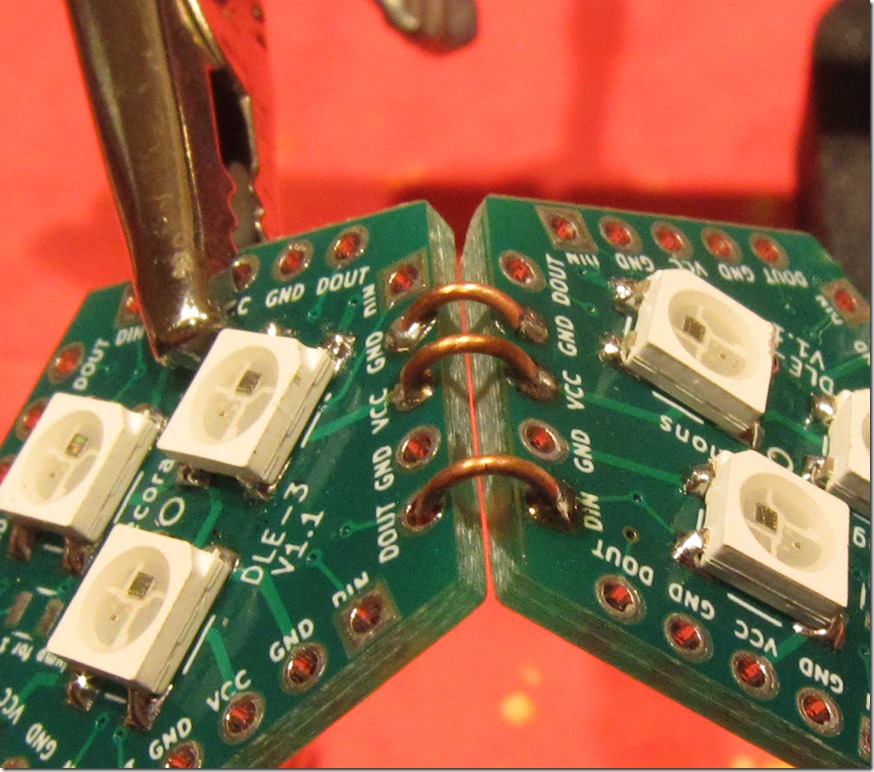
    We will be using a connection wire to make the connection. I have tried a few different ways of doing this, and the following is what I recommend:

    1. Add solder to the hole on one side of the connection (the right side in these pictures). Add enough so that there is a ball of solder protruding above the board.
    2. Hold the connecting wire in the middle and place one end of the wire in the hole without solder, and hold the other end against the hole with solder in it.
    3. Touch the soldering iron against the end with solder and lightly press the wire into the solder. It will melt and the wire will sink into the solder. Remove the iron, and hold the wire in position until the solder solidifies.
    4. Solder the other end normally. It works best if you get the solder in position and only apply the soldering iron only long enough to melt the solder. If you apply it too long, you will melt the other end and may have to resolder both.
    5. Verify that both solder joints are shiny and have enough solder. If the joints aren’t shiny, heat one at a time until it just goes liquid.

    It’s going to take a little time to get the hang of this. Don’t worry, you will get faster.

    After the VCC is connected, connect one of the GNDs to one of the others. It doesn’t matter which one you choose.

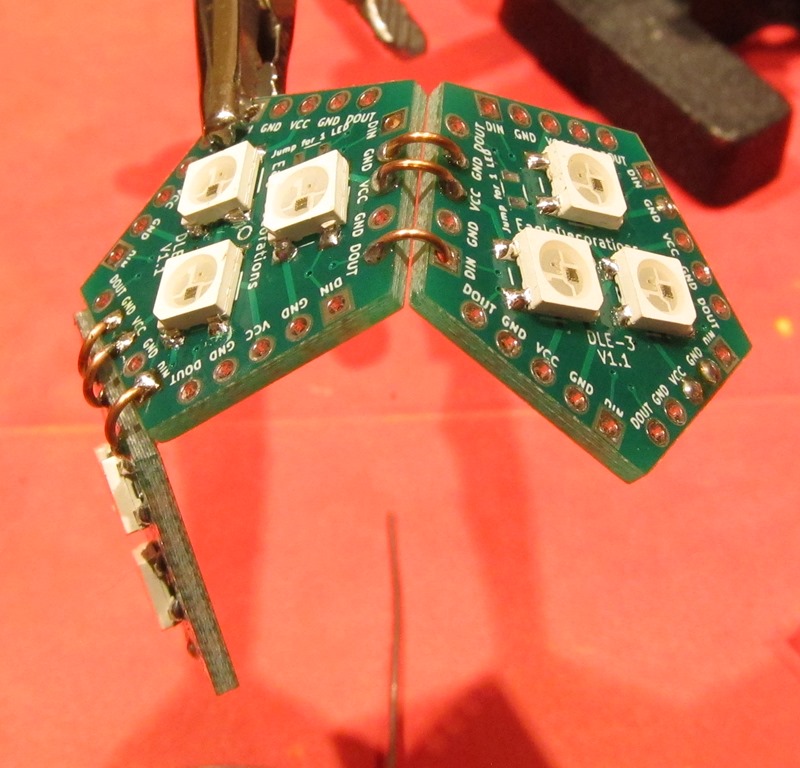
    After VCC and GND are soldered, remove the assembly jigs so that you can solder DIN and DOUT. This will carry the data signal from the DOUT face into the DIN face.

    IMG_9114

    In this detail, the right side (DIN) has been soldered, and left side is in the DOUT hole. The next step is to solder the DOUT end.

    If the second end takes too long to solder, it may heat up the first end and the connecting wire may come loose. If that happens, just hold the wire to one end and heat it and wait for the heat to conduct down to the other end and melt the solder there.

    That’s one face connected. There are a lot more, but it will get easier with practice.

    We next add a third face using the same approach. It looks like this:

    IMG_9110

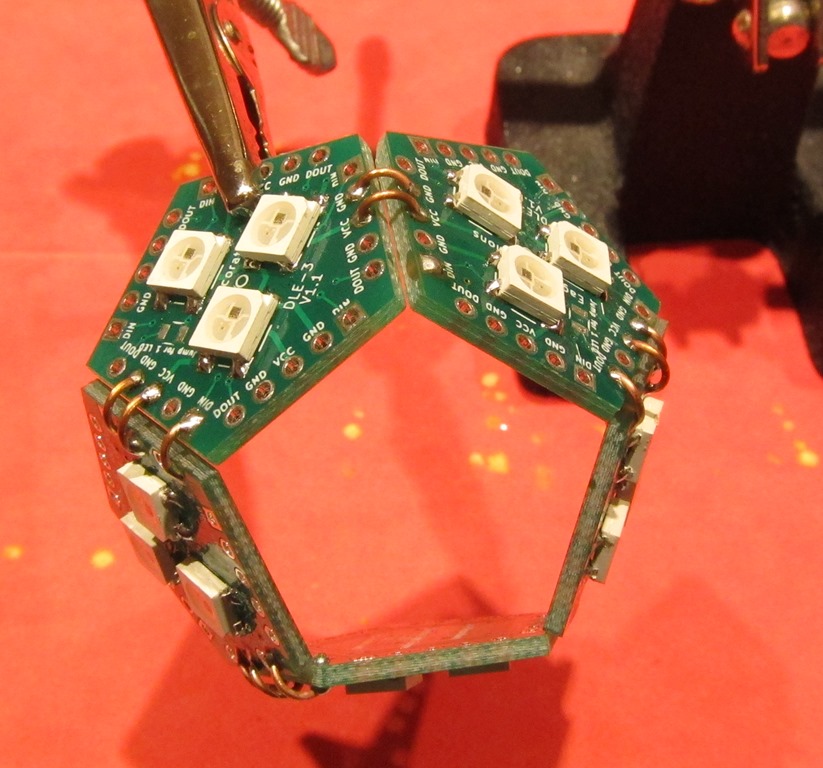
    Once we have three faces, assemble two more faces together. We will assemble the three and two face pieces to make a full ring. 

    Make the ring

    IMG_9112

    Use the alignment clamps to hook the three-face section to the two-face section, and solder one set of connections between the two section and three section.

    image

    The last set of connections is different. Note that only the GND and VCC parts are connected; the data lines are unconnected. This is so that data can come into the ring and go out of it.

    Looking at the input face, we notice that there is a connection to DOUT but not to DIN; for this face, the data will come in from a face that is not on this ring and then head out the left side of the face.

    Looking at the output face, we notice that there is a connection to DIN for the data that has travelled around the ring, but no connection to DOUT. The data coming into the right face will head out of the ring to another face, either the top or a ring that will be attached below.

    Adding the top

    IMG_9102

    We need to add wires to the top so it doesn’t fall through the middle of the ring, and each side will connect either VCC or GND. Start by adding solder to three VCC faces and two GND faces (one arrangement is shown above, but it doesn’t have to look exactly like this).

    We need to prepare one connector on each side of the board with solder; either GND or VCC. Do three faces with VCC and two with GND.

    IMG_9103

    To keep the top face from falling through, we need to put connections on it ahead of time. Note that each of these touches the surface; that will give us roughly the angle we need.

    IMG_9104

    The top face is just sitting there. Check that all the connections align properly with the connections from the ring. Solder all the VCC and GND connections to the ring. You may need to heat the already soldered wires to get them to align correctly with the holes on the ring.

    IMG_9105

    Next, we need to make the data connection from the ring to the top. Find the face on the ring that does not have a connection to DOUT (the output face in the previous picture), and make a connection from the DOUT on that face to the DIN connection on the top face.

    image

    Finally, we find that face that has a DOUT connection but no DIN connections. This is the face that will connect across to the other ring. I have marked the two DIN connections with marker so we can find them later; ONE of these will be connected to the other ring.

    If you have a controller than can drive these LEDs, it’s a good idea to test what you have built so far. Connect VCC to 5 volts, GND to ground, and DIN to your microcontroller, and run a program that can drive 33 LEDs. They should all light up. If they don’t, examine your solder connections and make sure that you don’t have DOUT/DIN connected all the way around the ring.

    Building the second ring

    The second ring is built using the same method as the first one. Do not add a top piece. 

    image

    This is the bottom ring and is actually upside down at this point. Eventually, we will need to make power, ground, and data connections for the whole globe. They are marked in blue on this face. Why did we choose this face? It’s the only one on the ring that has a DOUT connection but no DIN connection.

    It’s a good idea to test this ring at this time.

    image

    This is the output face of the second ring. I have put marks on the two DOUT connections; one of them will hook up to the input face on the other ring.

    image

    Put the first ring and the second one together, making sure to align the rings so the face that has DOUT marked on the bottom ring is aligned with the DIN that is marked on the upper ring. Tape the two rings together. Connect those two pins together, then attach the top and bottom by connect VCC between three faces and GND between the other two.

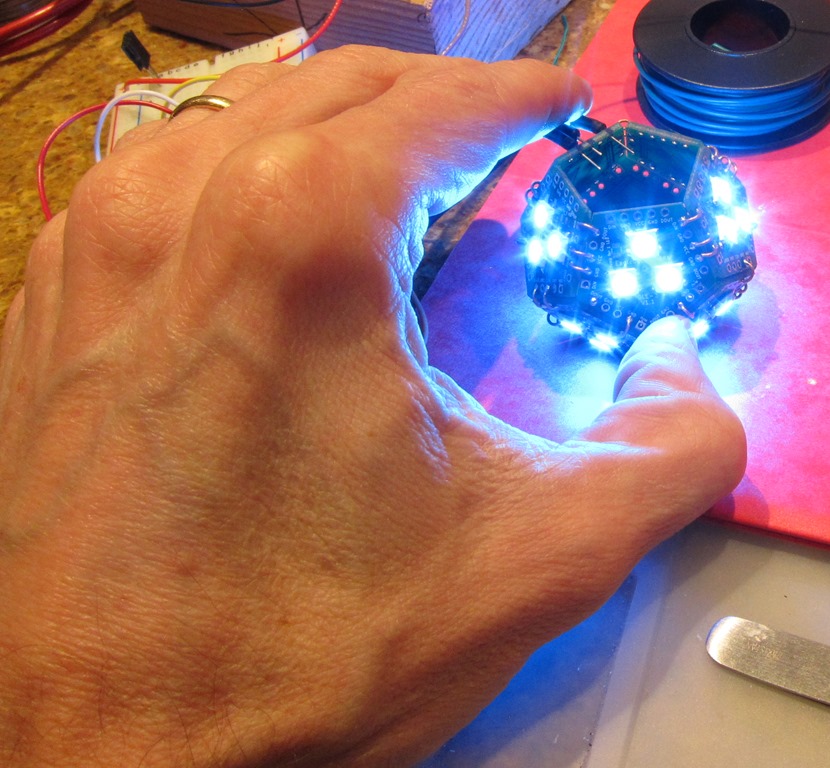
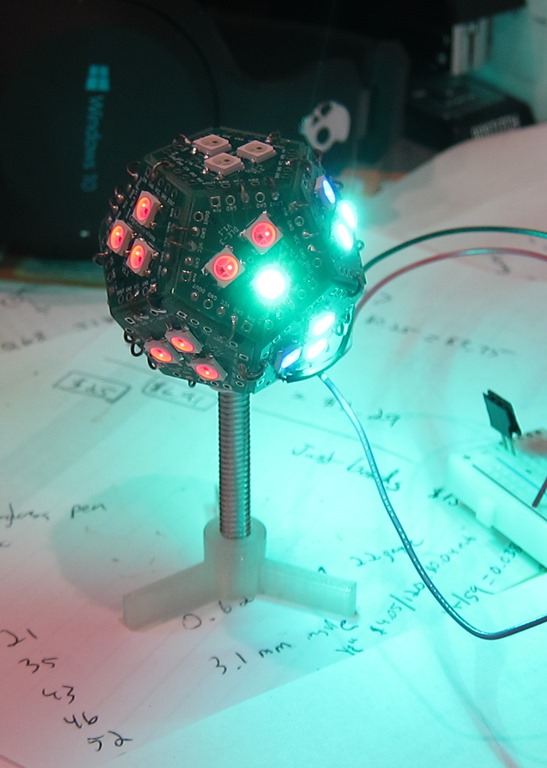
    At this point, the LED part of the globe is complete. Hook it up to your controller and verify that all of the faces light up. It should look like this (hand not included):

    IMG_9120

    Attaching the base

    The base is purely used for mechanical support; the connections that are made do not carry electricity.

    IMG_9162

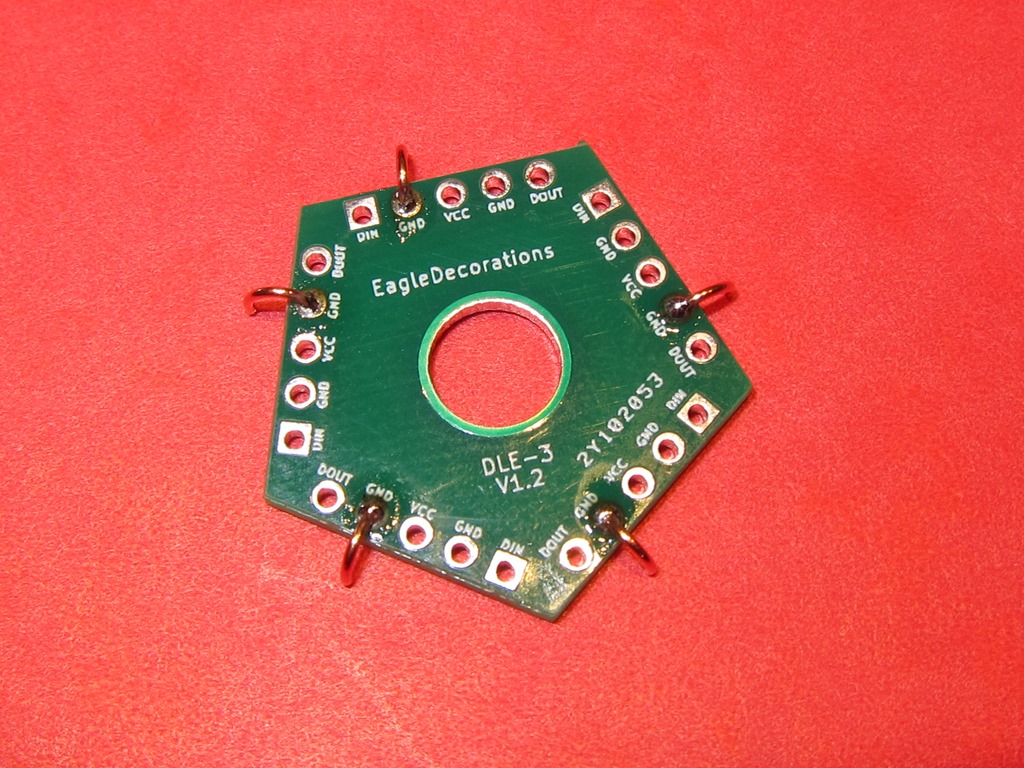
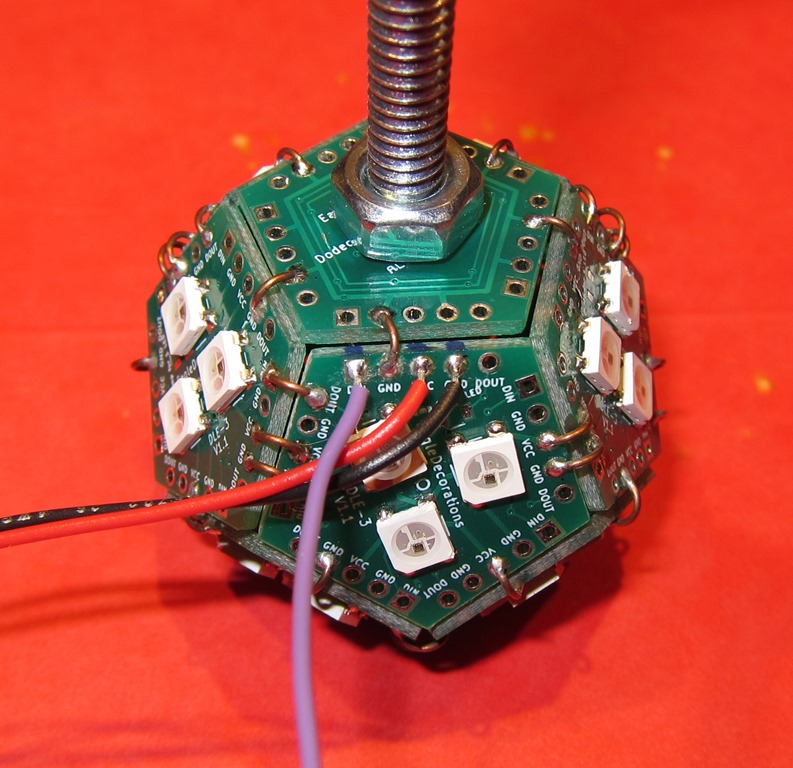
    We will use the special bottom pentagon; it has a hole in the middle and no other connections. Attach 5 wires to it on the GND connections, and make sure that you use a variety of GND connections.

    IMG_9163

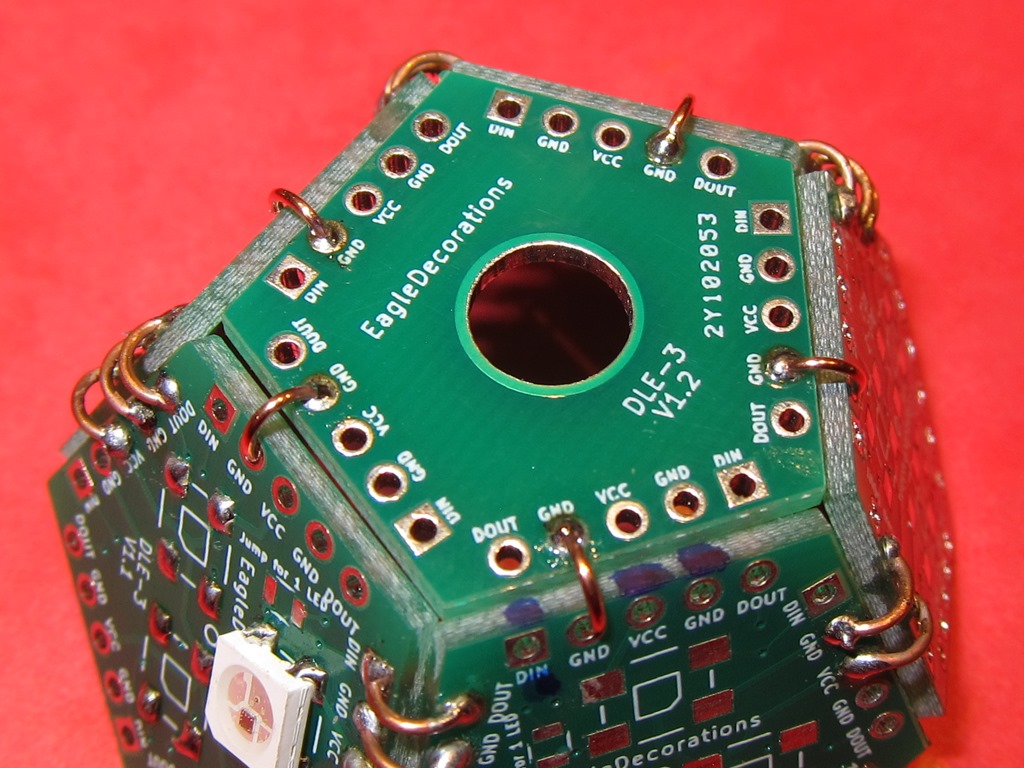
    Find the spot on the bottom ring where you will attach the wires – you should have marked it before. Rotate the bottom until one of the grounds lines up with the gap between the grounds on the wire-attachment face, as shown in the above picture.

    Do not solder the bottom on yet.

    IMG_9164

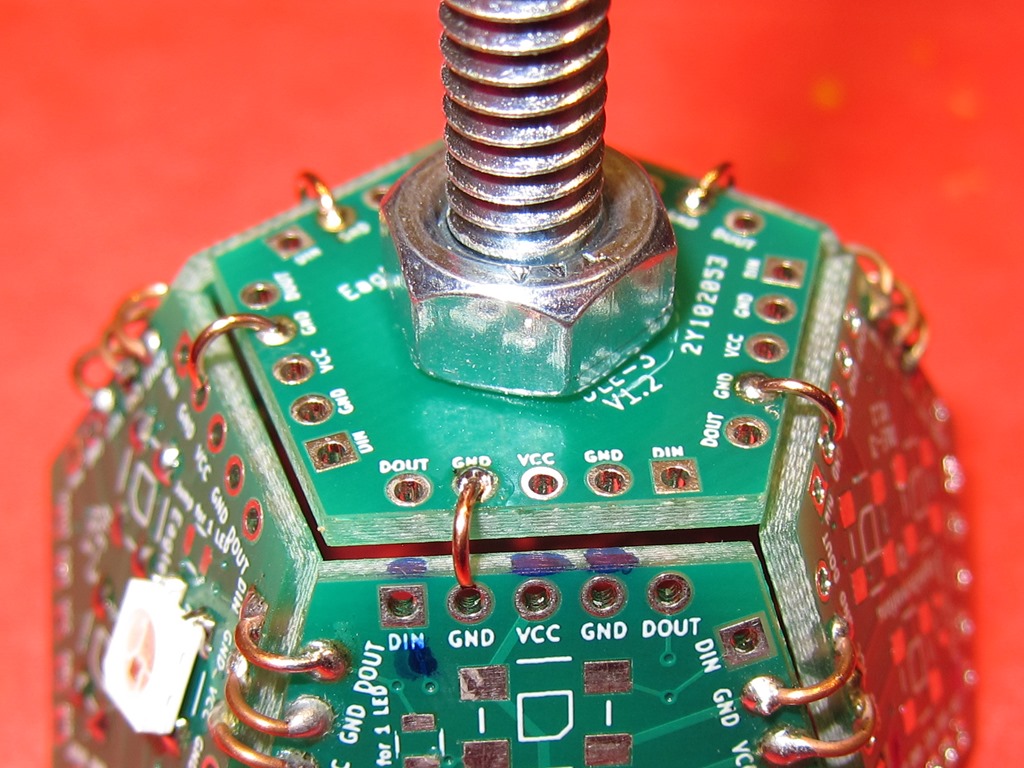
    Take the 1/4 screw and put in through the bottom face from the backside, and then put a nut on the outside face. You will want to tighten this out pretty well so that it doesn’t come loose.

    And then solder the wires to hold the bottom on.

    IMG_9165

    Next, solder on the wires; red to VCC, black to GND, and purple to VIN.

    IMG_9166

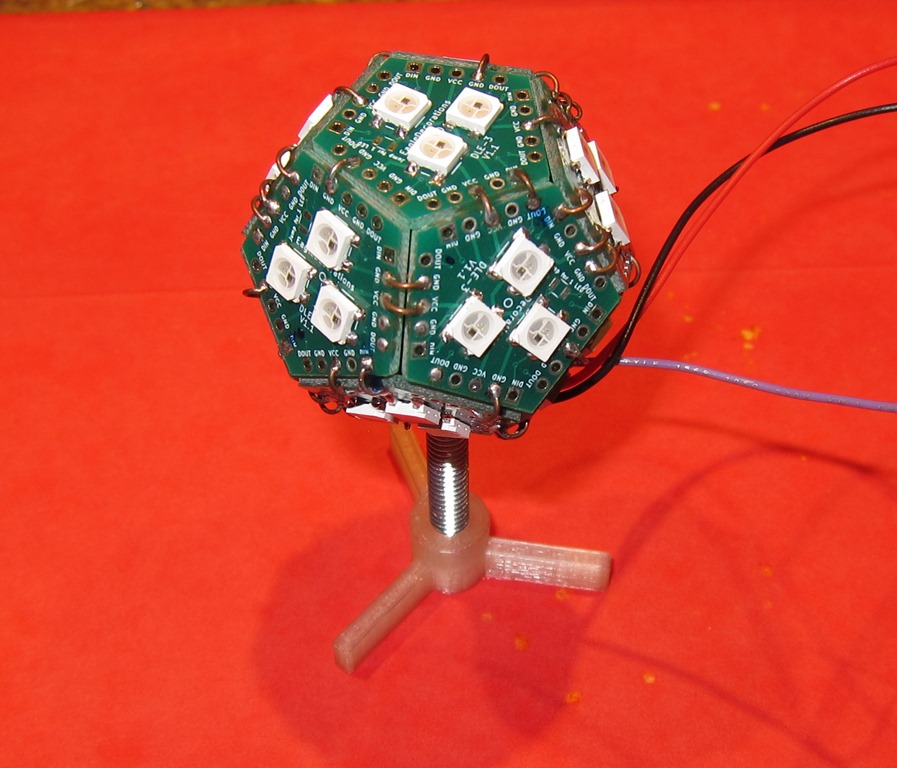
    Finally, screw the base onto the 1/4 bolt, and you’re done.

    Hook it up, and it should look something like this:

    IMG_9168

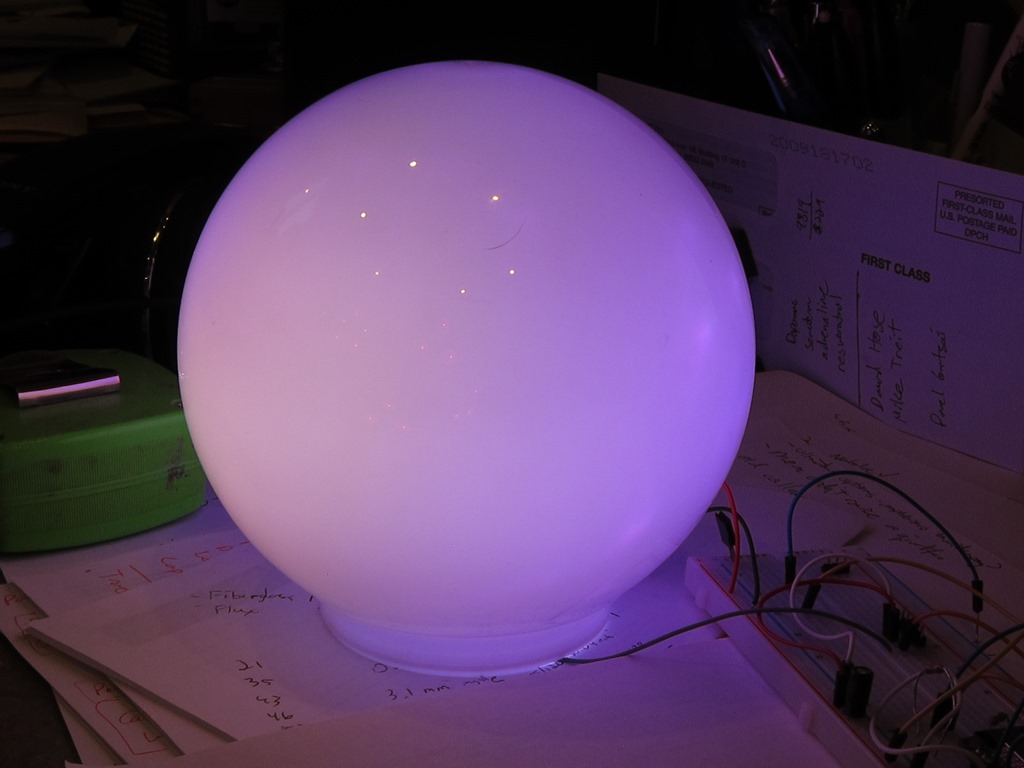
    If you’d like a more diffused look, you can put an acrylic plastic globe over it

    IMG_9170

    Both of these pictures are with full lights on and with the globe powered by an underpowered USB source.


    Finishing touches–USB charging station part 4

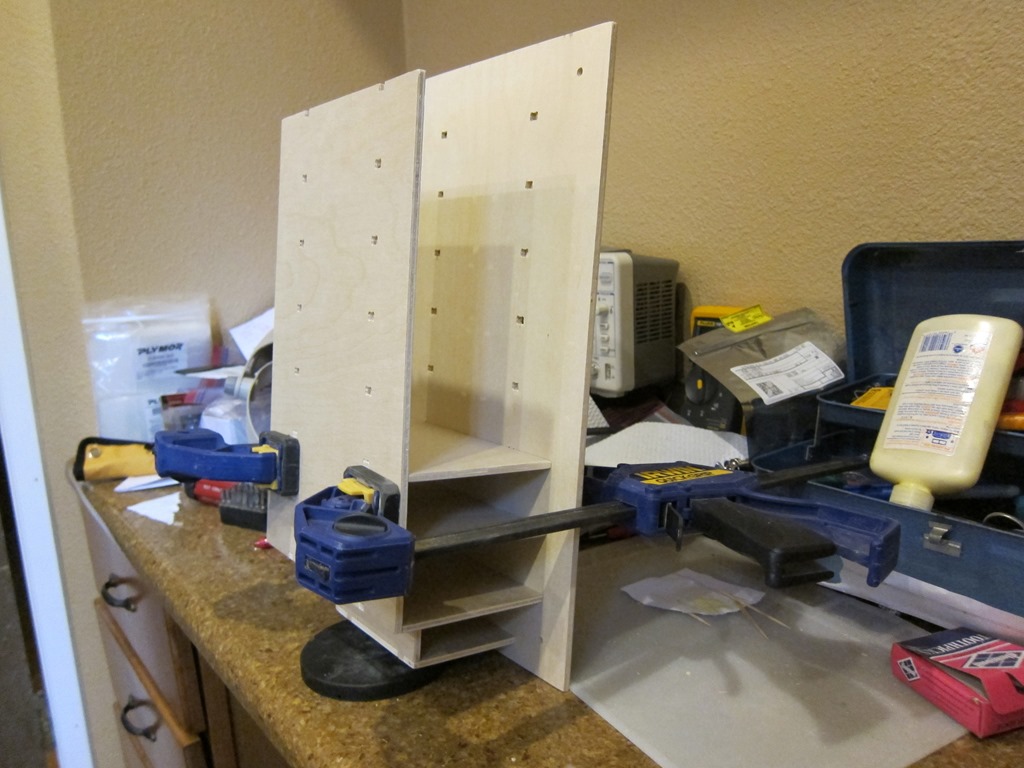
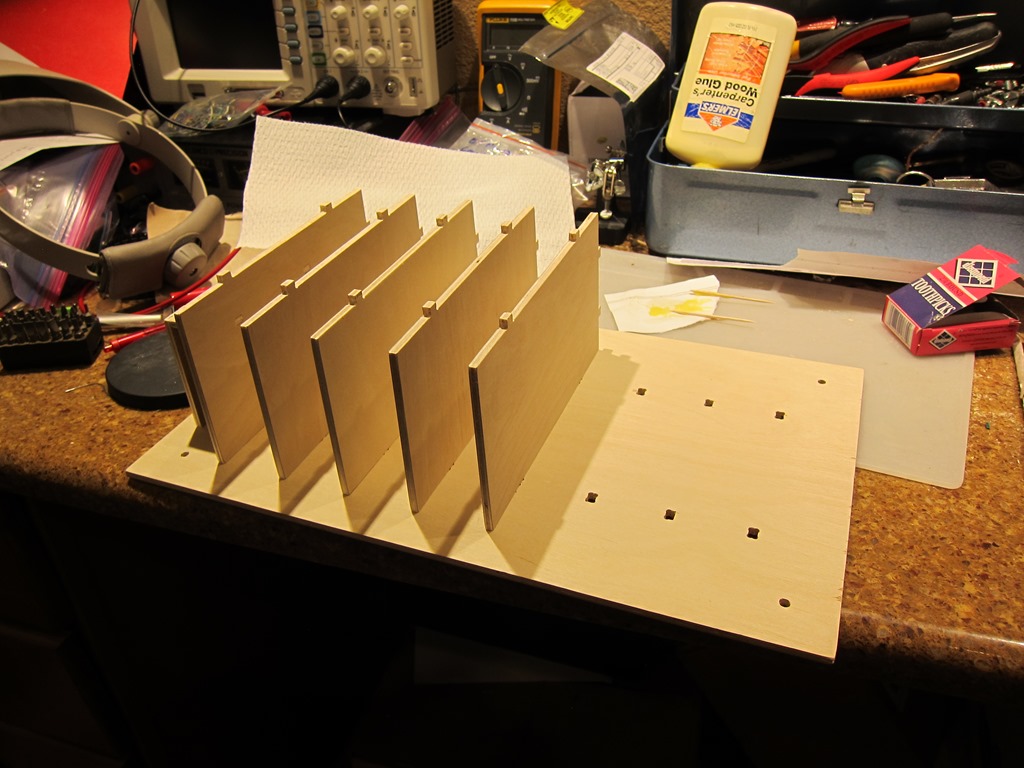
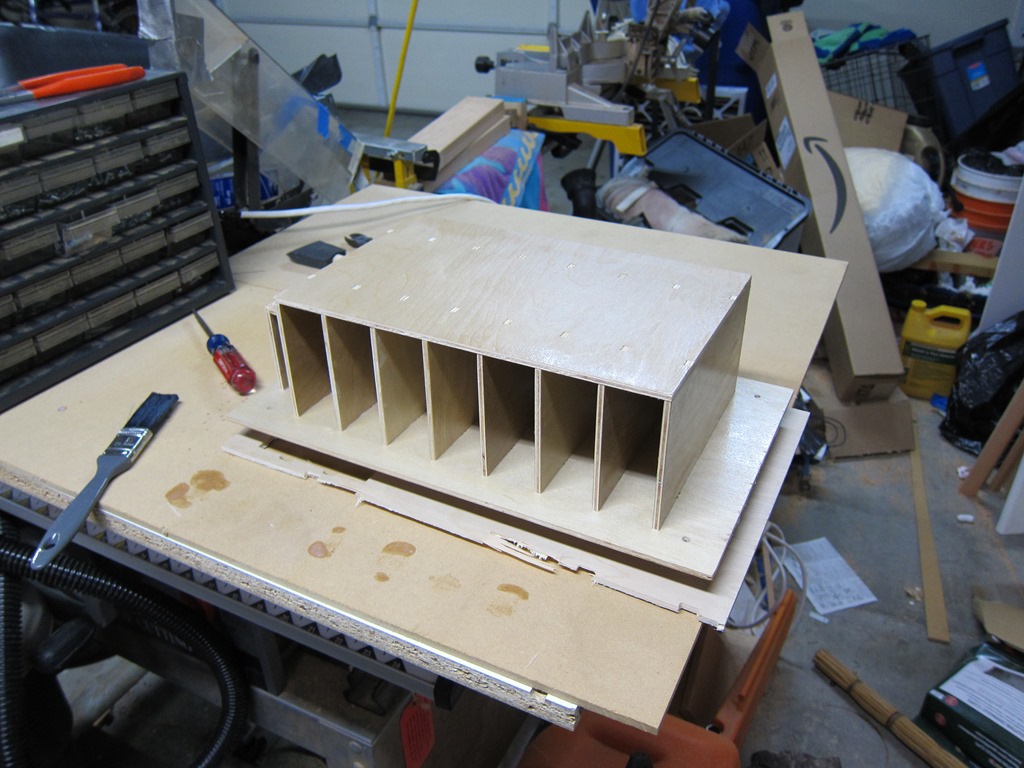
    I spent a bit of time tuning all of the joints, cleaning out the dog bones so that they would look nice, and doing an overall sanding of all the plywood. Then it was on to gluing. This was done in sections so that it could be easily clamped together:

    IMG_9186

    IMG_9187

    The top and back had to be glued all at once, and then clamped. I used a lot of clamps

    Finishing was next. I decided to use a water-based polyurethane that I already had:

    IMG_9188

    If you look closely, you will see the base hovering above the platform. I build a little stand using the incorrect base piece I built earlier and some standoffs made of machine screws and nuts. That way, I could finish the bottom, flip it over, and finish the parts of the top that were not done. Finishing the inside of the cubbies was a significant pain in the butt.

    After the finish dried, I sanded down the raised grain that water-based poly gives you and then put on… well, I was going to put on a second coat and then realized that I didn’t need the protection, so I called the finishing done.

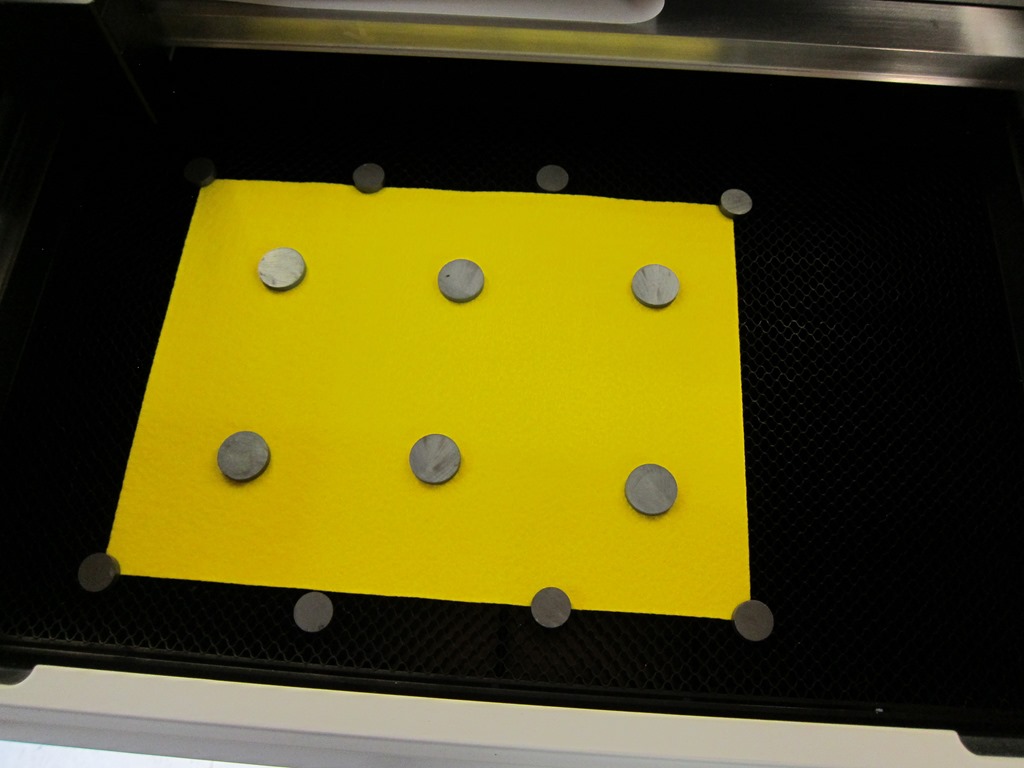
    I wanted to have some padding for the cubbies to help hold the devices in, so I bought some felt at the fabric store. The pieces needed to be cut into simple rectangles – which would have been pretty easy to do with an x-acto knife, but when you have a laser cutter hanging out under the garage, there’s an easier way.

    IMG_9189

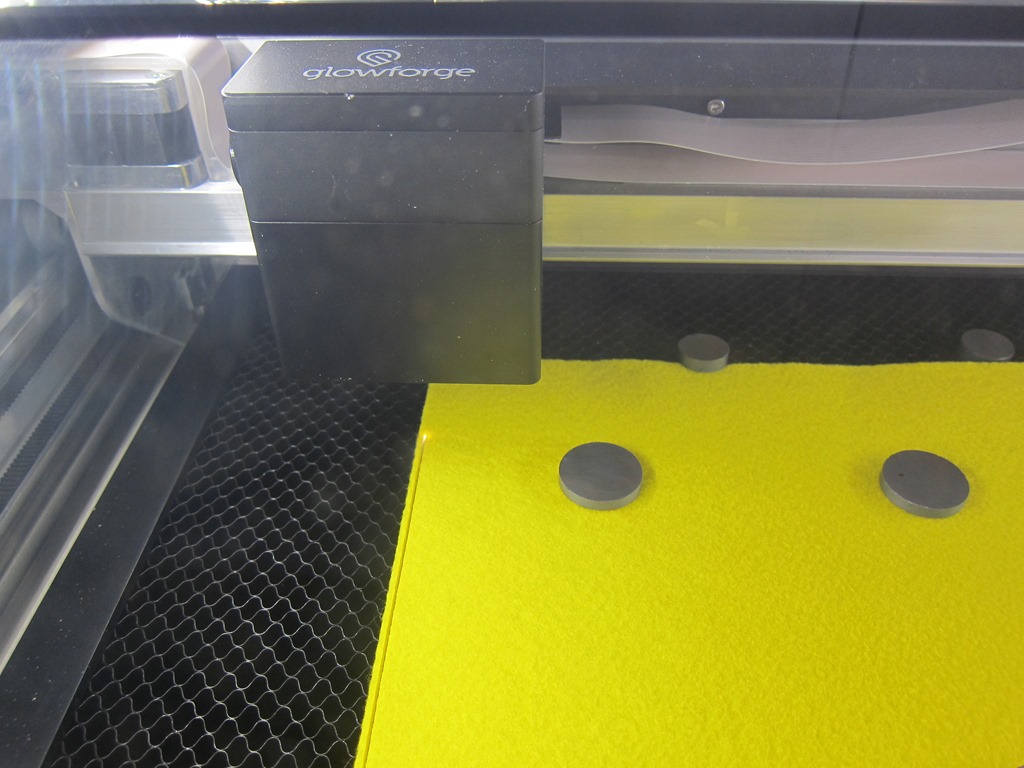
    Felt is pretty light and the laser cutter has air assist to clear away the smoke from the cutting, so you need to hold it down. The magnets are carefully aligned so they don’t overlap any of the cuts.

    IMG_9190

    An action shot of the cut.

    IMG_9192

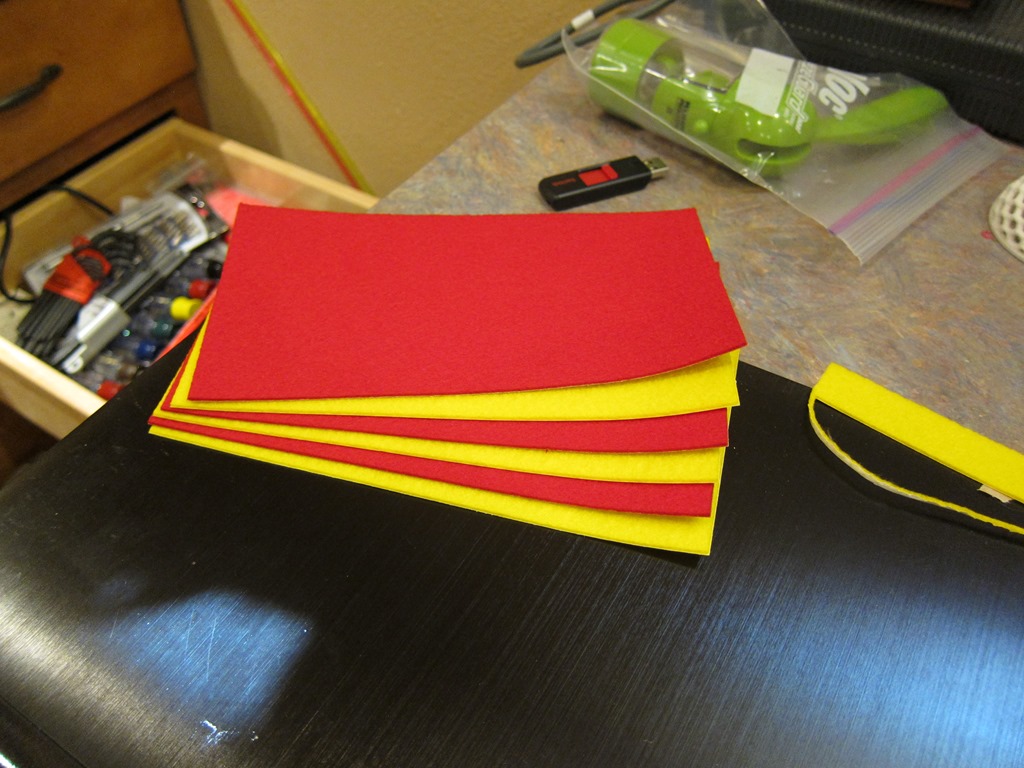
    And the result. Somewhat surprising to me, there was absolutely no charring at all on the felt; it looks like it was just cut with a very accurate knife.

    IMG_9194

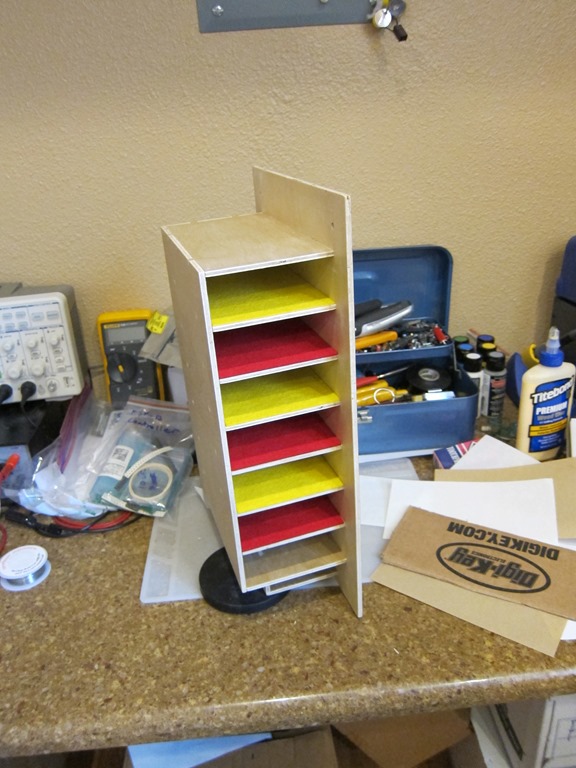
    And here we are with the felt installed. There is no felt in the bottom since that part is just a pass-through for the cables (yes, it could have been more elegant). Putting the felt in was *interesting*. I’d peel of the backing, put it adhesive-side up on the appropriately-sized piece of cardboard from a Digi-Key box, and then, with the unit upside down, carefully lift it up to align the felt with the edge, and then press it down. It worked pretty well.

    IMG_9195

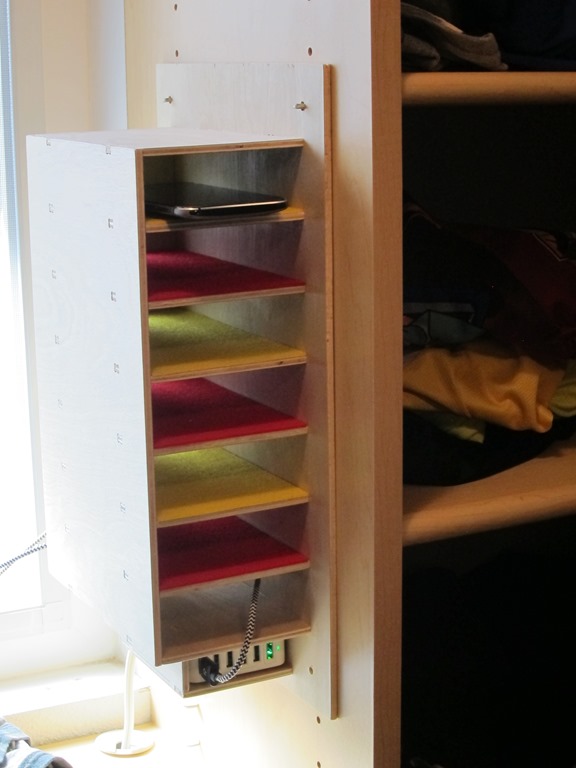
    And finally, it was time for installation. The first shelf peg fit perfectly, the second one was offset by a bit, which means my measurements were off a bit. I enlarged the holes and it was fine. The bottom holes… well, they were off by about 1/4 inch. Which is a bit embarrassing. I did a bit of modification to two of the shelf pins with a grinding wheel in my Dremel to make the cylindrical part a bit longer so they would stick farther into the shelve, drilled a hole through the shelf below to add a grommet, and installed the hub. Here you see it charging my cell phone. I bought some more cables to use but they’re currently all in use for another project, so that’s why there is only one device.

    Overall, I’m pretty happy about it; the project looks decent (if you like through-tab designs; I could have done a hidden tab design but chose not to for my first project) and I learned a lot about how to do the design and how to use the Shaper Origin.


    Pages:1...6789101112...35